While browsing through the Christmas section of my local craft store, a very nice woman browsing through similar items asked me if I knew anything about filling ornaments.
I don’t think she was ready for the verbose discourse that was to follow as I took her under my tutelage. *insert wrinkle nosed, sparkly-eyed, mischievous grin* Oh don’t worry, I didn’t accost that woman with tutorials. She asked a bunch of questions which I did my best to answer. Tee hee.
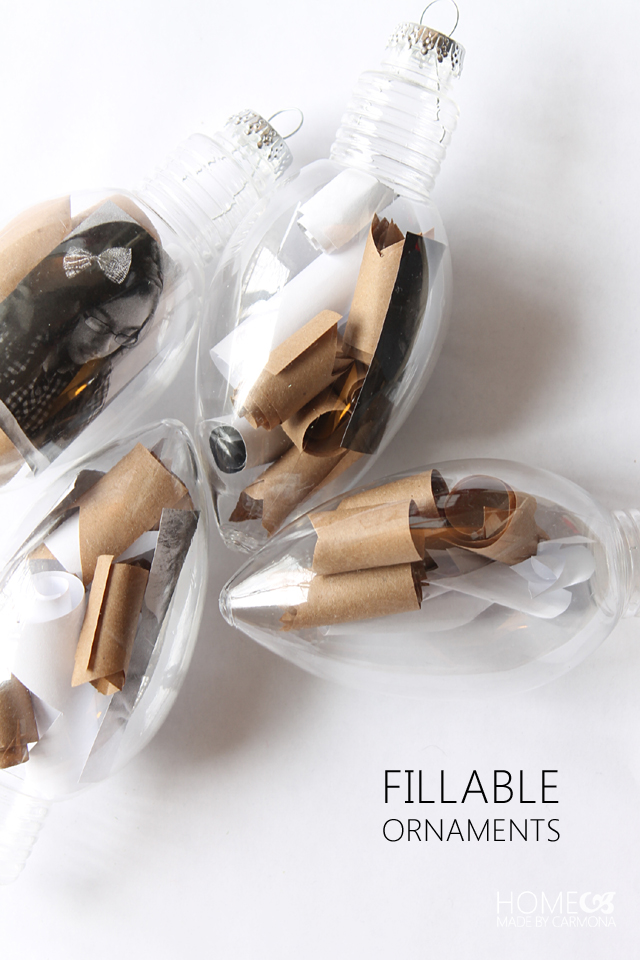
She had questions about inserting photos into clear ornaments, and possibly filling them with personal notes! Lovely ideas! A couple, which I had fortunately attempted myself. Through trial and error I learned a couple things which I’ll share with you today.
#1. You have to have the right kind of plastic ornament: The clear ornaments that come in two halves and lock into each other will work wonderfully if you want to fill them with personal notes. Otherwise forget about being able to fish those notes out! Just use paper rolled up for looks instead.
#2. If you want to add a picture to a non-interlocking plastic ornaments you need to fill the ornament with something to hold the rolled up picture open.
Here is how to do it with whole plastic or glass ornaments:
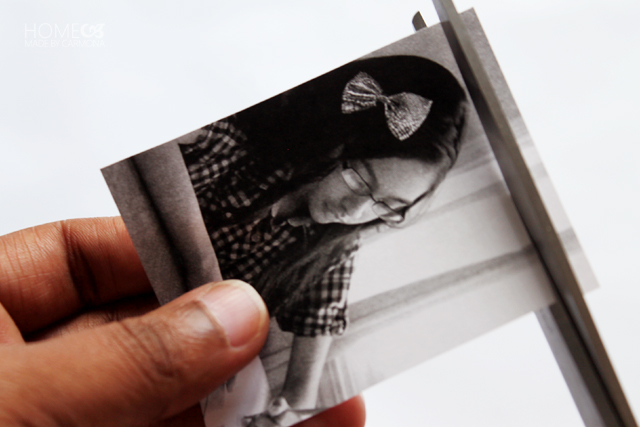
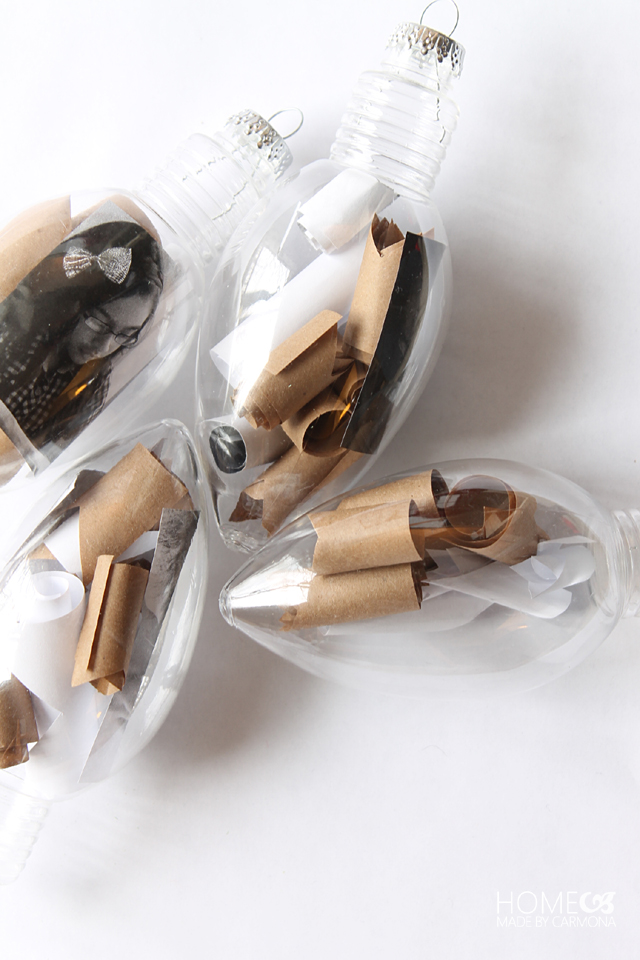
Print out a small sized picture, one you can trim to size. I printed on regular paper, nothing too fancy. [tooltip text=”If you have a printer or copier it is better to print a couple small pictures onto plain paper rather than using an original photograph. It might take you a couple tries to get the size just right…start with 4×6″] TIP [/tooltip]
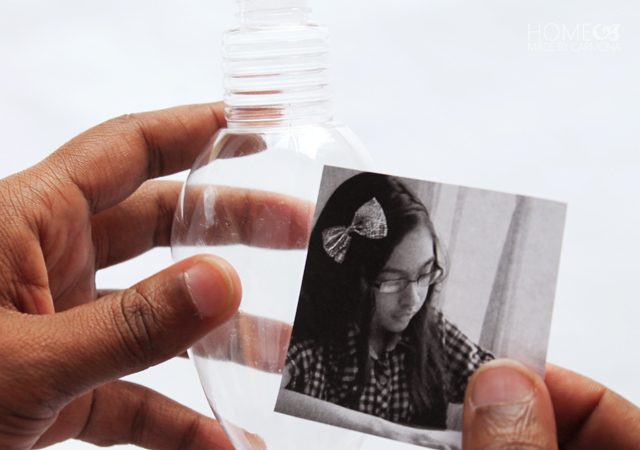
Make sure the size of the trimmed photo is small enough to fit in the rounded part of the ornament. Shorter is better, otherwise you might run into problems with the photo not sitting flush against the inside of the ornament.
Roll the picture loosely, just small enough to fit into the opening of the ornament. Insert the photo into the ornament.
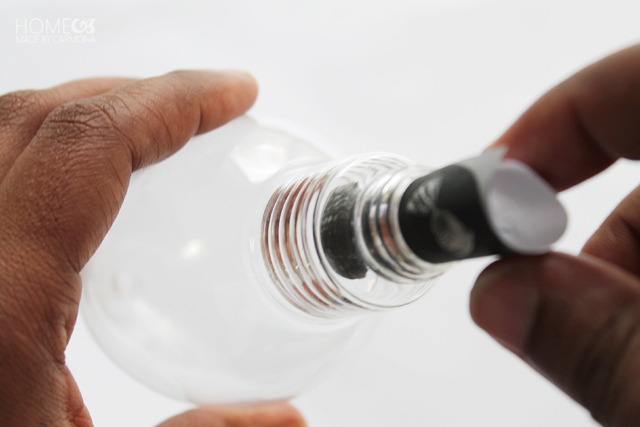
Now you will need a pencil to help unfurl the picture…just enough to fill in the space behind the picture.
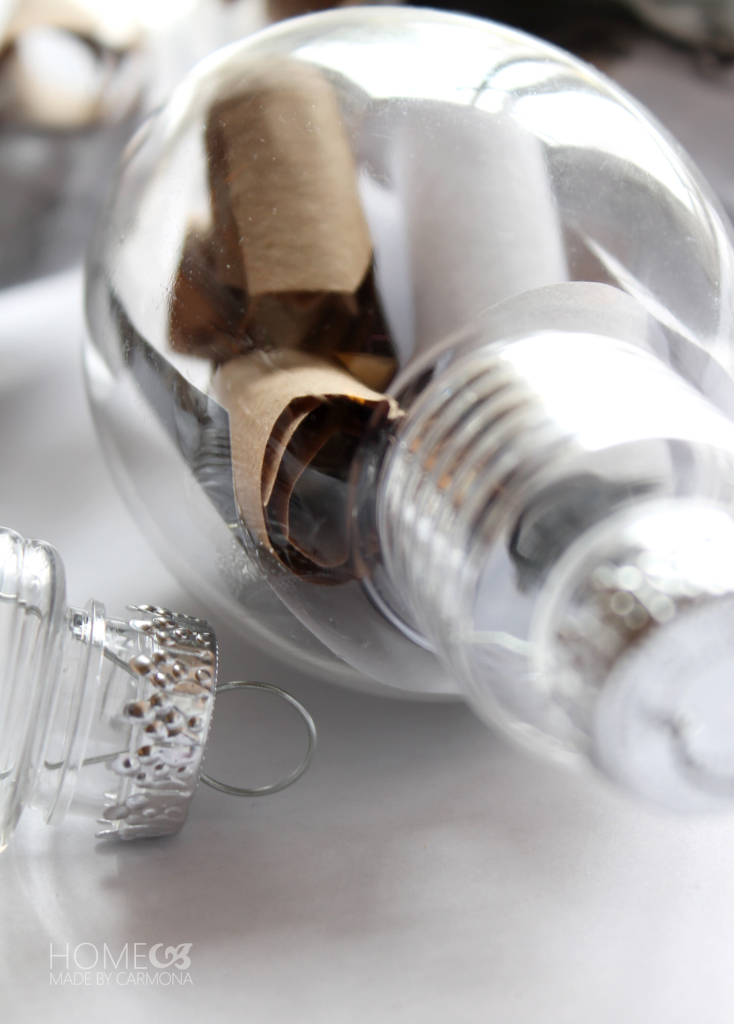
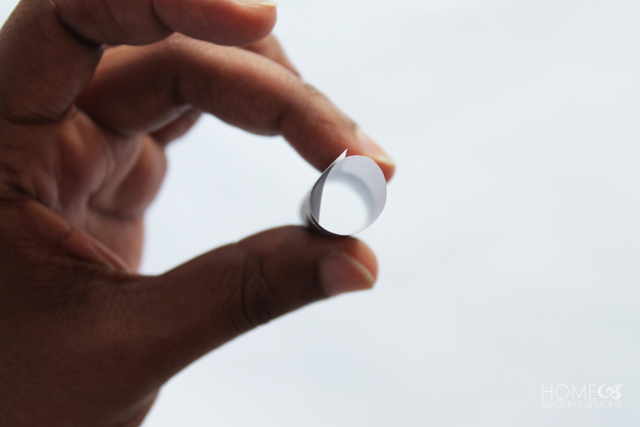
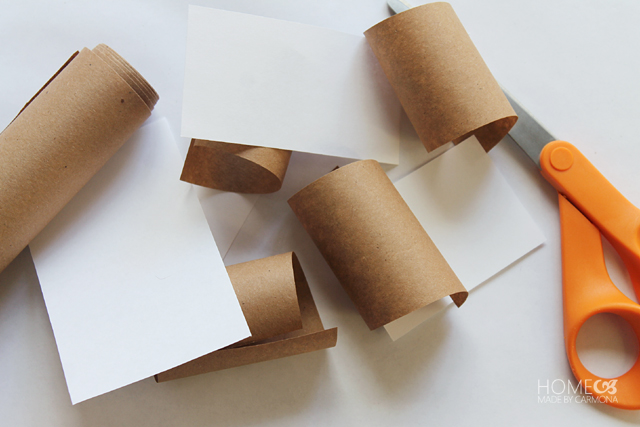
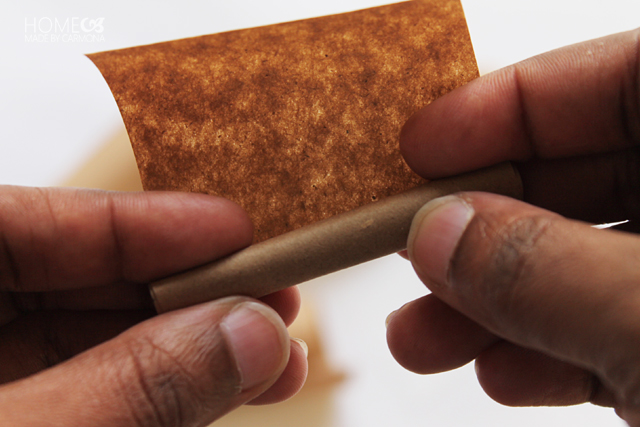
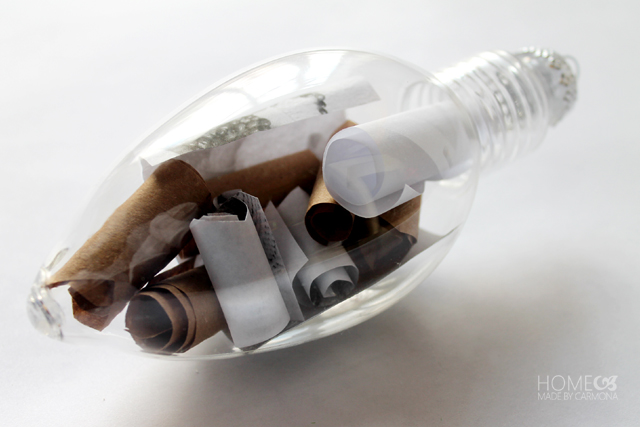
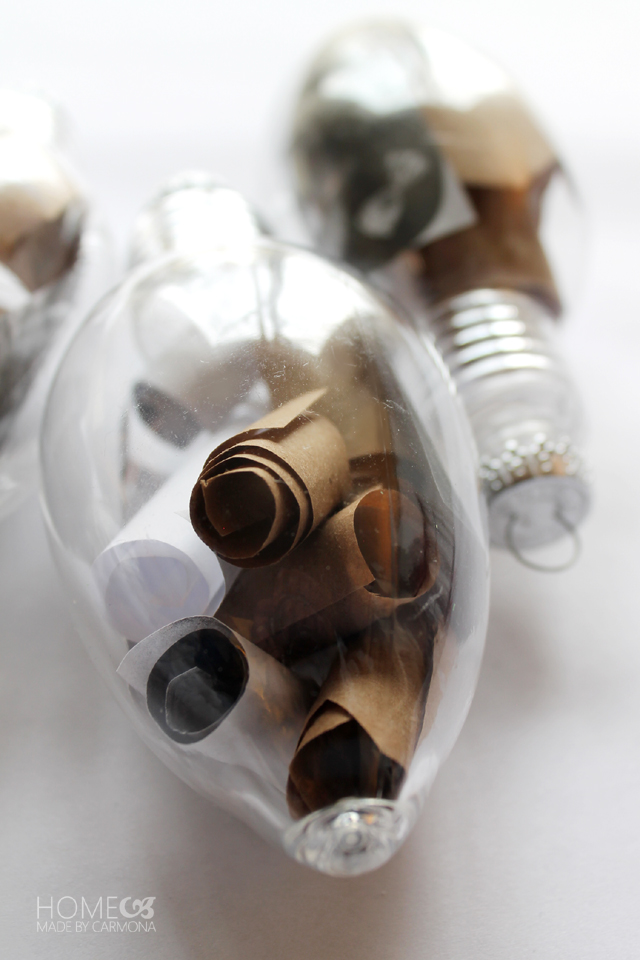
I am filling my ornament with scrolls made from craft paper. Simply cut small rectangular pieces of paper…wrapping paper, printer paper, craft paper, whatever you like!
Tightly roll those small rectangular sheets. They will unfurl more than you want them to if they aren’t really tightly rolled.
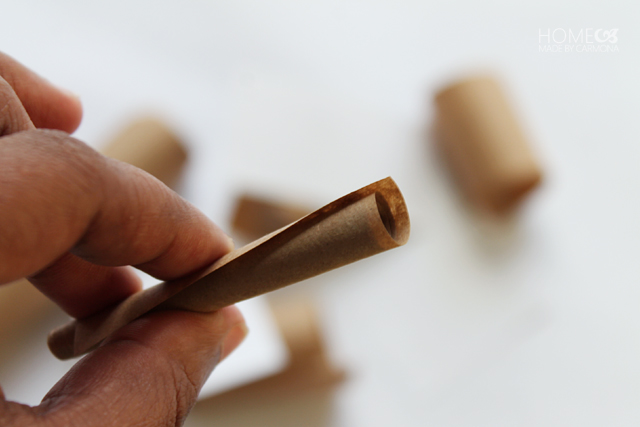
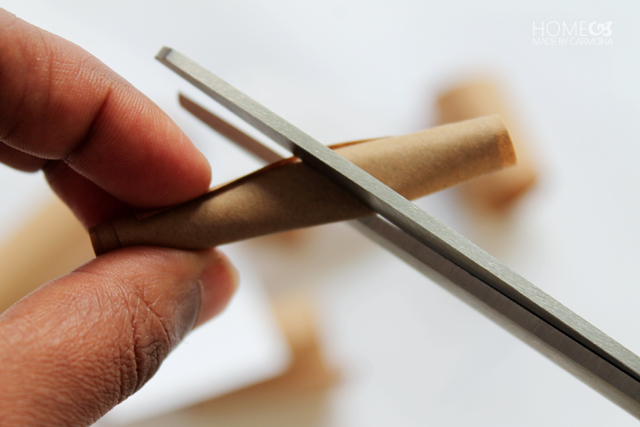
Next cut those rolls in half, or just cut both ends. It makes a really cool design as it unfurls slightly.
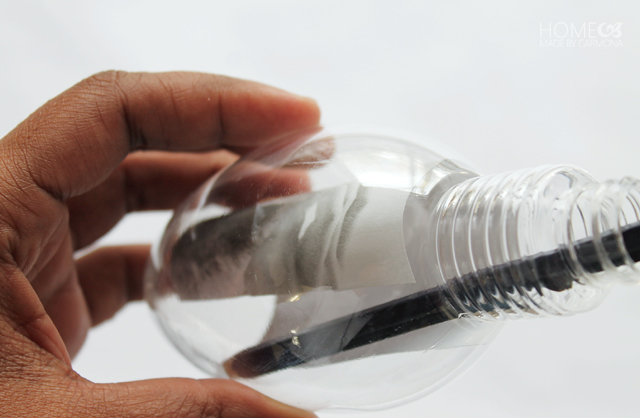
Go ahead and fill your ornament with the scrolls. These scrolls / paper rolls will help hold your picture open and push the picture up against the wall of the ornament.
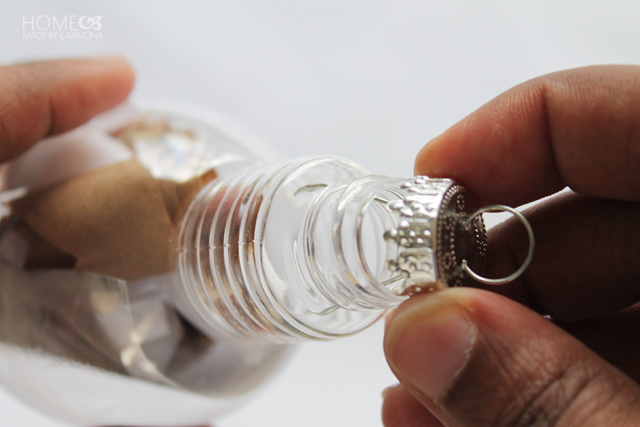
The picture may still curl slightly, but it will stay open and visible at the front of the ornament, and the back will have beautiful decorative scrolls.
I find I like the scroll filled side even more than I like the picture side! Still, I think that personalized touch adds meaning. Merry Christmas!
Like This? You’ll Love These Holiday Posts!
Sweet gift ideas that have a personal touch | Decorate your holiday home in elegant fashion with these tips | Tour this historic home decorated for the holidays | Make scented orange pomanders for your holiday vignette | Two family’s holiday traditions | Budget friendly holiday decorating hacks


Oh wow, love them!
Aw, thank you dear!
Super cute!
Thanks chica!
I love these–so many possibilities!
Thanks dear! Yes, there are so many possibilities! Gee, I feel like I could have done a ton more posts. lol!
Such a neat idea to include photos in these ornaments!
Thanks Emily! Plus Grandparents will love them…they are the perfect gift for Grandma! 😉
So elegant. I love the way you cut the scroll edges, and the photos add a beautiful personal touch. Lovely!
Thanks Amy! 😉