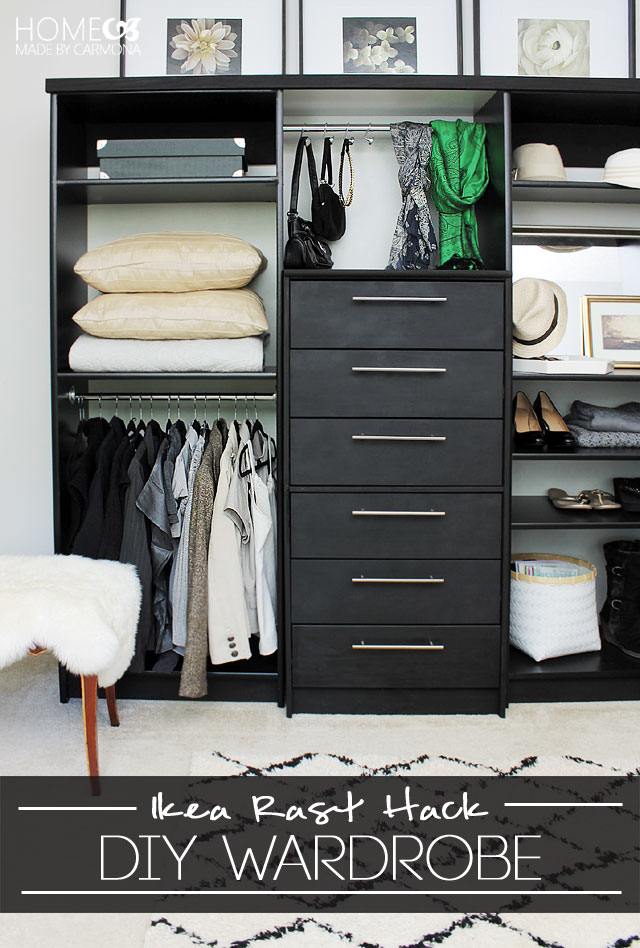
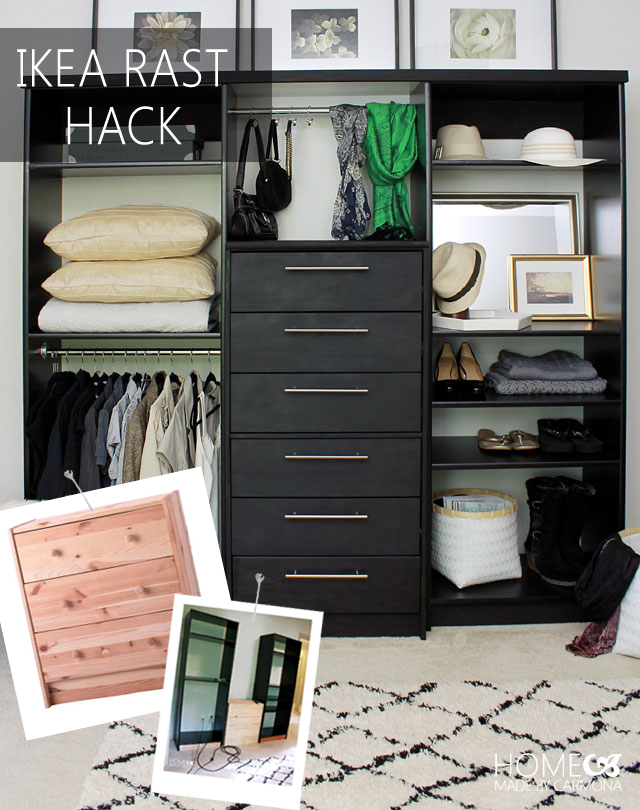
Build your own free-standing wardrobe, but not from scratch. This IKEA rast hack will help you create beautiful storage for clothes or linens!
*Affiliate Links Contained Below*
This month Hickory Hardware and Pittsburgh Paints challenged 9 bloggers (including yours truly) to transform an Ikea Rast Dresser using their products. What fun! I jumped onboard right away with the perfect project in mind.
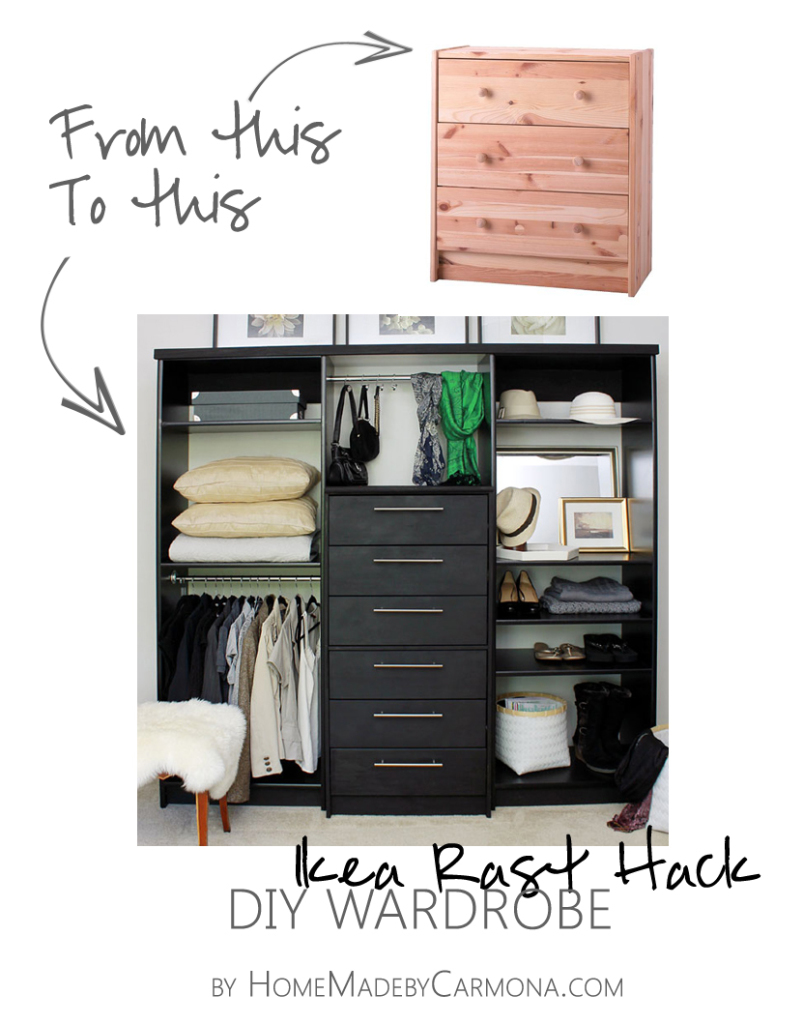
My master closet is itty bitty living space, and I’ve been dreaming of the perfect freestanding wardrobe to expand some of my clothes and storage into. I searched high and low…loved the Ikea Pax Wardrobe, adored the Pottery Barn Sutton wardrobe, but neither were anywhere in the budget. Who knew Ikea would still be the solution, just not in the way I had originally envisioned? Yep, enter two Ikea Rast Dressers, and some melamine boards… I have to say, being able to my own DIY custom wardrobe for under $200 was pure happiness! Today I’m going to show you how I created this beaut.
I suggest that the first thing you do is make a list of all the things you want to store, then sketch a basic plan for where you want your shelves to fall. You’ll need to measure the height of hanging items, and certain tall shoes such as boots.
Supplies
- (2) IKEA Rast Drawer
- (6) Metropolis Satin Nickel Cabinet Pull
- Trim, Door & Furniture Interior/Exterior Oil/Alkyd Gel Paint (found in-store at Menards)
- (2) 6 ft x 15 inch melamine boards / closet boards
- (4) 8ft x 15 inch melamine boards / closet boards
- (1) 7ft x 15 inch melamine boards / closet boards
- a long 2×4 to make a sturdy base (4 – 2 ft strips)
- (2) 24 inch wooden strip to secure to the wall
- Closet rod & rod holders (optional)
- Trim (optional)
- Wood screws
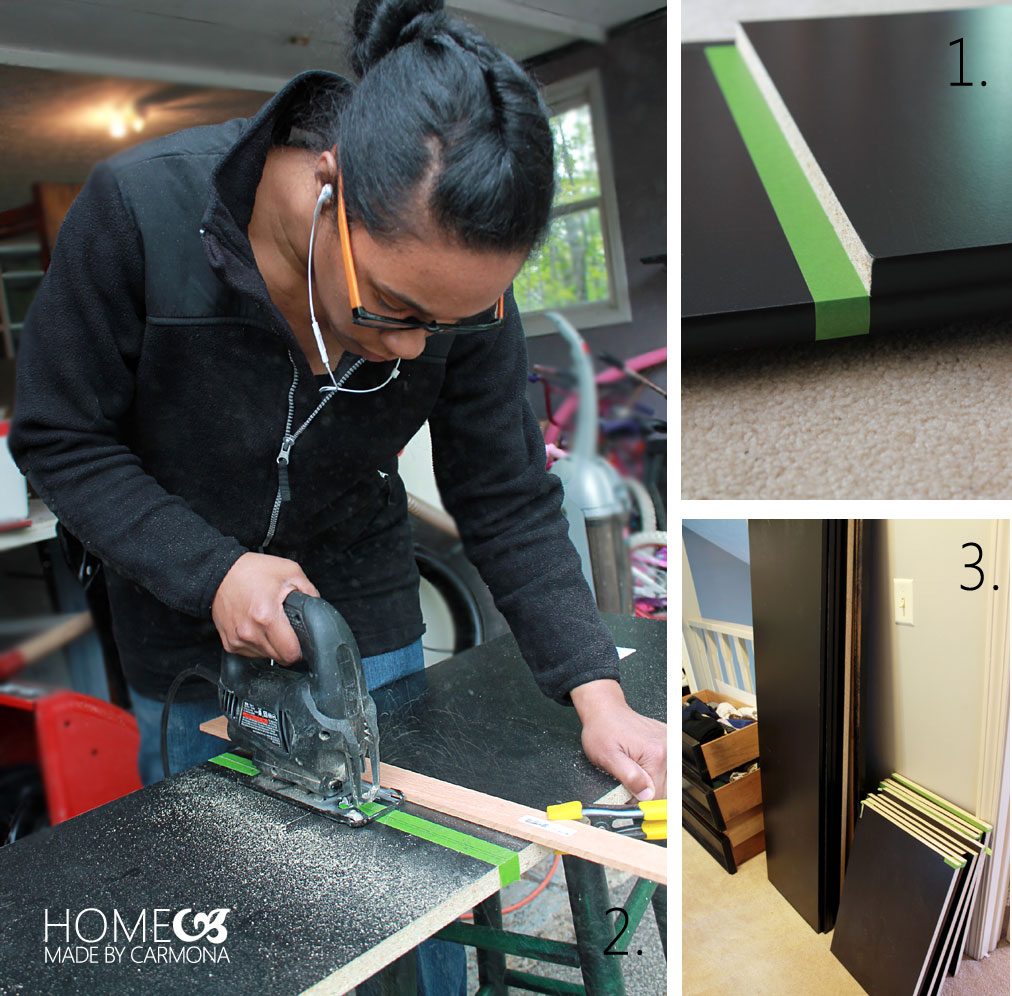
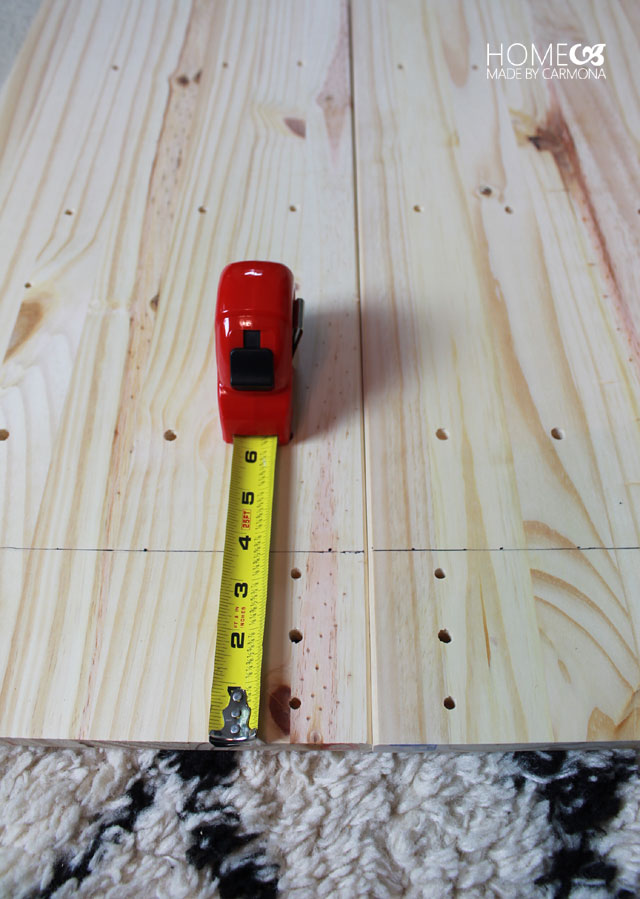
1. To mark cuts (and save your melamine boards from chipping edges), loosely measure and place painters tape then use your straight edge to mark where you need to cut.
2.Cut two 8 ft boards into 2 ft pieces. These are your shelves. The other two 8 ft boards will be cut down to 6 ft boards, and the remaining 2 ft that are leftover are also used as shelves.
3. You’ll have 4 – 6 ft boards, and 10 – 2 ft boards. The final 7 ft board will sit atop the two bookshelf-like units to make them look like one full wardrobe.
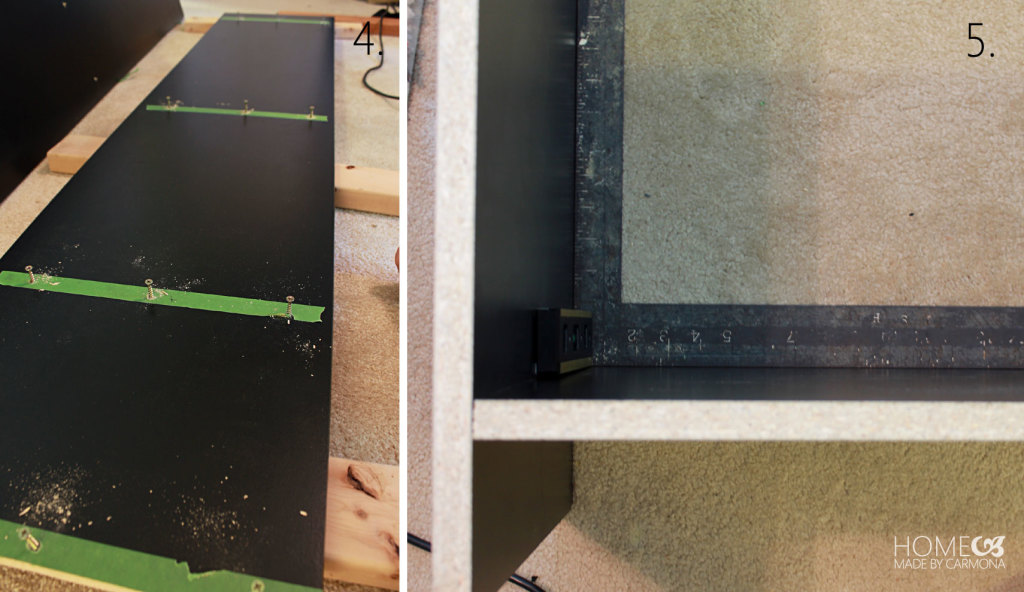
4. Pre-determine how far apart you want each shelf to sit, then using painters tape measure and mark where each shelf should sit. Drill pilot holes and insert 3 wood screw along each marked measured line. Let the screw tips poke slightly out the other side. Also, be sure to place the first shelf height at 4 inches so you can place a 2×4 (cut to 24 inches length) right at the bottom of the first shelf. You’ll do this for all 4 – 6 ft boards. These are the sides of your two bookshelf-like units you are building.
5. Next line up each shelf one at a time against the vertical pieces with the screws poking out. Make sure that the shelf is level/square. You can do this using a level, a straight edge, and measuring to ensure the the sides of each shelf is the same length from the last shelf/bottom. Plus you already have your screw tips poking out, so when you press the middle of the shelf into those screws you’ve already gotten it mostly centered. Once it is perfectly level/squared, screw the rest of the way to attach. This is very easy since you are using melamine.
6. Once you have attached the shelves on both bookshelf- like units, you are ready to add the 2×4’s to the underside of the unit. One toward the front underside of the unit (you may recess it 2 inches to mimic the Ikea Rast Dresser), and one placed at the back underside of the unit. It will create a sturdy base, as well as prevent things from rolling under your bookshelf-like units.
Here is what your two bookshelves will look like:
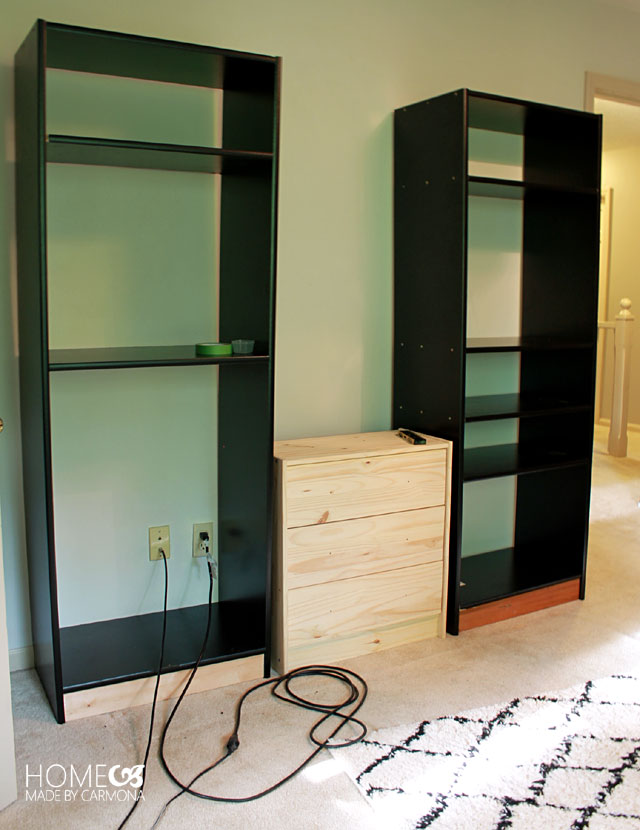
**ALTERNATIVE BOOKSHELF UNIT STEP**
If you would rather not build the bookshelf-like units, you could simply buy two deep bookshelves (and it doesn’t have to be that deep if you don’t plan to use it for hanging space), assemble it, and jump to step 7.
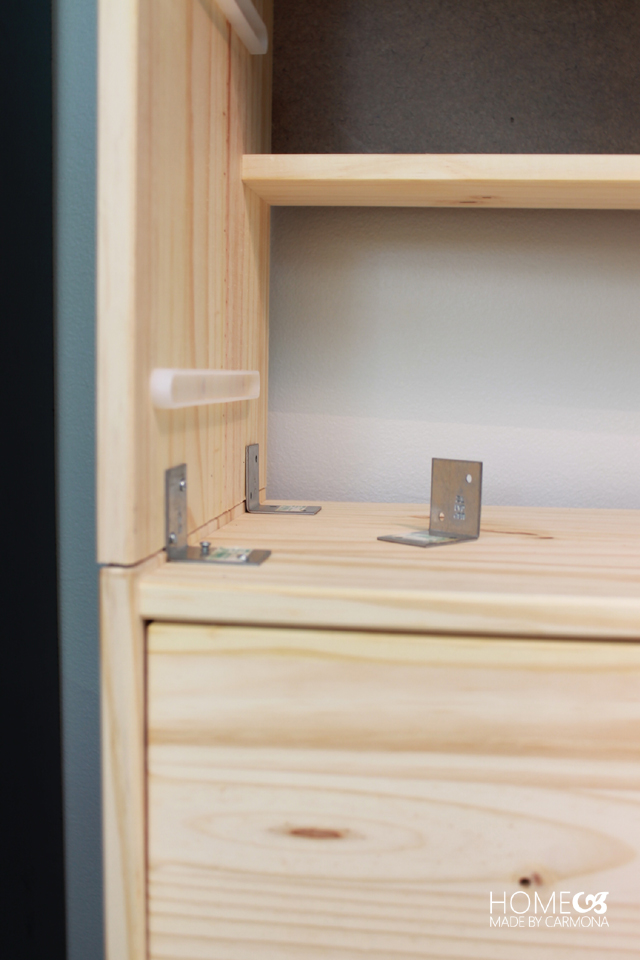
7. Next it is time to prepare your two Ikea Rast Dressers. Assemble the first one as normal. But cut 4 inches off the two sides of the second unit before assembling it. One will sit atop the other, and you don’t want a lot of space between the first and second drawer set. There will be one strip of wood that typically goes across the bottom front that will no longer be used. Set one unit atop the other, pull out the middle drawer, attach using thin metal connectors.
8. If you are using the same gorgeous Metropolis Satin Nickel Cabinet Pull from Hickory Hardware like I am, you will need to fill the original holes in the Ikea Rast Dressers, and drill new ones. Next paint the parts that will show on your Ikea Rast Dressers.
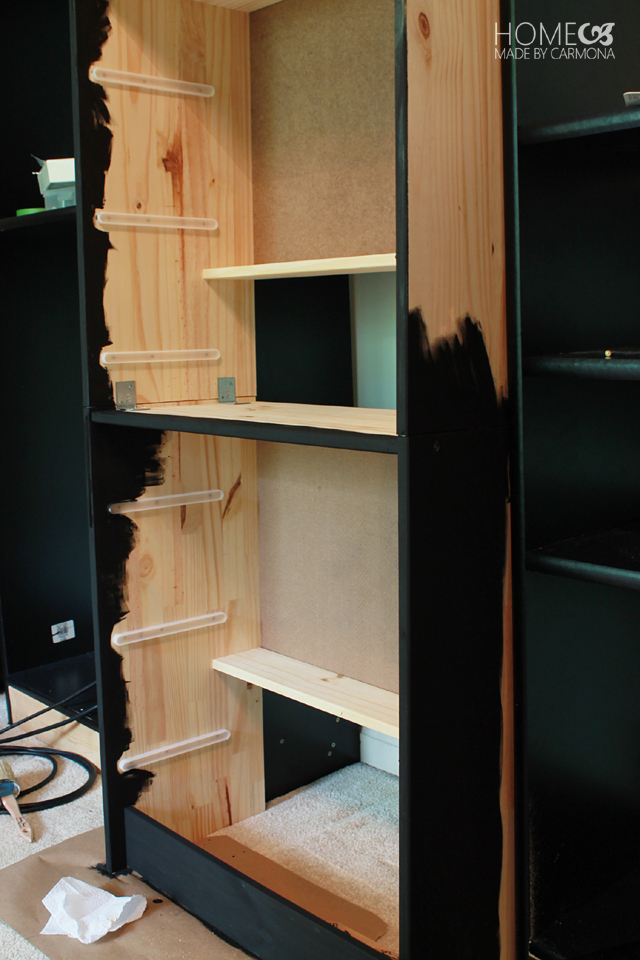
I used Pittsburgh Paints Trim, Door & Furniture Interior/Exterior Oil/Alkyd Gel Paint (found in-store at Menards), which went on like butter! No drips, and it went on in one coat beautifully! Just be sure that you take the dressers outdoors or do it in a well ventilated area.
9. Finally place your two bookshelf units on either side of the Ikea dressers, and be sure that the dressers are pulled forward by an inch or two so they look nice and deep (yes there will be a space behind those dressers). Attach the 3 units by inserting a screw through each bookshelf into the dressers. Do this toward the top. While all other screws can be filled and painted (if desired), leave these two screws bare…this way you can detach the three units to transport if you move or redecorate. Now measure the space atop the Ikea dressers all the way back to the wall and add a shelf in that space so nothing falls behind the dressers. I went with a very thin board with a piece of trim in the front, no need for the board to be particularly thick or fancy. Mine fit very snugly in that corner, so there was no need for me to secure it to the dressers, however you can if you need to.

10. Add the wall securing strips by drilling through either side of the bookshelf and screwing in. Then you can nail or screw through the back of those strips into the wall behind (use drywall anchors if you don’t line up with studs). Now is also the time to add any closet rods.
11. Finally place the floating 7ft x 15 inch board with trim sitting atop. No need to secure this to the entire unit, it is fairly heavy and does just fine floating. Now when you want to move, you only need lift off the top (which is actually optional since both bookshelf units already have a top), remove the screws that secure it to the wall, and the two screws that go from bookshelf to the dresser drawers. Easy peasy and ready for transport!
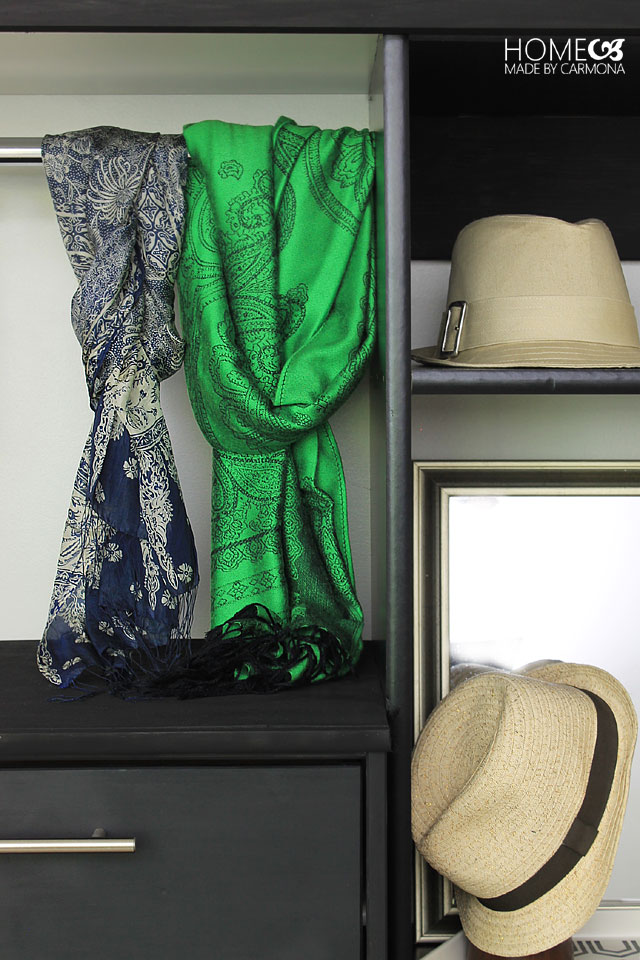
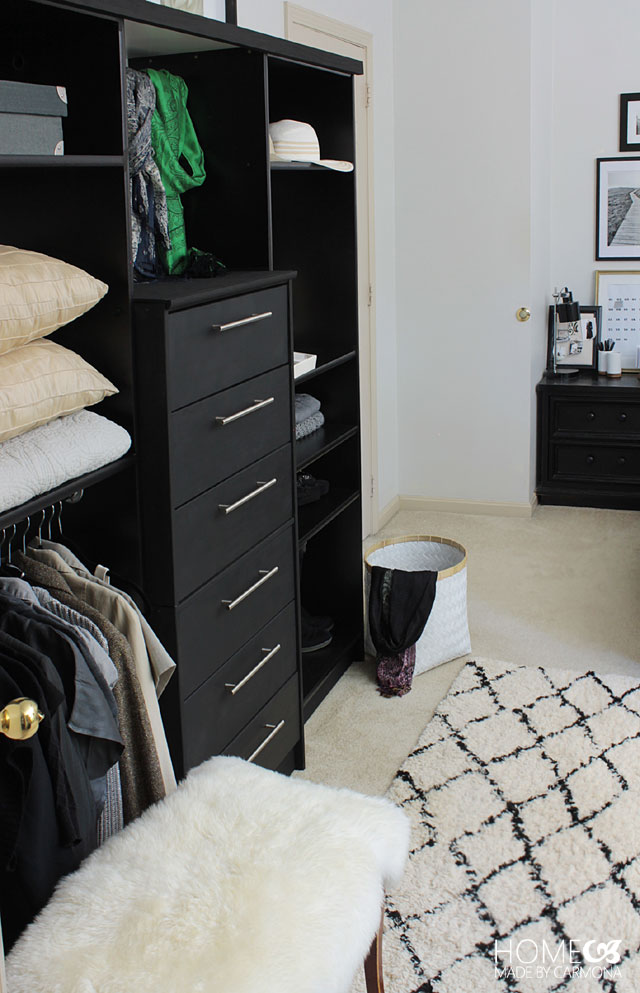
I love how much storage this simple unit adds to my small bedroom! Not to mention how chic it is in the space.
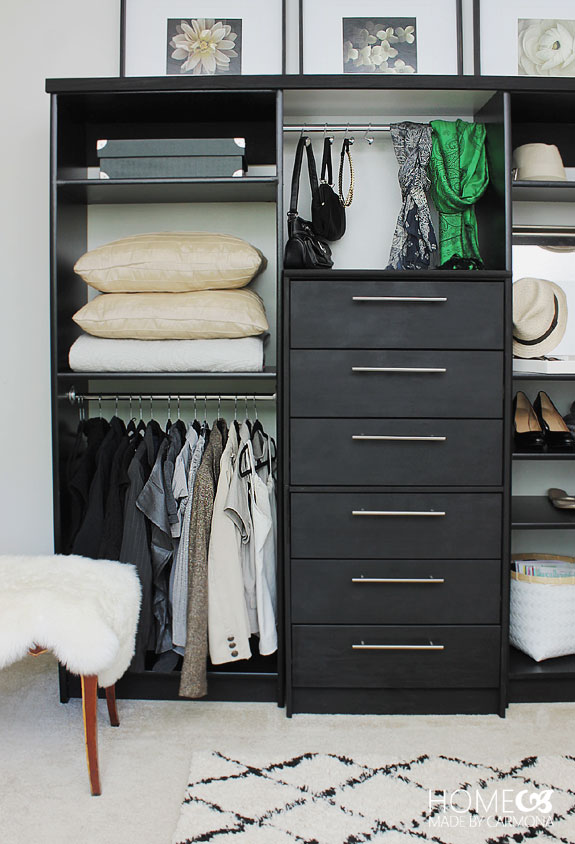
Having an extra mirror and “dressing area” outside of the bathroom allows a space for both me and my husband to simultaneous get ready for church and other functions.
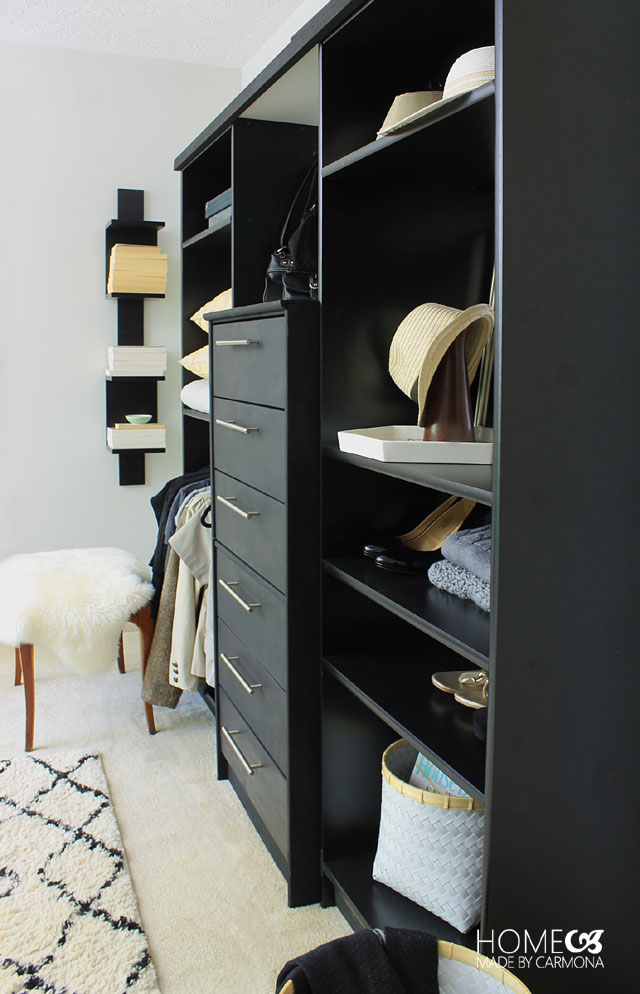
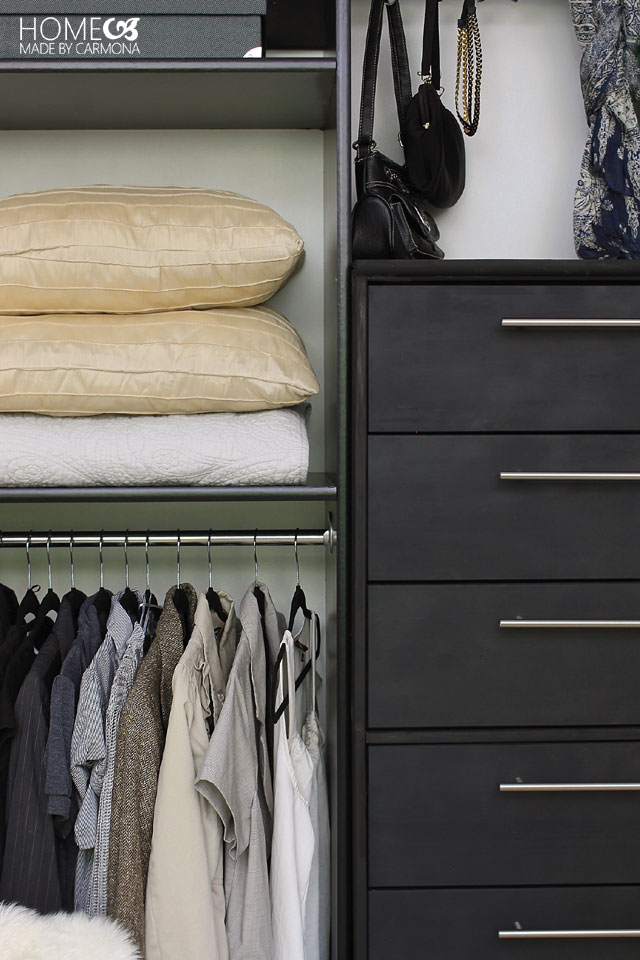
I love the pulls I chose from Hickory Hardware because it acts like a set of hooks would. I often find myself hanging pieces off of it I’ve throw together for an outing. Of course you can add all the bells and whistles to your piece such as hooks, and pull out hanging bars, and more. I may add some of these to my unit as I go along as well.
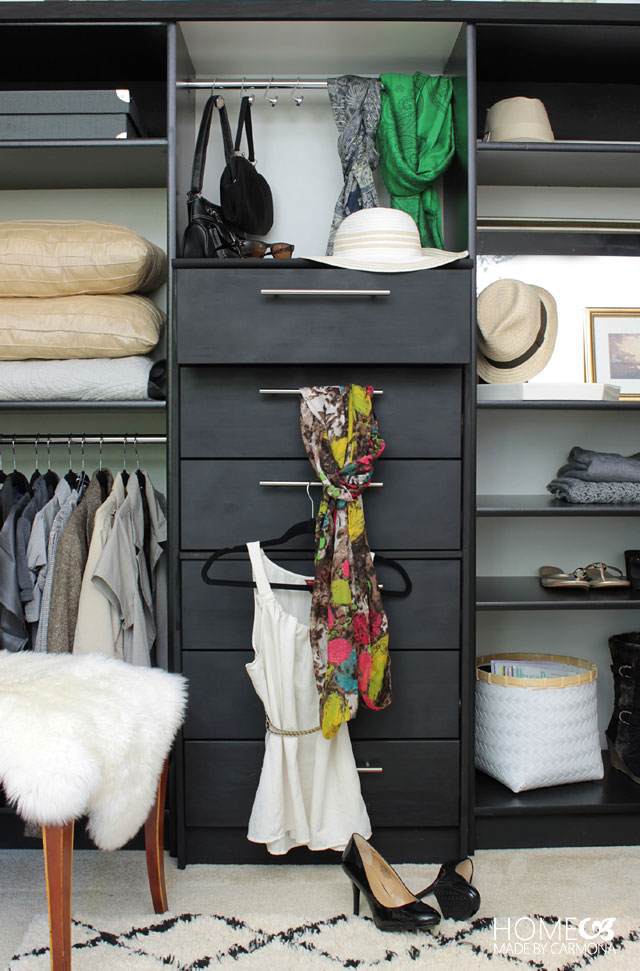
A bench nearby for getting ready and pulling your shoes on is also a lovely little addition. It makes your room a true dressing room.
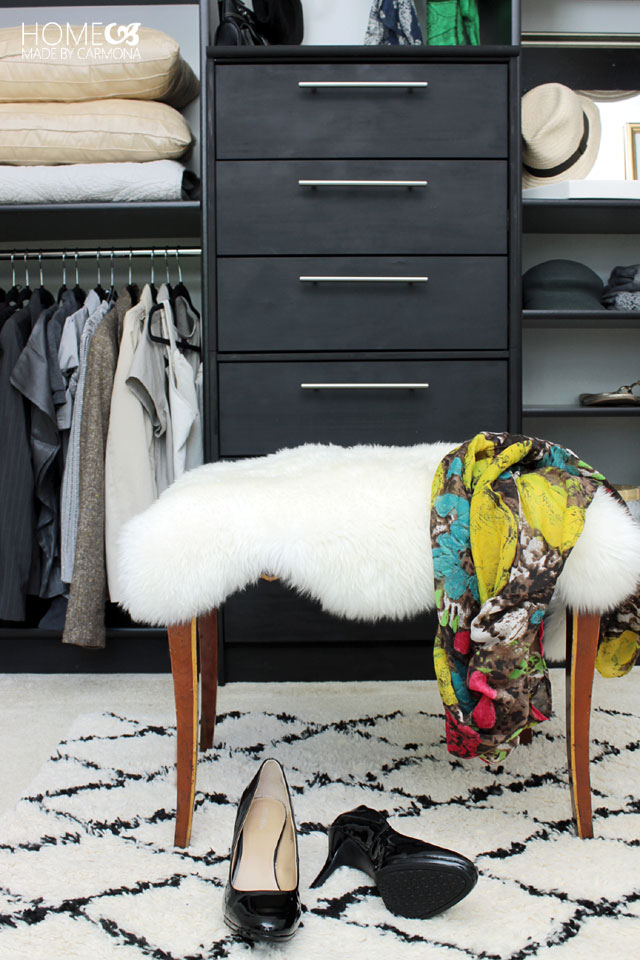
I realize that my method of “building” is a little unique. I do what I call the “common sense build”, when you don’t have the ideal tools or materials to make something, you construct things in a way that makes the most sense, and a sturdy final product. I hope this helps enable you to custom build or custom assemble from several different parts, the wardrobe of your dreams!
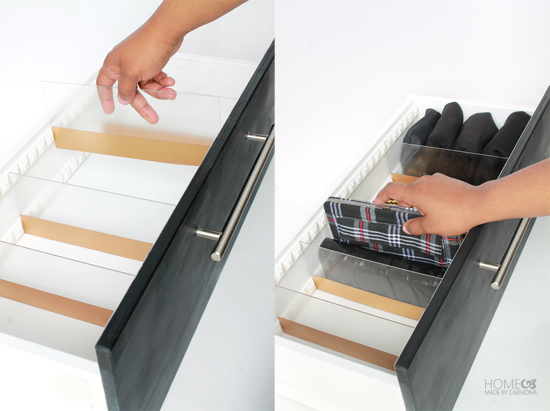
Once you’re done building your wardrobe, don’t forget to organize the drawers with these amazing DIY Acrylic drawer organizers! I shared the full tutorial at IHeart Organizing, but you’ll find the materials you need to make it here on the blog, then follow the link to the full tutorial from there.
The wardrobe really helped complete my master bedroom, which I just LOVE! You should see the amazing before and after pictures…it really is a transformation.
Like This? You’ll Love These!
Related Posts: Tips to makeover a closet | Organizing hangers | How to turn a kids closet into a play nook |




Amazing job!!!!! Very impressed!!! Looks beautiful!!
Great job!! I love your creation and instructions~ 🙂
Hello. I love what you have done and am considering doing the same to our closet. I’m looking for the melamine boards and I’m not sure where to find them. Where did you get yours?
I found some at Lowes and again at Menards. I would Google to see which hardware stores near you carry it.
Amazing amazing, I am inspired. Headed to IKEA today!
This turned out so beautiful – thanks so much for sharing! One question for you – how are the rast drawers? Do they get stuck easily or are smooth to pull in/out?
Thank you! The Rast drawers are shallow, but they actually pull out pretty smoothly for being a wooden glide system. 😉
Wow! So fantastic job,so cool! Thanks so much for idea and detailed instructions.
I love black furniture too!
Love this. And you decorated it so beautifully. I love the sheepskin on your bench. I foundmyself wondering if you had a hard time getting your hanging clothes to pull together ina cohesive pallette-the colors and textures came together really pleasantly. My husband prefers to close doors for a more simple look, but I’d love to see it in my private spaces!
I’m really late to seeing this amazing remodel. I’m just confused on removing the 4 inches? Step 7 is where I’m lost. Can you clarify?
I’d been racking my brain to come up w/ built-in storage for my daughter’s tiny room. I modified a bit (i.e. dimensions, used solid wood, braced to studs, etc.) but the basic plan was perfect & I didn’t have to dovetail drawers! Turned out beautifully – wish I could figure out how to share a pic! Anyway, just wanted to say THANK YOU!!!
I’m so glad to hear that!! Thanks for sharing!
This is gorgeous! And did I catch an Aladdin reference in there? (itty bitty living space) haha! You’re awesome.
I am in the process of moving and would love an open wardrobe. Recreating this is definitely on my to do list!! I was wondering, what are the dimensions of the entire unit so I can adjust my measurements based on the space I have if necessary? Thanks!!
I absolutely LOVE this and plan to replicate it in my daughters closets. Do you have any issues with that drawer that has the metal connectors in it? I’m trying to figure out how to do this myself.
Thank you, and awesome job!
Thank you! No, I don’t have any issues with the drawer with the metal connectors, but that is because they are very thin, and don’t even touch the drawer or sliders… 😉 Good luck with your project!
you are a genius! I love this idea!
WOW!!! What an incredible project. It looks great!
Thank you!
You are amazing!! This is amazing!! LOVE IT!
This is absolutely awesome, so much i went out to ikea last night and purchase everything to recreate the look. I have been trying for the last year to find a cost effect way to organize my small room. Thanks for the idea, I am so glad I found you on Pinterest. Wish me luck.
Good luck!! Although I bet you don’t need it…everyone who comes through here is so creative and skilled! 🙂 Best readers ever!
I’d love to see a picture of it when you are done. If you do, share it with us via FB or Instagram and use #HMCmaker so I can show you off here on HMC!
Ursula, Your wardrobe is not only functional… it beautifully decorative! LOVE it!!!!
Thank you so much Yvonne! I truly appreciate that!
I love, love, love this and want to do one. In step 7 you said you cut 4 inches off the two sides….did you cut the front piece as well?
Hi! No need to cut the front piece…once you cut the sides, you’ll see that there is no need (or any place) to install the front piece at all. 😉
Hope that helps, good luck!
This is brilliant! Loving the creativity you brought to a plani IKEA dresser! Sharing & Pinning 🙂 – xo – Wendi
Awesome post! Thanks for simplifying the process for us.
You blew this one straight out the ball park and scored a home run!! Fantastic job
Thank you so much!
I this is just SO good! You’re the best for not making it more complicated than it needed to be. And it’s still so chic!
Thanks so much Corinna! Haha, what can I say, I hate complicated. 😀
Wow! I want to do this. Thanks for the detailed instructions!
this is so cool and if you break it down into small steps not really that hard to end up with so much xx