
Every other month I’m excited and honored to partner with Better Homes & Gardens Live Better to present a beautiful makeover or amazing DIY I created using my favorite Better Homes and Gardens products found exclusively at Walmart. So when BHG asked me how I would makeover a bedroom space, well I said go big or go home. It was just the motivation I needed to finally complete my master bedroom (after 3 years of procrastinating!!). I’m really excited to show you the crazy drastic before and after! I cringed at my master before, now every night I can hardly believe it is MY bedroom. *Doing my happy dance*
[left]
Why is it we always put the Master bedroom as last on the to-do list anyway? I think I had every excuse in the book… after all, no one but the immediate family ever sees the master bedroom. The reality is that I spend a lot of time in my bedroom…sure I spend quite a bit of family time in the living room, but it’s my personal space for alone time aside from the family where I spend my mornings and evenings. As a homeschooling mom I value a retreat every so often, so finally I hunkered down and got it done![/left]
[right][pullquote width=”250″ float=”left”]When BHG asked me how I would makeover a bedroom space, I said go big or go home…I’m really excited to show you the crazy drastic before and after! [/pullquote]
[/right]
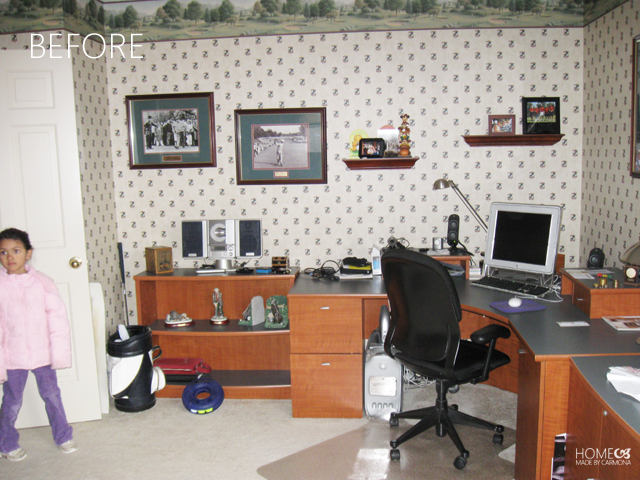
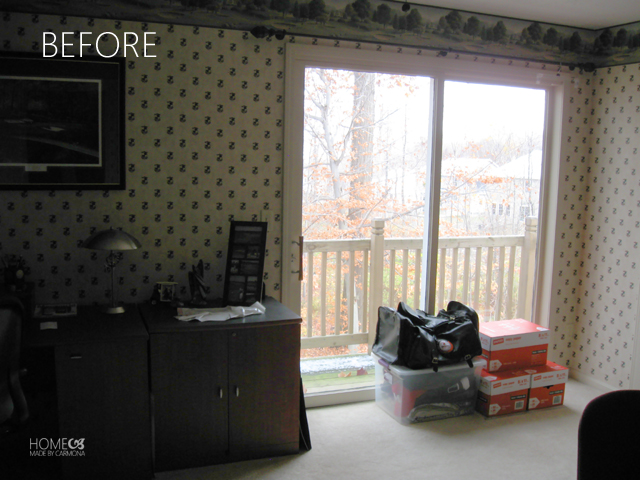
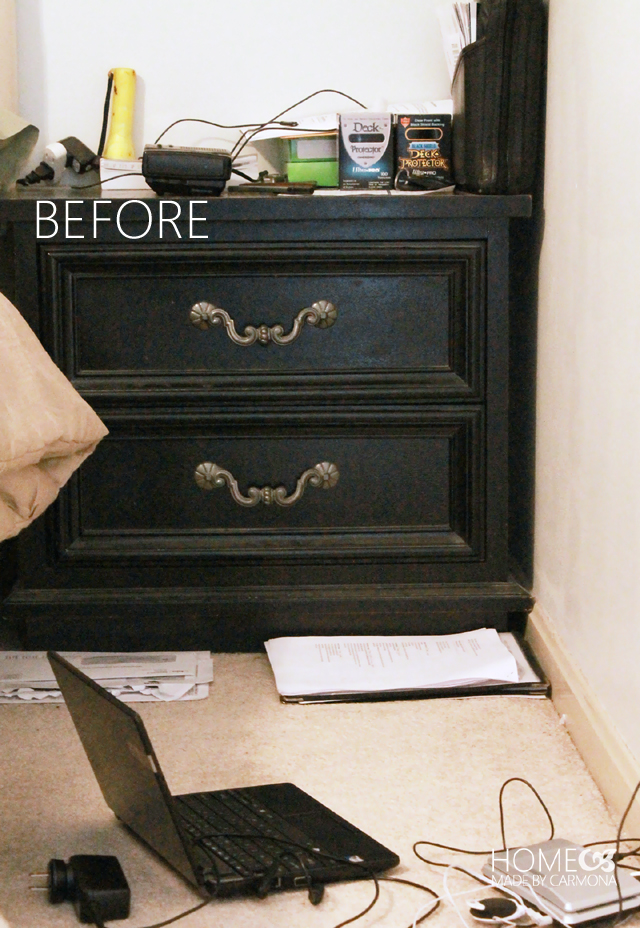
The previous owners use this space as an office space, these are the pictures we took at our final walk through. Honestly, I’d love an office, but sharing a Jack & Jill bathroom with the kids wasn’t an option… so my eldest got the “master” bedroom, and we settled for this smaller “office” space turned bedroom.
I suppose that means I shouldn’t call it “master” since the bathroom and closet is as tiny as the bedroom. However it has everything we need, and we both happily live by the philosophy of less-is-more, so it works! You think I’m crazy right? Ok, I know, I’m a weird woman that I hate shopping and have 4 total pairs of shoes and a week’s worth of clothes…haha, I have no absolutely no defense.
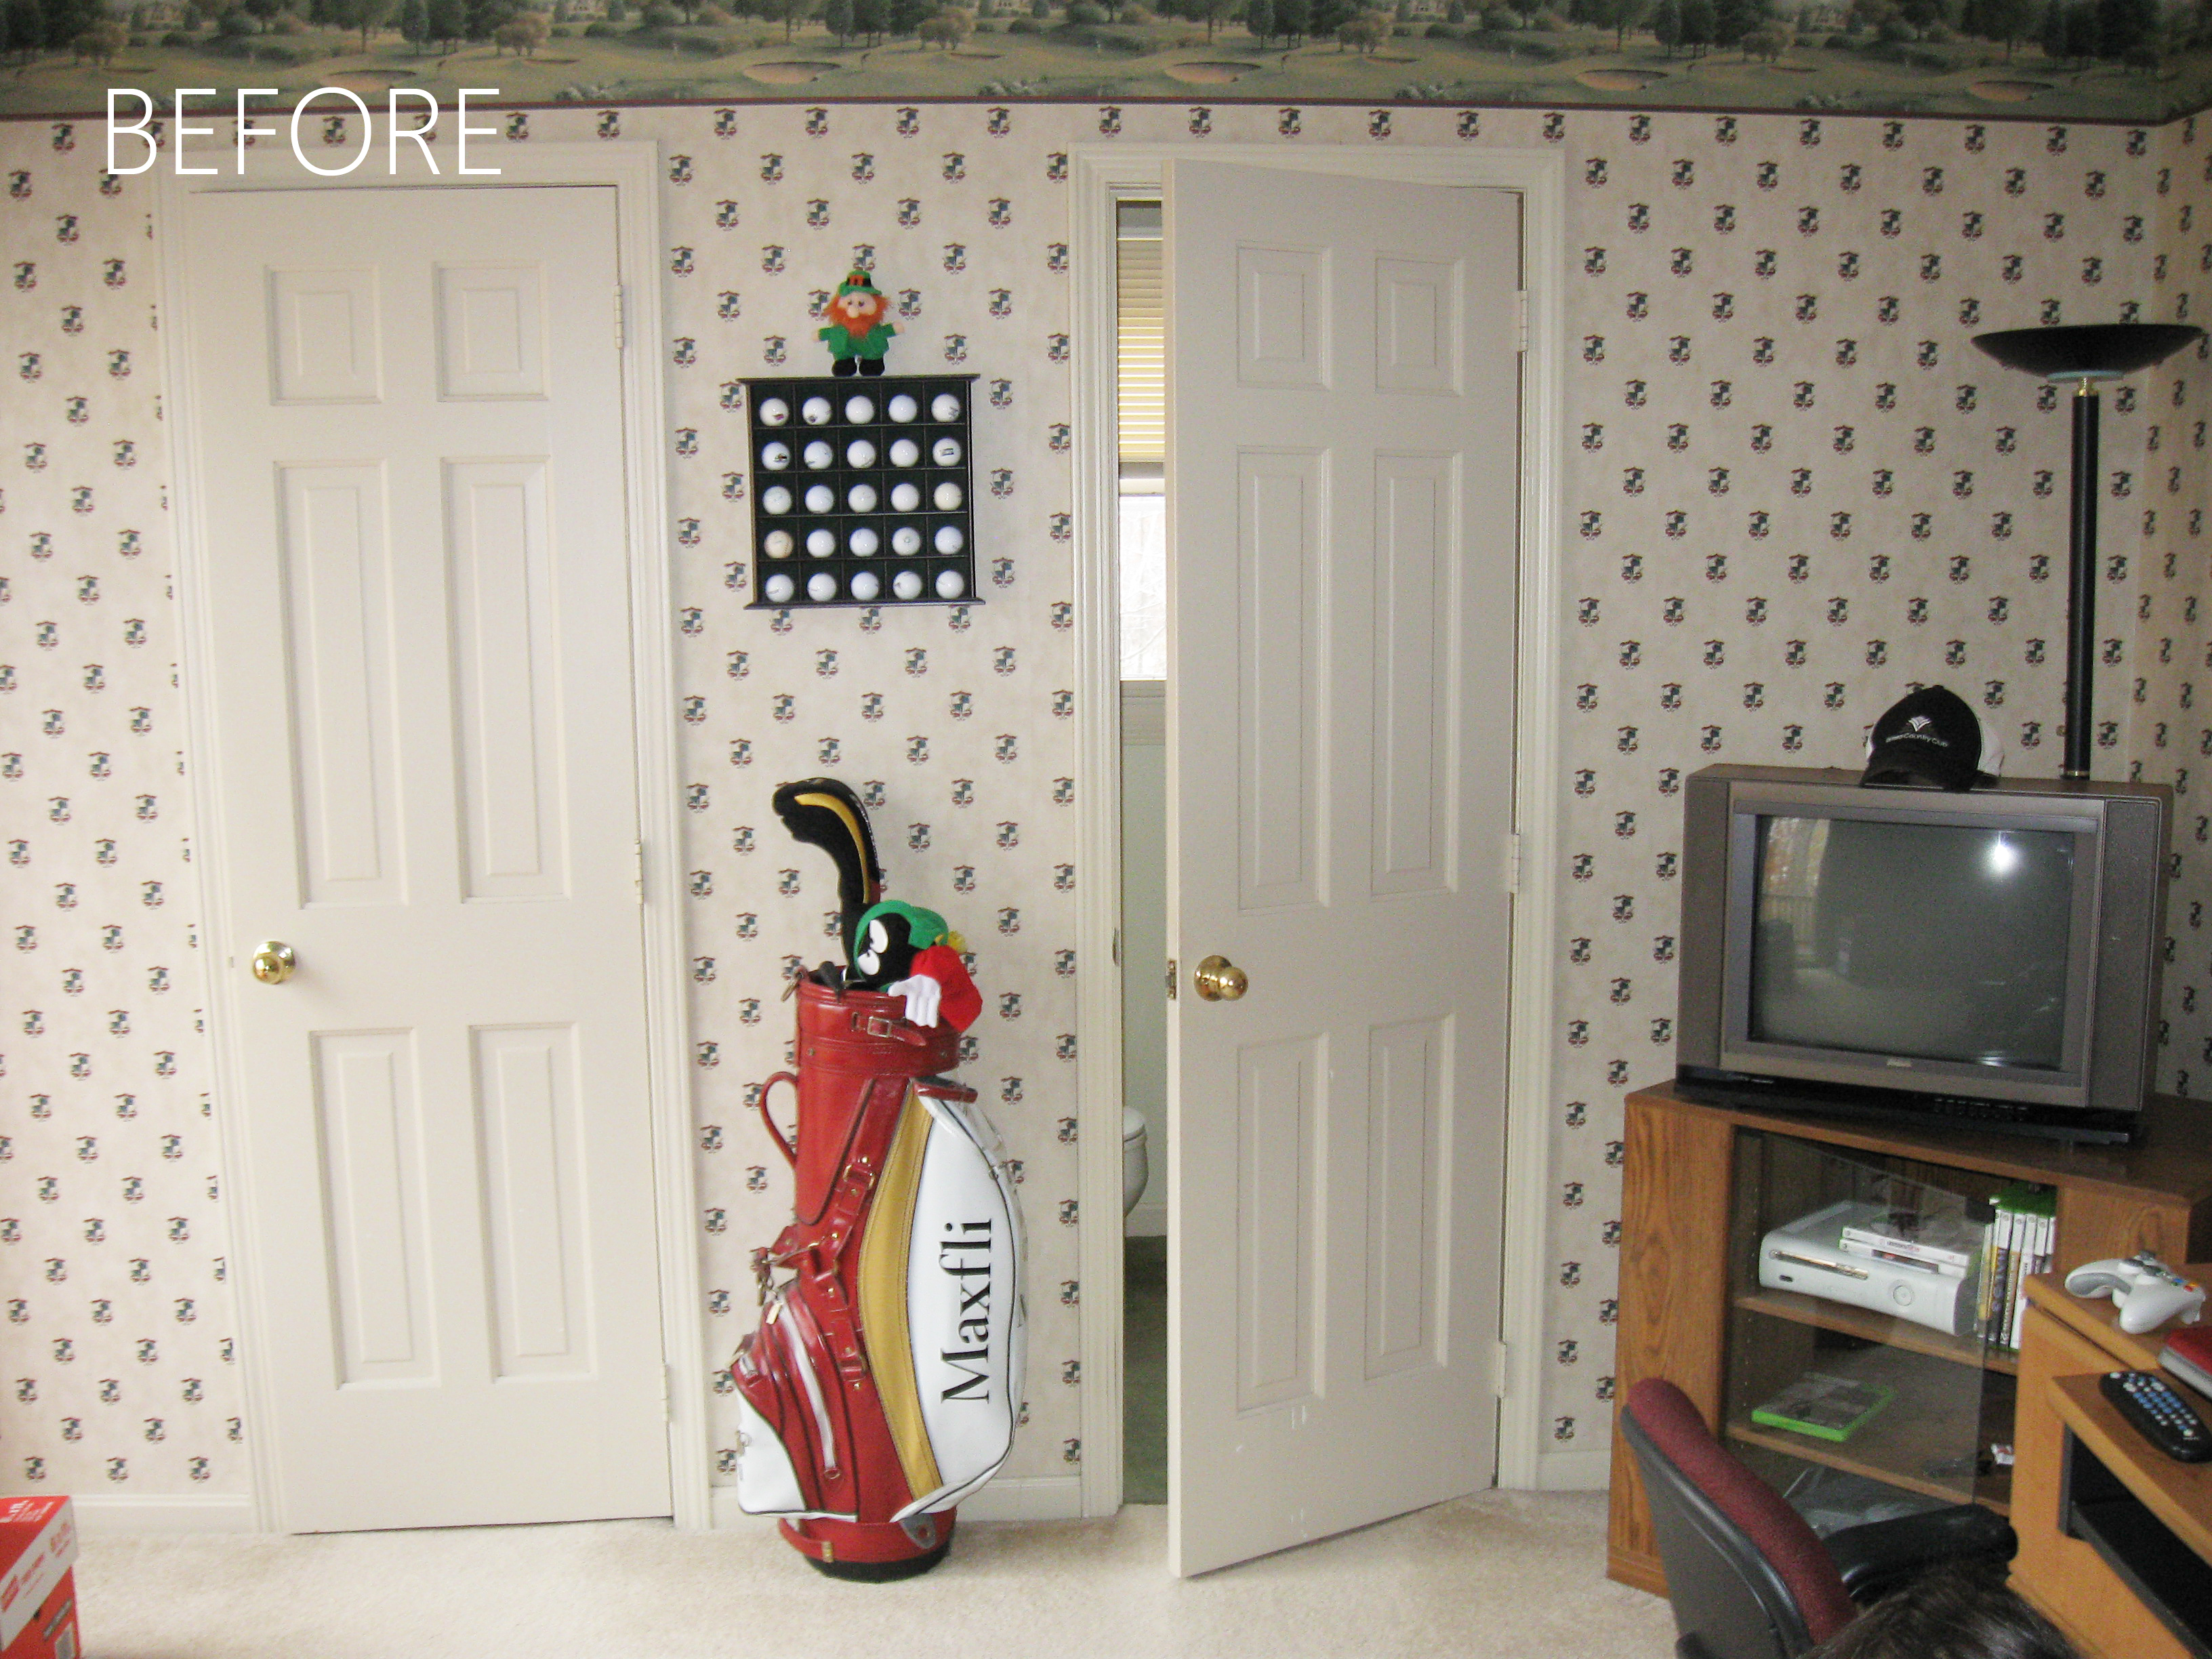
As you can see the golf motif didn’t do anything for me (I’ve never played golf a day in my life!), so after peeling the wallpaper off the walls I went with a simple white with grey-blue tones for paint.
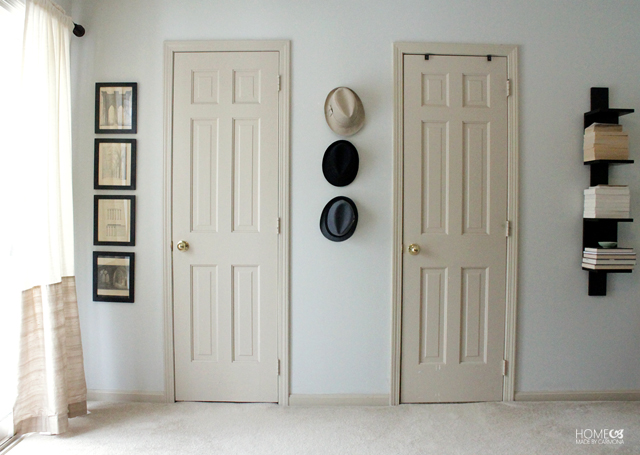
Removing the paper and border and painting a grey-white hue seemed to really open up the space entirely. Yep, paint pulls it off again!
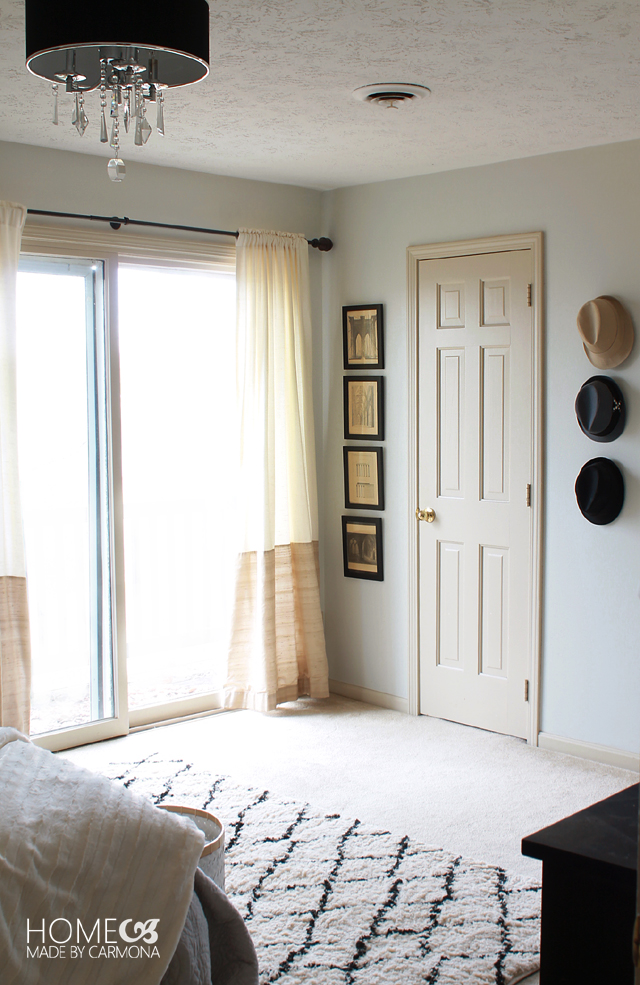
As small as the little second story balcony is, it has a stunning view and also makes the room feel larger. One of these days I plan to make that balcony amazing with tons of lovely plants. Nothing is more wonderful than throwing open that door on a warm day and allowing the cool breeze into our bedroom!
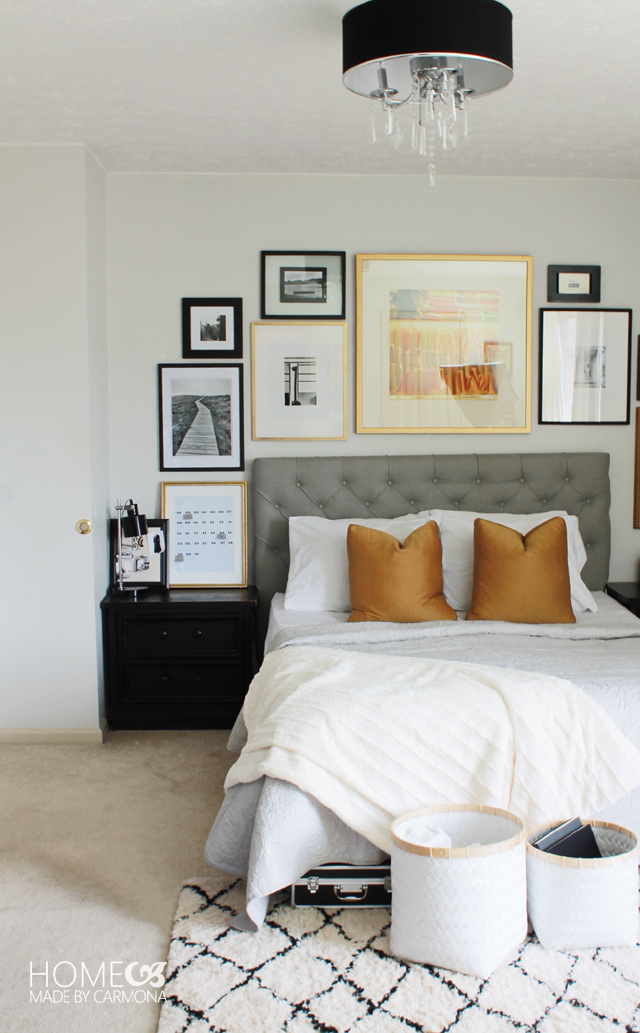
There is one adorning item I do love and could totally collect, and that is fedoras! I think you should always display what you love, so a few hooks on the wall created both practical storage for my fedoras as well as stylish wall decor. Speaking of adorning, what do you think of my choice of light fixture? You should see the room when it is lit up with that fixture in the night; the crystals glitter beautifully off the walls and create the most romantic mood! Don’t worry, it isn’t the only lighting in the room, but hey, it is the master bedroom…you need romance! Want to see it in action? I shared the fixture before and after here.
My side of the bed requires a bit more work since I do some blogging right there from my bed in the earliest flush of dawn and again during the last rays of the day. But I’ll share how I’m organizing it to be the perfect work space in the week to come…
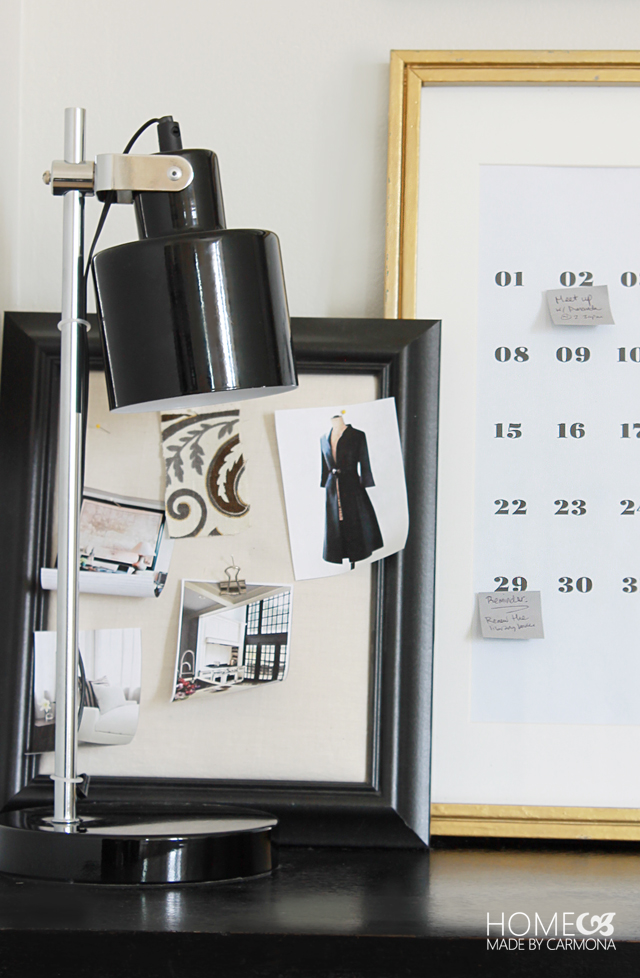
The one item I found for my side table is this modern Better Homes and Gardens metal LED desk lamp from Walmart (found in store). The style lends itself perfectly to that chic NY air that I wanted to bring into my small master bedroom, and it compliments my lovely side table very well! It was actually one of the first items I bought for the space and my inspiration to keep the style in the direction I sought.
It isn’t always the big expensive things that make the best inspiration item.
My husband’s side table was a disaster, which is fascinating since he fancies himself organized… ah well, I have no doubt he knows exactly where every item is, and that is certainly a type of organization. Still, this wasn’t going to work since dust settles on dark furniture such as these side tables and requires regular dusting. I did however clear out the top drawer for him to store and “organize” all his items in so the top could be kept clear. I also updated those horrid side tables by adding two simple and cheap wooden knobs painted black.
A few white glass dishes served to store his change and keys, but everything else is safely stowed in the top drawer.
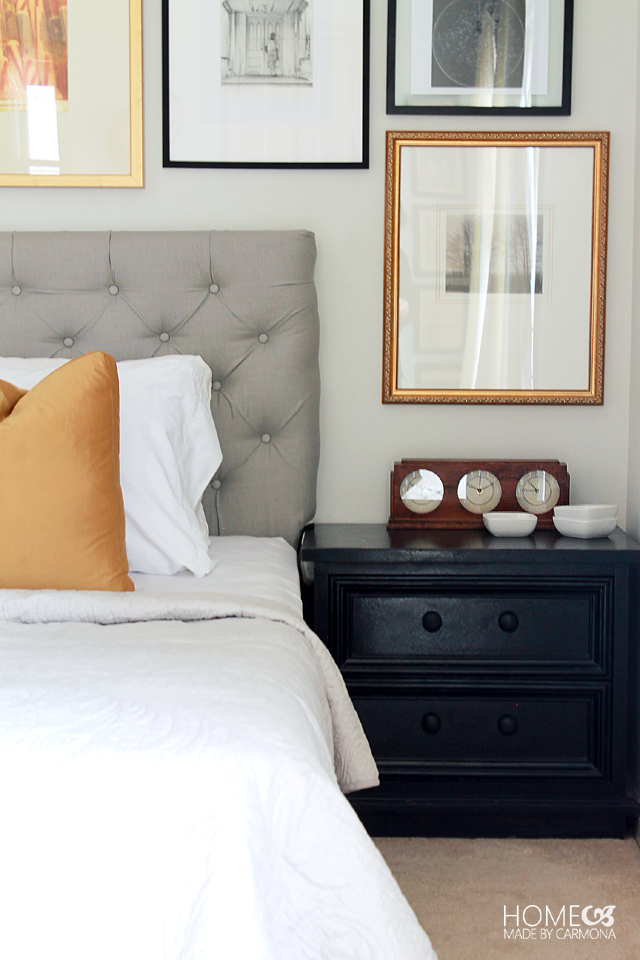
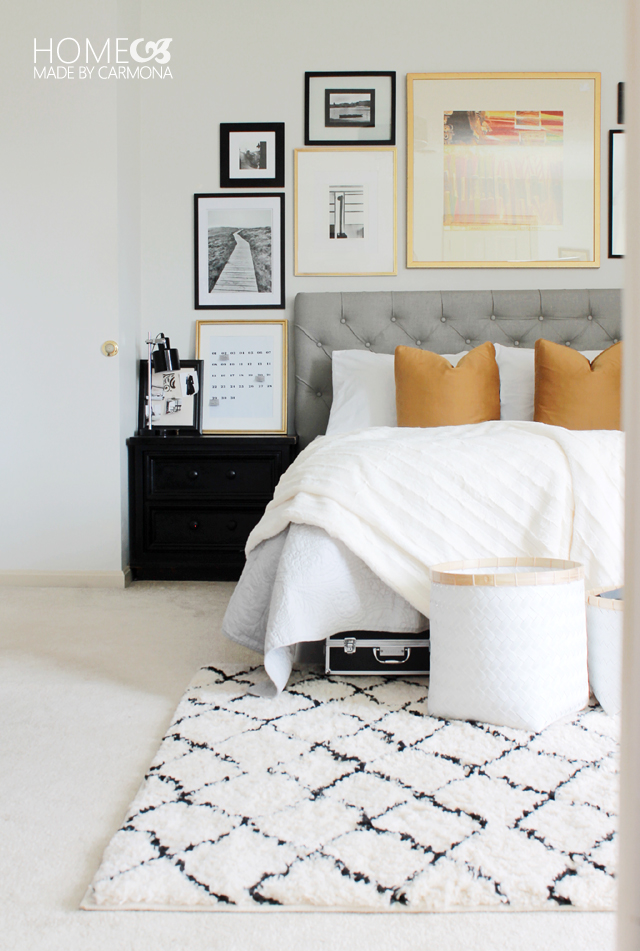
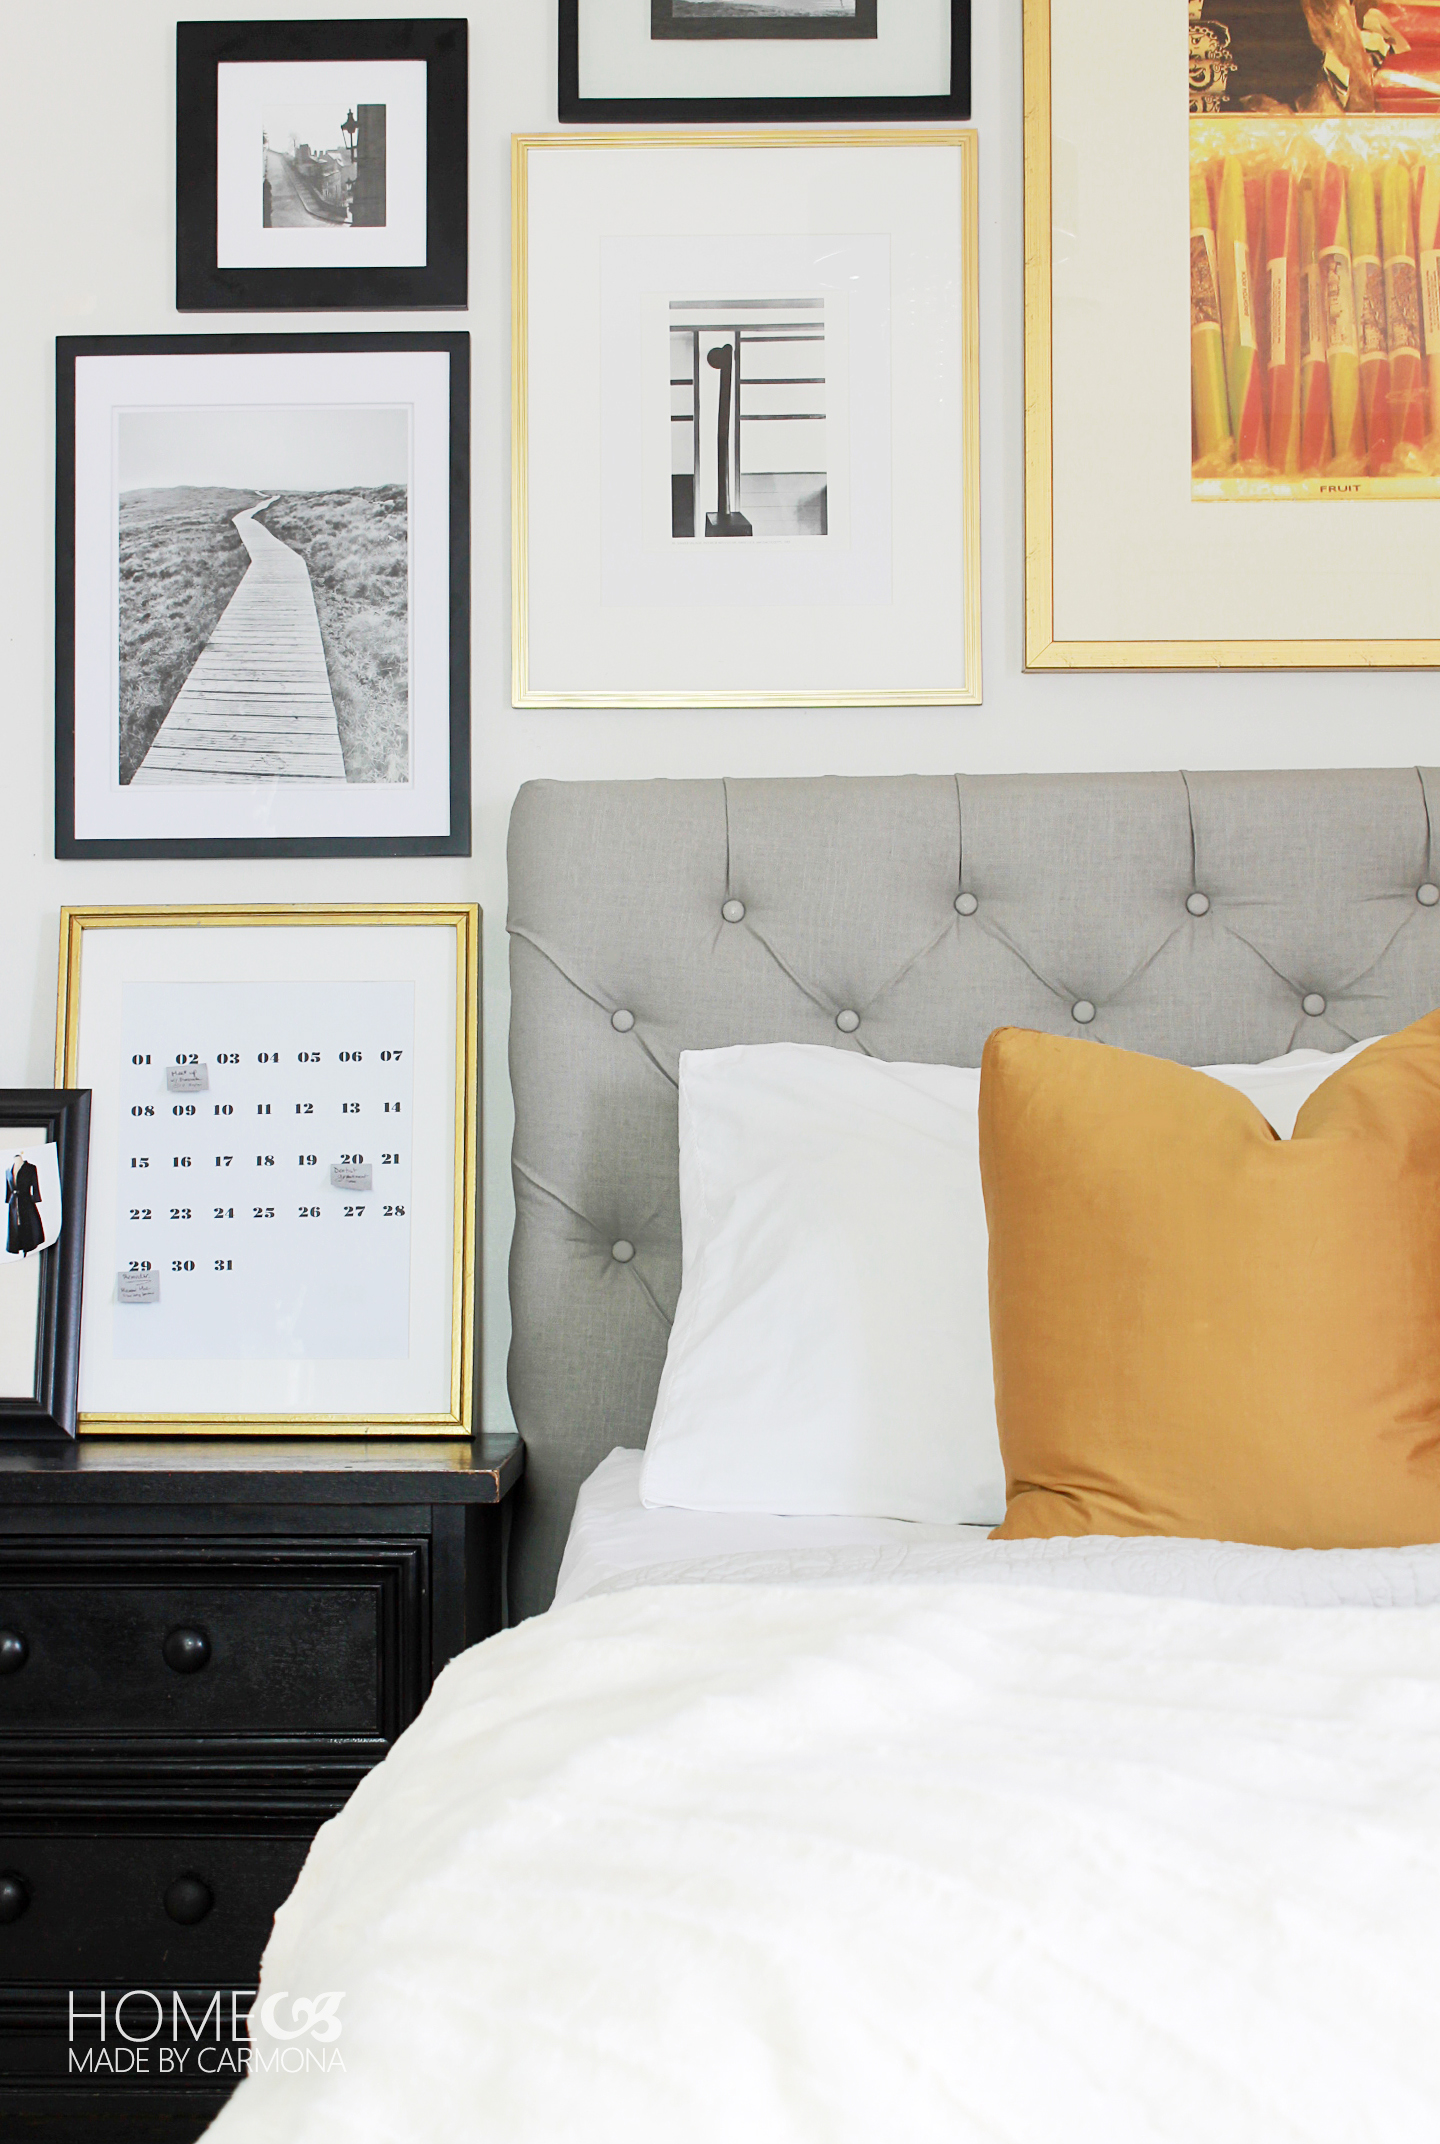
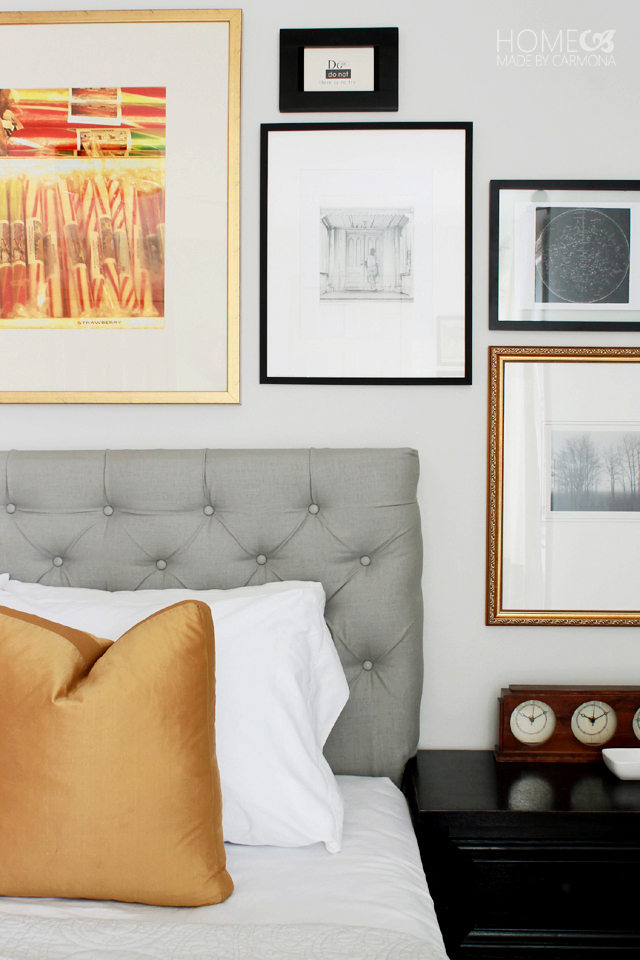
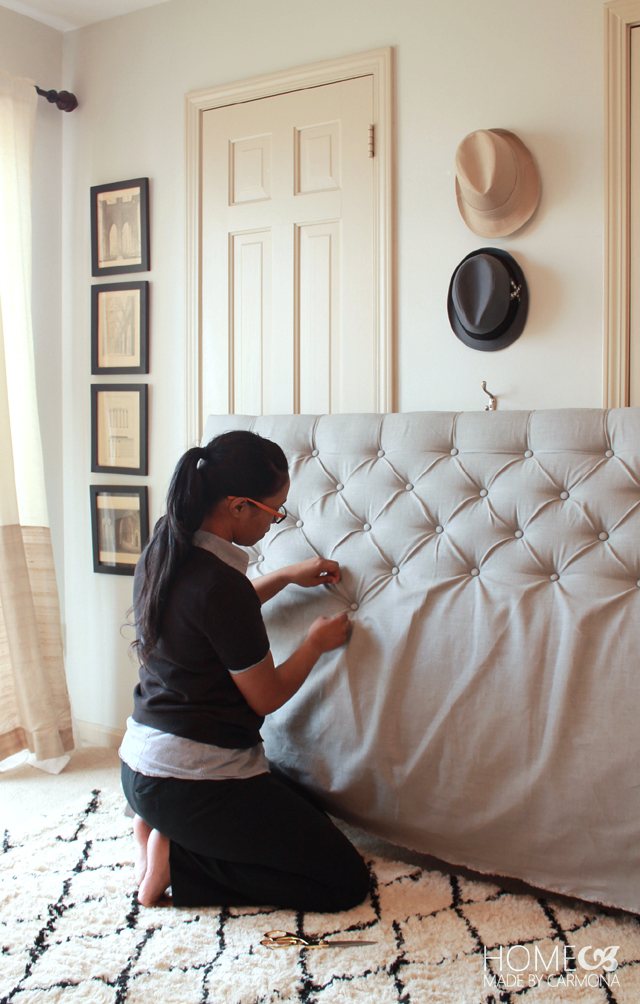
Did you notice the fantastic “new” headboard? I love diamond tufted anything, but knew it was way to rich for my blood. Really this is my old headboard (pictured below), then I turned it into the headboard you see now. Yes, that’s right, this diamond tufted headboard is completely DIY and I share the entire step-by-step tutorial to make your own here!!
I’m pretty thrilled with the result of my very first DIY tufting project!! Sure, I think I could do even better the second time, but for $44 I’m happy with my DIY headboard.
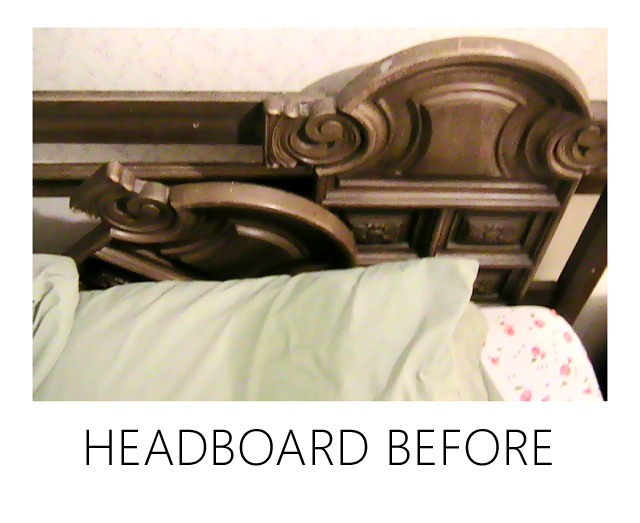
Oh, and just in case you think that is drool, I swear it isn’t. Hahahaha! I took this picture years ago with an old camera to document a leak we had in our roof. Yes, I awoke to a face full of dirty water.
I’m pretty thrilled with the result of my very first DIY tufting project!! Sure, I think I could do even better the second time, but for $44 I’m happy with my DIY headboard.
You know what I think really makes this space come together in stunning style?

[col1]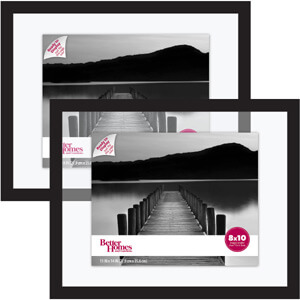 [/col1]
[col2]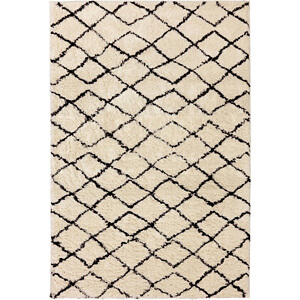 [/col2]
[col3]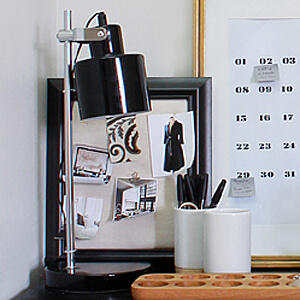 [/col3]
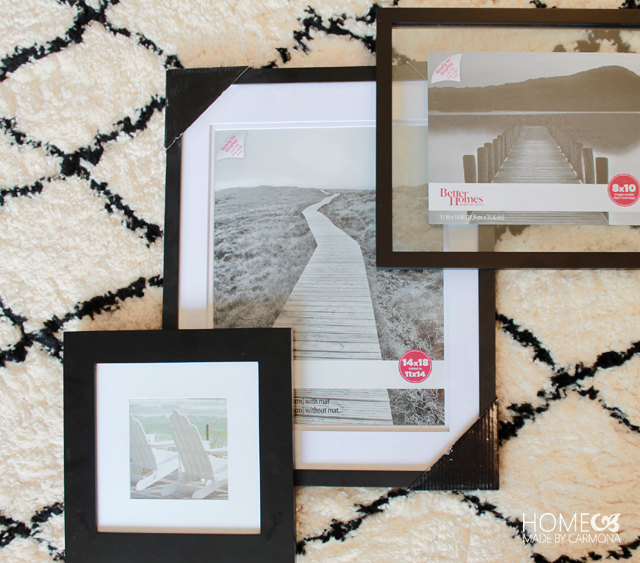
#1.That fantastic gallery wall! Haha, I am totally patting myself on the back over the gallery wall, but I’m a gallery wall fanatic so I can’t help myself. I purchased several great Better Homes and Gardens frames from Walmart to round out pieces I’ve had sitting in my basement for a while. Here’s what I found>>
- Floating Picture frames in black
- 14×18″ Flat Gallery matted frames with a picture already in place! Just flip the print around.
- 8×8″ Flat Gallery matted frame with picture
#2. The gorgeous Better Homes and Gardens Moroccan Cream Woven Area Rug from Walmart really adds flair to the space. I love the extra bit of texture and design it brings into the space.
I am truly thrilled with my bedroom space. It has been a looooong time coming, and I feel I’ve worked hard enough to enjoy my little sanctuary. I’ve also been longing to infuse at least one room in my house with a little NY style, so I’m thrilled!
[left]
What about you? Have you made over a beautiful bedroom space lately? Share it with me by tagging your pictures to my Facebook page. I’d love to see what you did!
*I am honored (and crazy excited!)(yes I’m doing my happy dance again) to be part of the BHG Live Better network, and to share a few of my favorite things, projects, and my own original ideas with you. Thank you to BHG at Walmart for sponsoring this post. Follow BHG on Facebook, Twitter, Pinterest, and Instagram.[/left]
[right]
![]()
[/right]

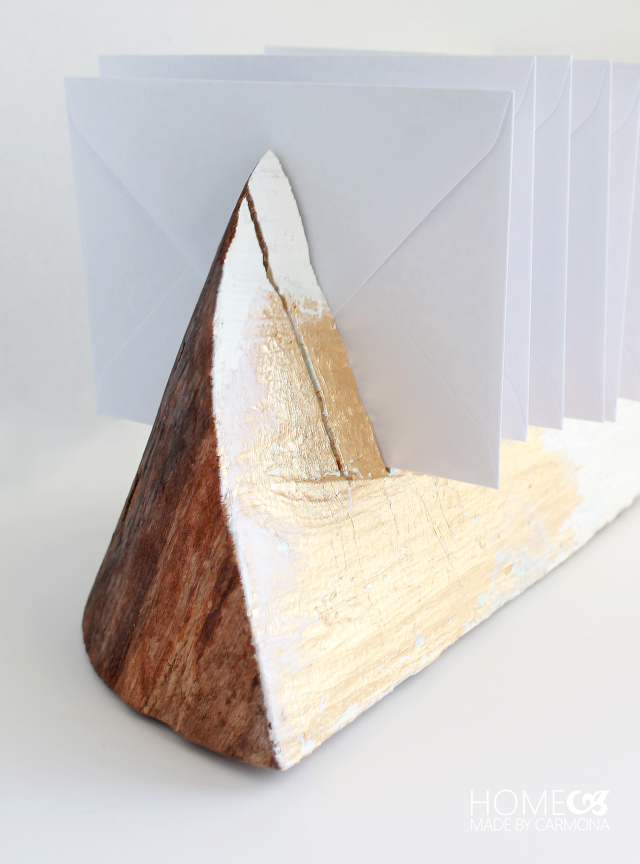
See the projects that make up this space. Learn how to make your own custom DIY diamond tufted headboard here, gain free printables to make your own bedside calendar art here, and learn how to make this gorgeous DIY letter holder for your sidetable here.
[col1]
[/col1]
[col2]
[/col2]
[col3]
[/col3]
[go_portfolio id=”diy_gallery”]


Wow! didn’t recognize your old room. Love how you’re able to build this master bedroom. It was a complete transformation and it is so beautiful. I also love your choice of colours.
Love your style and headboard tutorial!!! Tufting a headboard for my 10 year old daughter, and you have some of the best pics and instructions I’ve seen! Best to you on all your endeavors!!!
Such a stunning makeover! Your master bedroom looks amazing. I love all the extra touches, like the fedoras on the wall.
Thank you so much for this easy to follow tutorial. I can not wait to make this beautiful headboard. You did an exceptional job!!!
I am looking for a cheap way to make bedside tables that are floating on wall. would like to have a shelf in them and then do not have to have a front door. Any ideas?
Can you please share where you got the shelf unit that’s holding books? I’ve been looking for something exactly like it!
I believe it originally came from Target, but I actually got mine from a thrift shop. I got lucky! 🙂
Great job!!! I love the inexpensive way you made a very expensive looking piece that enhances your headroom. Everything looks so pulled together elegantly. Love the photo gallery as well. Thanks for sharing this beautiful project.
Absolutely Incredible!!! 👌 Awesome!!! Very stylish and ooooo so chic!! Fantastic job,well done💝 i think i may be able to pull this one off!! Thank you!!😃
Oh my gosh. This is absolutely beautiful! I couldn’t even imagine an “after” looking like it does based on the before pictures! You are officially hired to decorate my house! I LOVE this so much!!
Thank you for figuring all this out so I didn’t have to! And for writing such clear instructions with photos. I’m confident I can now accomplish this. If/when I do, I’ll send photos.
Love it…
hello ,
what kind of fabric you used ?
The headboard is just beautiful. How many total hours did it take? The entire room is beautiful!!!!
Thanks so very much for the instructions – very through.
Hi Ursula,
Thanks for such great inspiration. I used this master bedroom makeover to help inspire me for my own! I shared your bedroom image and post, which can be found here: http://www.themooninmae.blogspot.com/2016/02/master-suite-inspiration.html
Thanks!
Jennifer
Hi Jennifer,
Thank you for such a lovely compliment! Can’t wait to see how your room turned out! 🙂
Love your blog! You inspire me.
So sweet of you to say!! Glad you’re here!
This is the color scheme I am trying to recreate in my own bedroom! Where did you get those mustard/gold throw pillows?
I was lucky, I got the pillows from a yard sale for a dollar each… tossed them in the washer and they were just like new! I believe the previous owner said she got them from Pier One. 😉 Good luck with your bedroom!
this is probably one of my favorite make overs. What a huge change. Its gorgeous!!! I love the gold, and the fedoras. I am loving your head board too, i need to make me one we are currently headboard less.
Haha, I have such a weakness for fedoras. Thank you for the high compliment!!
this turned out amazing! Love the headboard!
It turned out stunning, Ursula! You did a beautiful job. I’m OBSESSED with that headboard!
Love the space! I want to copy every aspect of your gallery wall in my master bedroom. I see some of the frame sizes noted in the post but would you mind sharing the sizes of all the frames used? I don’t want to leave anything to chance!
Oh thank you, well imitation is the best form of flattery! 🙂 The large center print is 13.5 x 13.5″, the two on either side are 21 x 17″, the tiny one is 6.5 x 9.5″, the ornate gold one is 18 x 22″, and the rest you already know! 😉 Hope that helps!
Ursula you did a fantastic job. I love the neutral colour scheme and the DIY headboard is awesome!!
The only concern I have is with the framed art over the headboard. I thought that glass over the head of the bed is a general no-no?
Or did you use plastic and not glass in your frames?
I live on the west coast and although I’ve felt a few earthquakes nothing have ever fallen off the walls…yet!
Great question! I’m originally from Cali, so even though I’m technically not in earthquake zone anymore I am careful about securing things well. Yes a few of the smaller framed art pieces are glass, but they are all (especially the large sized frame) lightweight. Additionally I use 3M command strips instead of nails. It keeps my walls free of holes, but more importantly those frames aren’t going anywhere!! 🙂
lovely just lovely xx
I Love what you did to this room! I am a big fan of neutral spaces and this is a space I would LOVE to call my own!!! Way to go Ursula!!!!
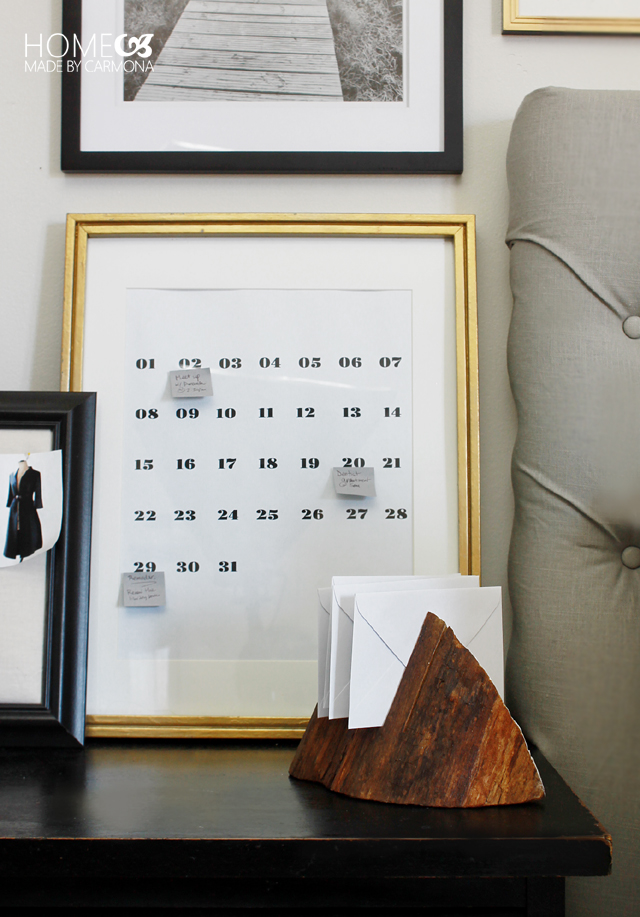
Is that DIY calendar and can you share how to?
Oh my gosh, it’s like you know me. lol! It is a DIY calendar, and I will be sharing it later this week! 😉 Thanks for asking!
I so need to get going on my master bedroom! This is an inspiring post! Your retreat is fantastic.
Holy moly, what a transformation! Please tell me you don’t get tired of me telling me how talented you are 😛
This is so good Ursula! I just love that rug in the space – such a beautiful room design!
LOVE this room Ursula! You did an amazing job transforming it! But I don’t know why you didn’t like that golf motif! Haha!
Oh my goodness, what a GORGEOUS transformation! Everything you chose is just perfection. That gallery wall is amazing! I’m dealing with a similar wallpapered room right now and your makeover gives me hope that I can make my ugly space beautiful, too! Also, how did you become a part of the BHG Live Better Network? Seems like such a cool partnership!
Thank you! That’s very sweet of you to say.
Well, one day I just came home to an email from BHG… much squealing and happy dancing ensued. 😀 I’m afraid it is a closed process and they do the approaching. But yes, I feel very honored to partner.
As usual, you killed it! This bedroom makeover is outstanding. The diy headboard looks incredible ($44?! what?!) and I love, love, love that gallery wall. You have such a natural instinct when it comes to color palettes — just lovely!
Thanks Anna! I’m a sucker for gallery walls too…my poor husband just doesn’t get it. 😀 He says he looks up and sees candy. lol!
Gosh! It is gorgeous what you have done! I like how you have the pictures! Really cool!
I am working on our master bedroom RIGHT now and this loveliness is putting mine to shame, ha! Regardless, I ADORE what you did… you have such a talent!! Pinning to my bedroom board right now.
Wonderful transformation… You did a fantastic job on the headboard, especially since it was your first time around… Kudos to you and congrats
I always love your style!! I wish, wish, wish I had your insight! My home needs a MASSIVE makeover. I love your site because you have affordable and beautiful options!
Absolutely fantastic!!!♥
Love it all! Pinned it!
Wow! What a huge difference. Dramatic barely covers it.
VERY nicely done! I love the finished product 🙂
Absolutely stunning! Love the special touches you added, like the hats…so fun!
Thank you! I do love me some fedoras… 😀
gorgeous, ursula! i love the art around the bed!
It looks fantastic Ursula! What a great before and after
Thank you Julia! I waited waaay too long to finish this project. 😀