*This post is awesomely sponsored by The Home Depot. Woop woop!
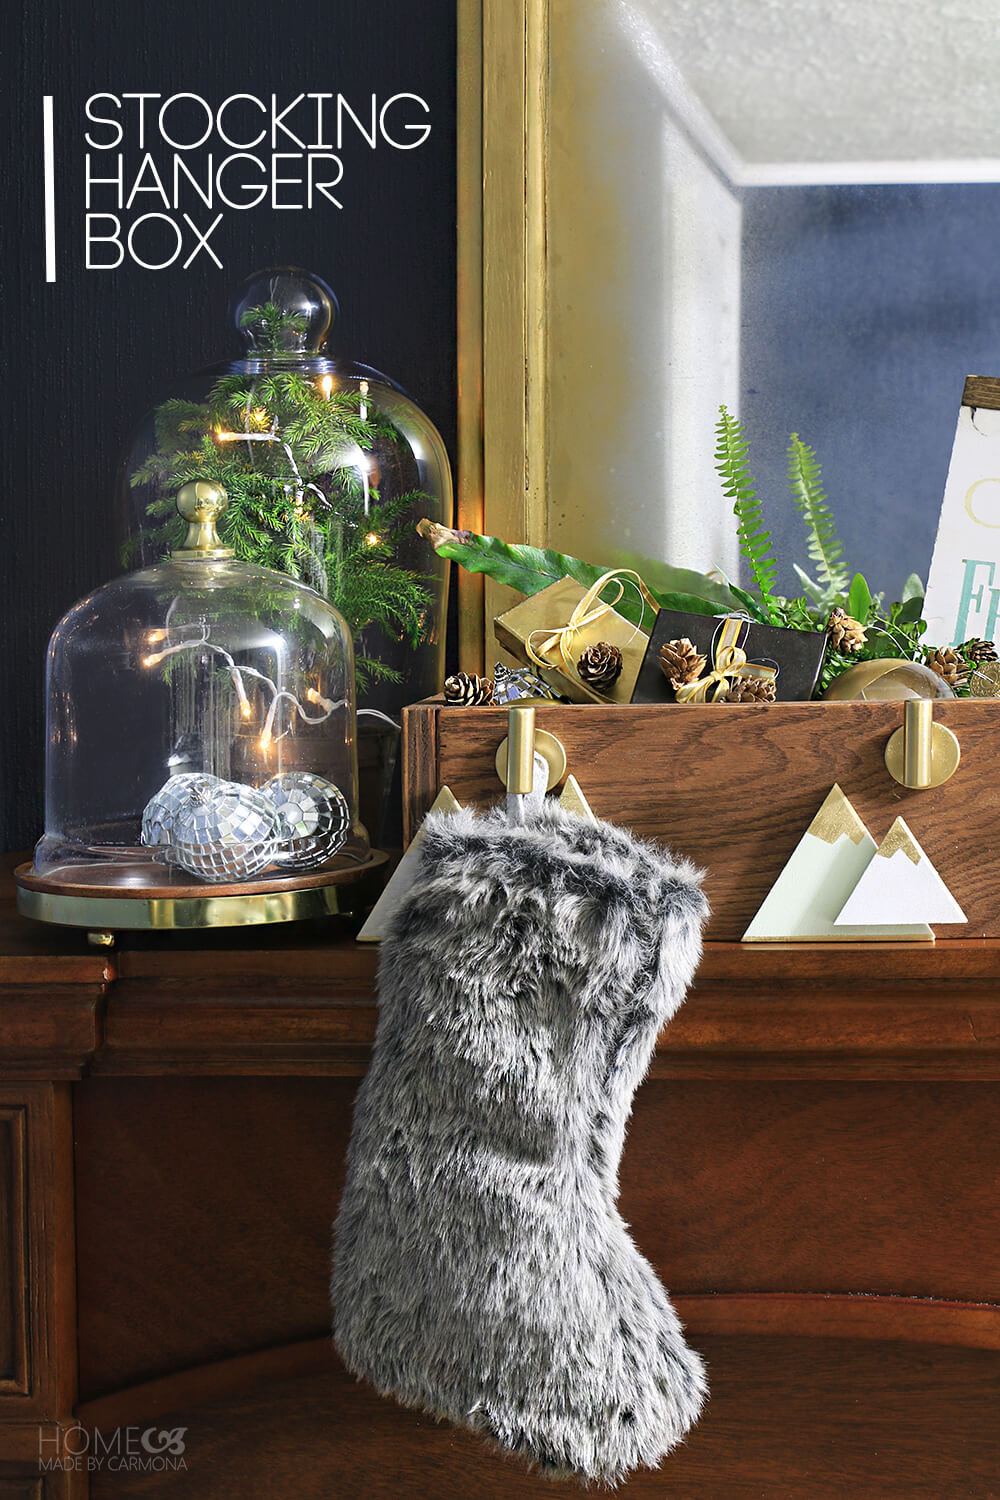
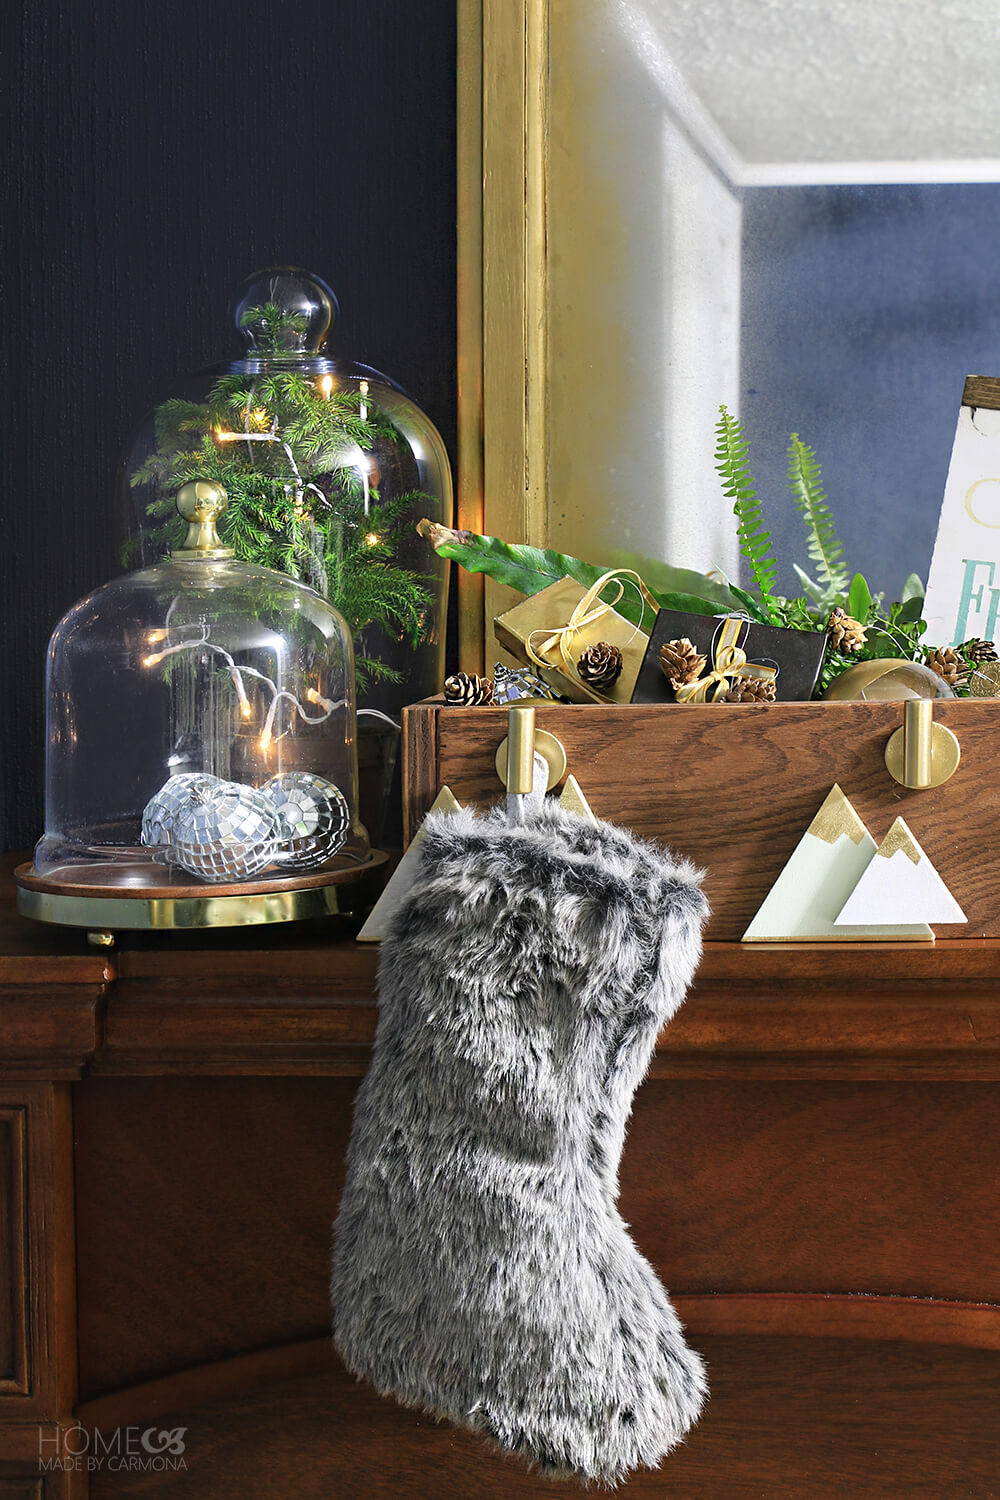
Oh guys, I’m so in love with how this little Stocking Hanger Box turned out! It’s super easy to make, but oh so cute.
I hope you will sign up for the Do-It-Herslef workshop to make the stocking hanger box. It’s coming up this Thursday (Nov. 16th, 2017). It is totally worth checking here online to see which of your Home Depot locations are having the workshop, and get more details. If you can make it, definitely take some pictures and video to share with me. I love seeing everyone’s ‘girls night build party’ (as I call it)…it’s just so much fun!
This is what the original stocking hanger box tutorial looks like. As you can see, I didn’t change the style of the box. I simply added to it. Which means it will be so easy for you to add your own flair to your stocking hanger box too.

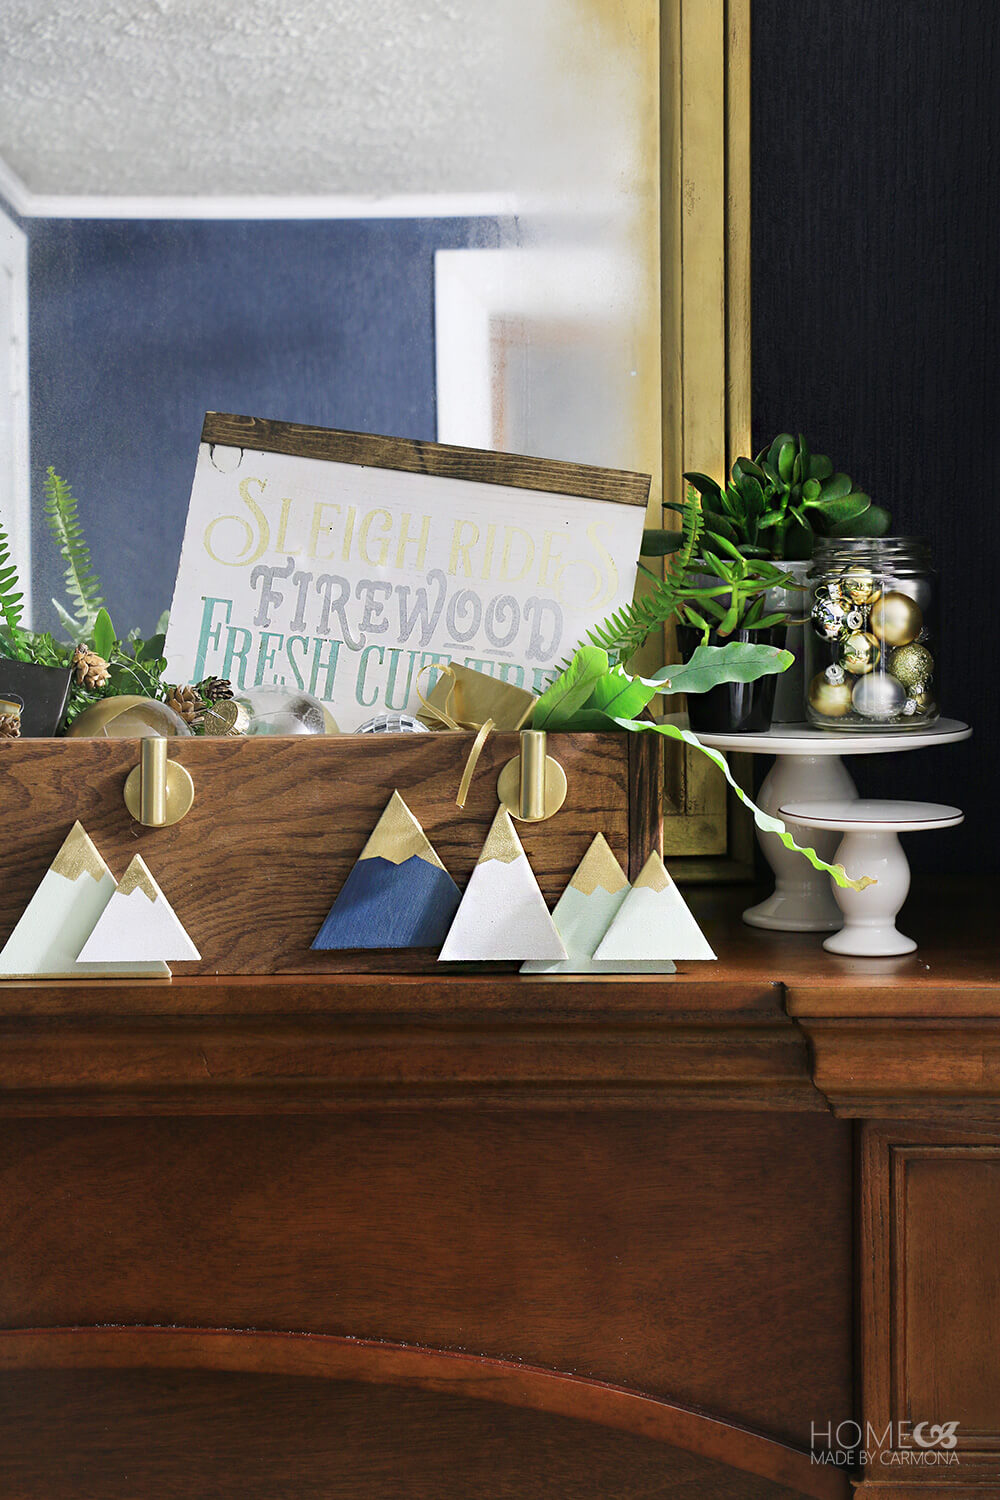
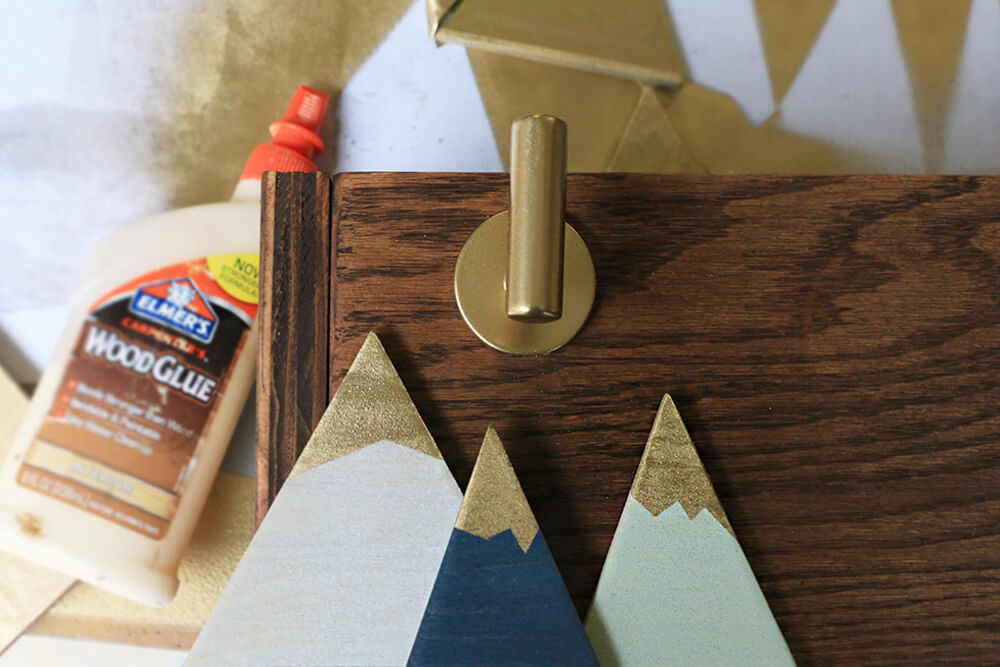
I created these adorable little gold capped mountains (my husband totally teased me about those mountains…or “gold topped triangles” as he called it).
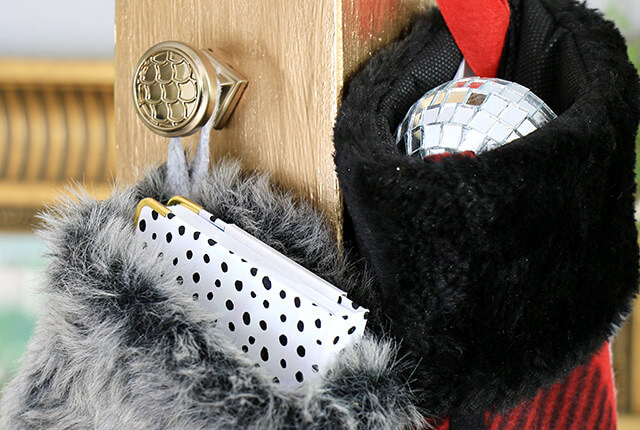
Of course I also opted for a little more modern hook. The ones I bought from The Home Depot were polished chrome, and I spray painted them with the same gold spray I used on my gold peaked mountains…ahem, triangles.
This was such a fun project, you will definitely want to sign up to make this at your local Home Depot Do-It-Herself workshop this week. Just say’in…

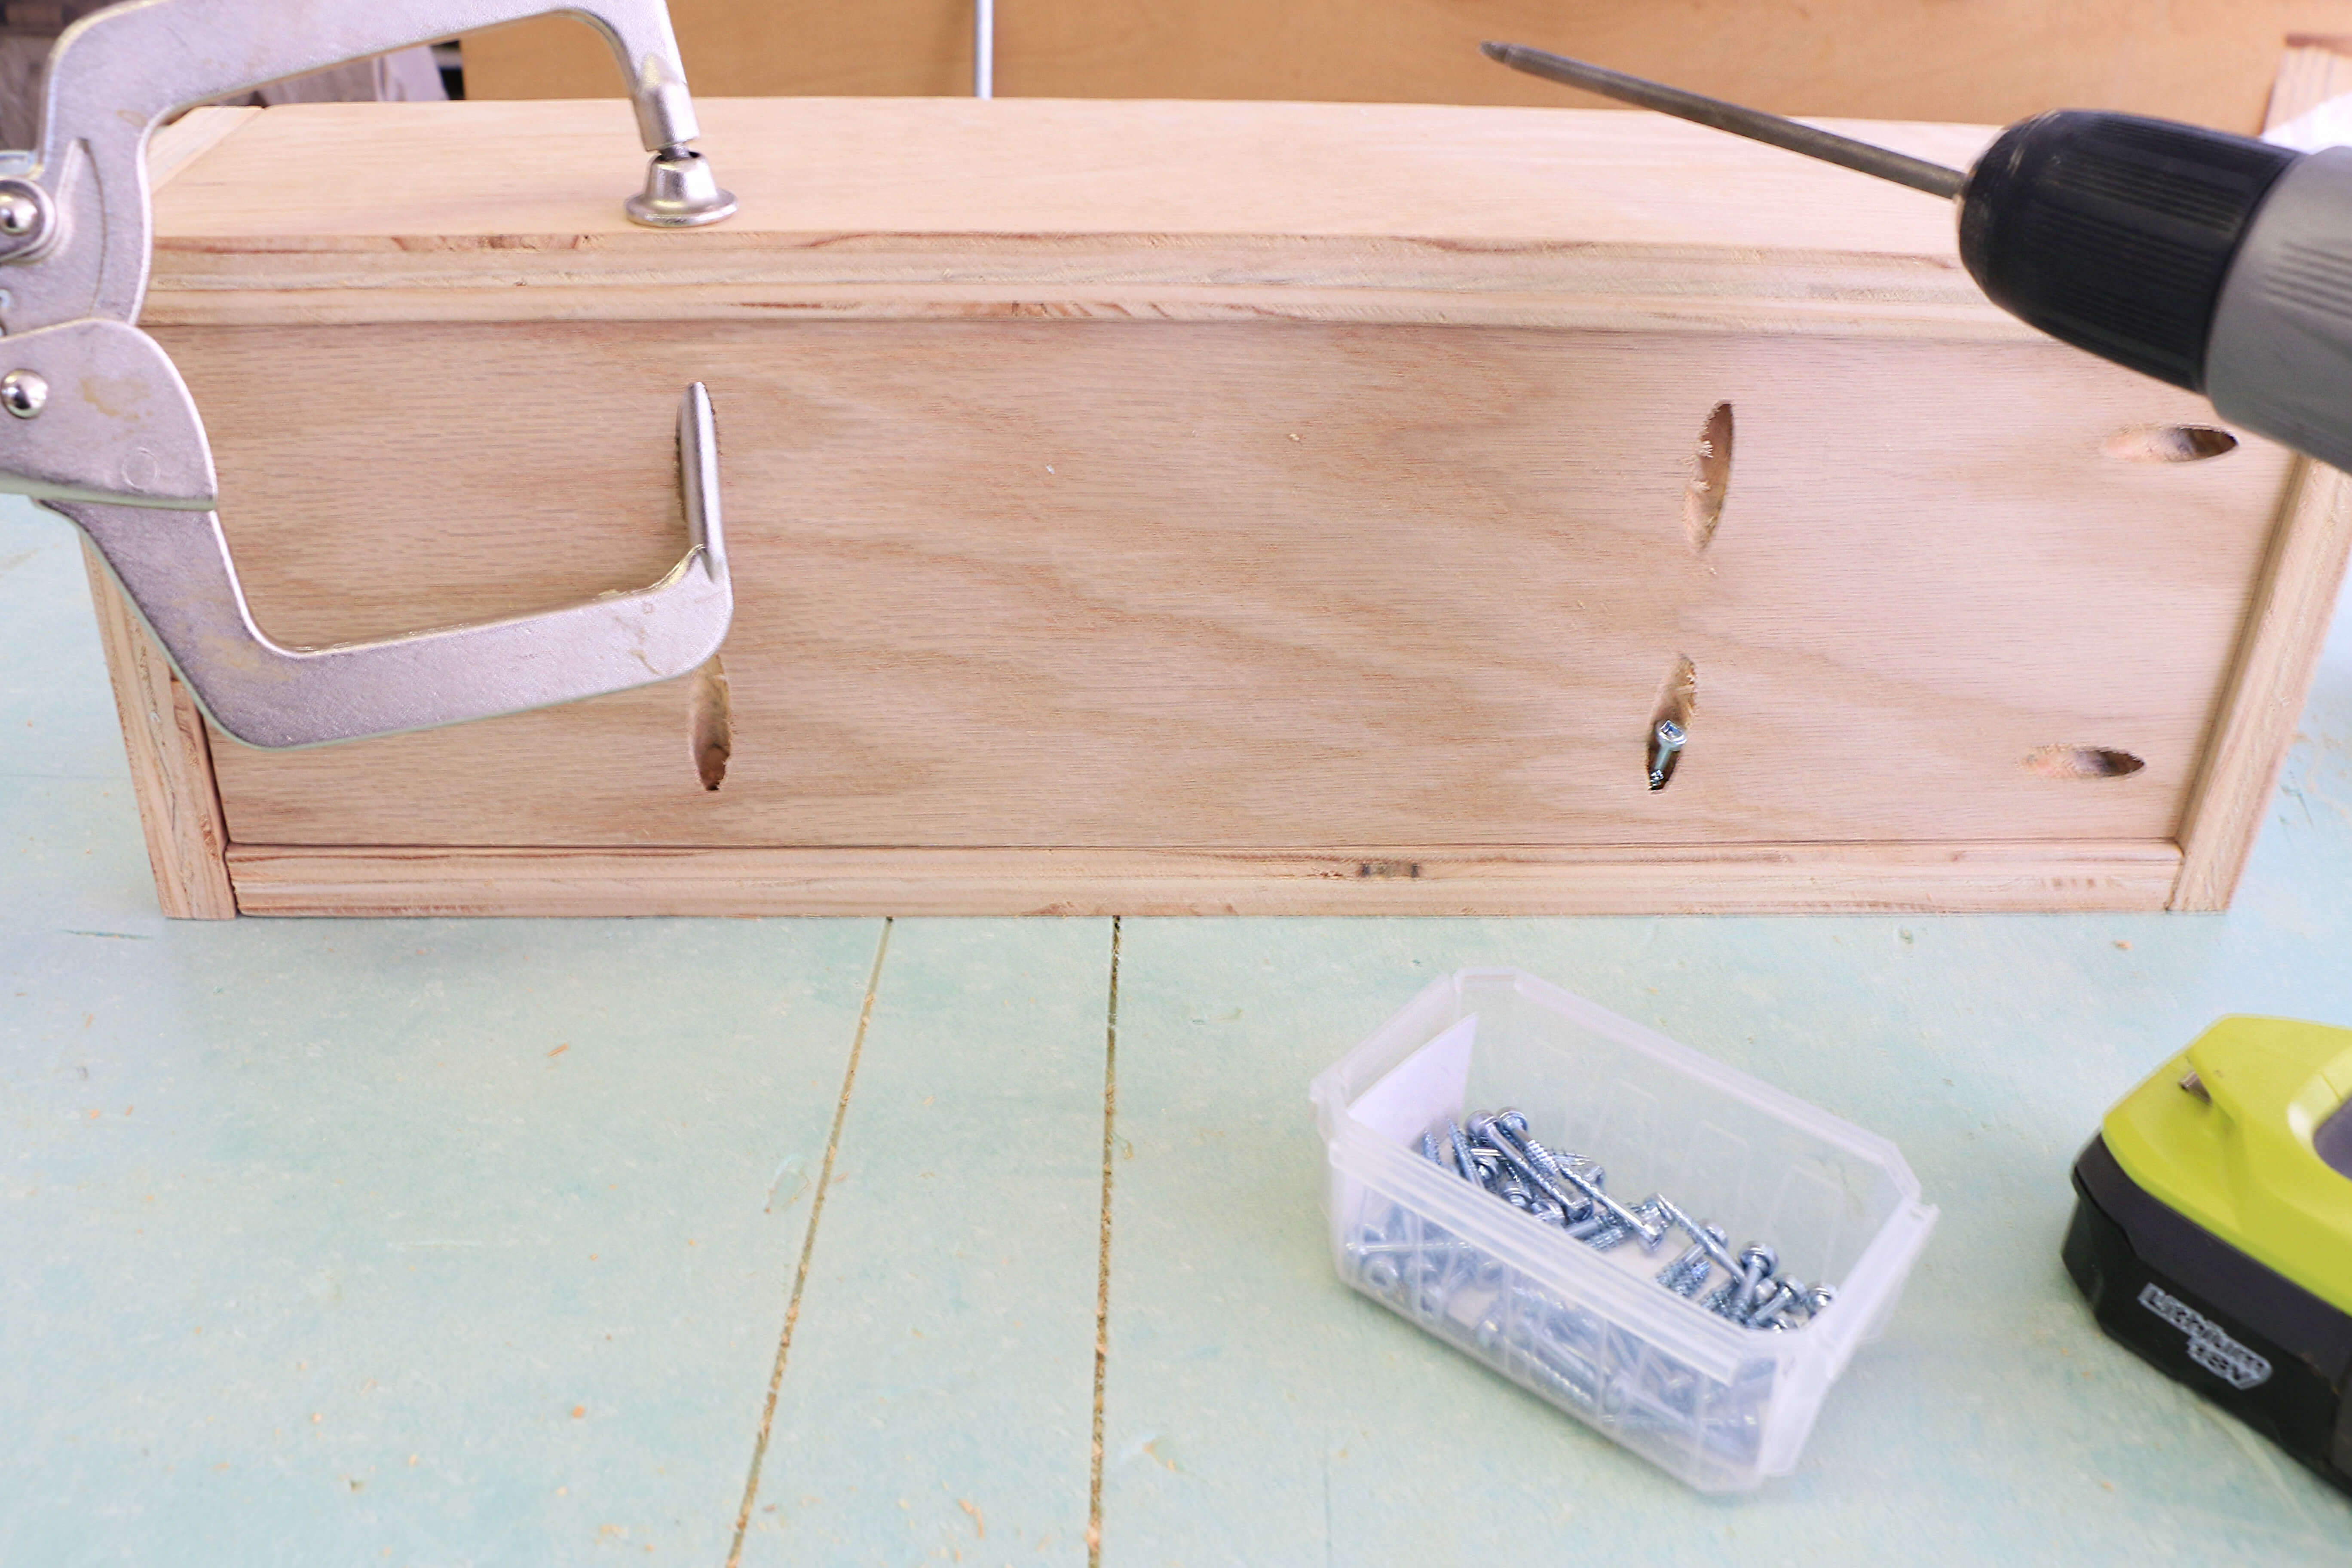
How To Build The Box Using Pocket Holes
When it came to the building of the box, I did change up the methodology a bit. The plans have you using nails, but my nailer seems to be on the fritz…not sure what is going on, but I will have to have it looked at.
So I opted to build the box using pocket hole joinery. It is my favorite way to build these days, and makes for an easy super sturdy assembly.

If you decide to make this at home using pocket hole joinery, here is what you’ll need to know.
This is where you will want to drill your pocket holes:
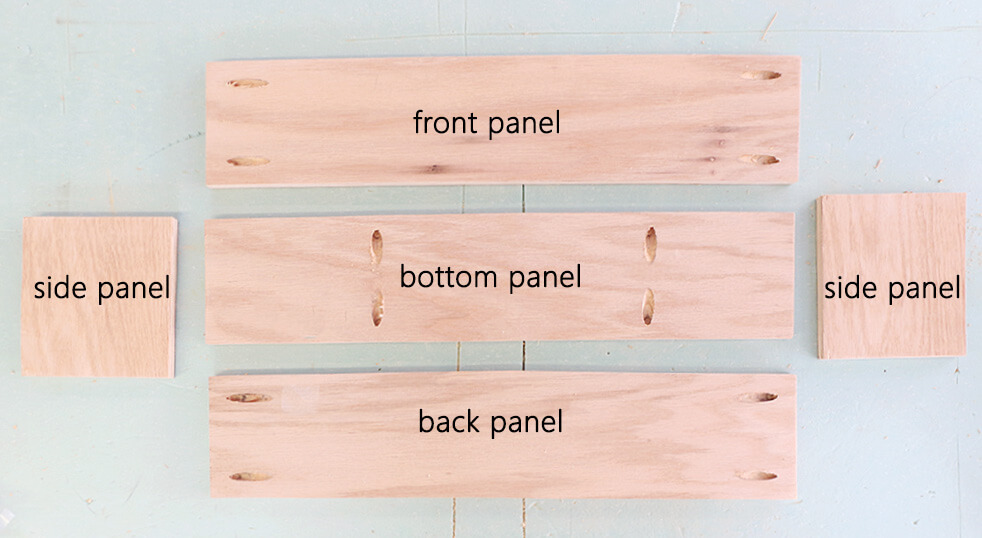
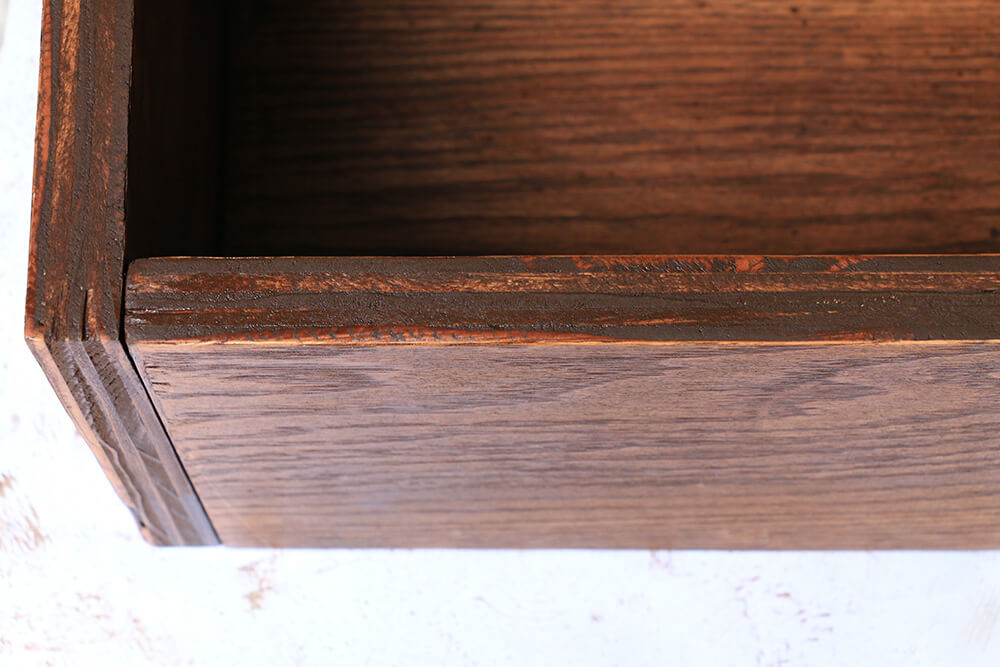
Then the bottom panel gets flipped so it is facing down, and the sides are assembled.

After the sides are attached, then flip the box on it’s side and attach the bottom panel from the underside.
Stain or paint per the normal instructions, and you are ready to customize your box however you like!
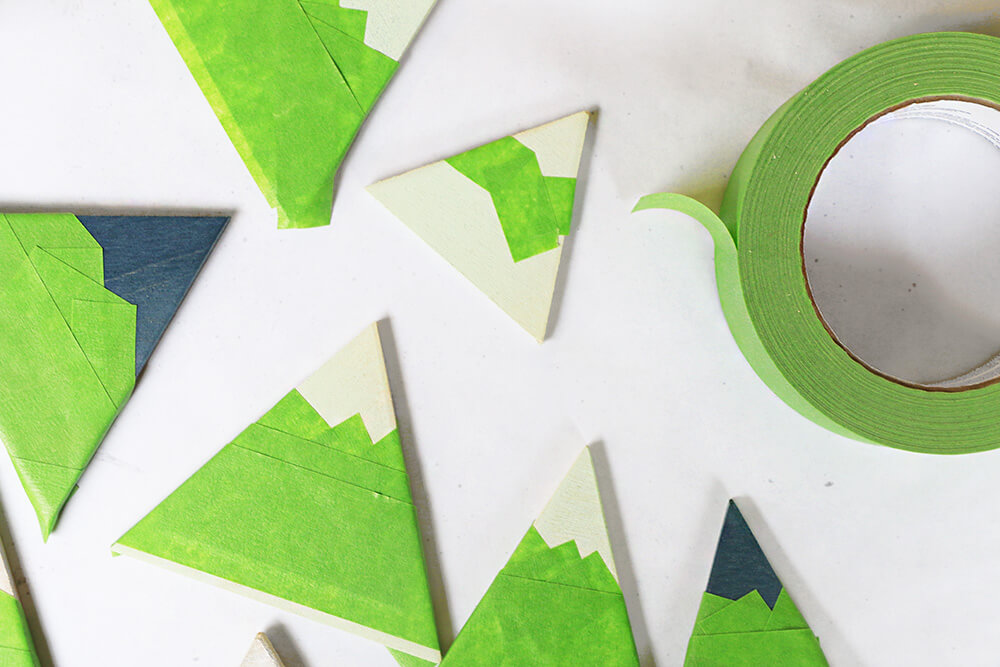
I am using a little piece of 1/4″x3″ craft wood to make little triangles for my mountains. I simply turned my miter saw to a 30 degree angle, cut the first piece, flipped the wood over and cut to create a triangle.
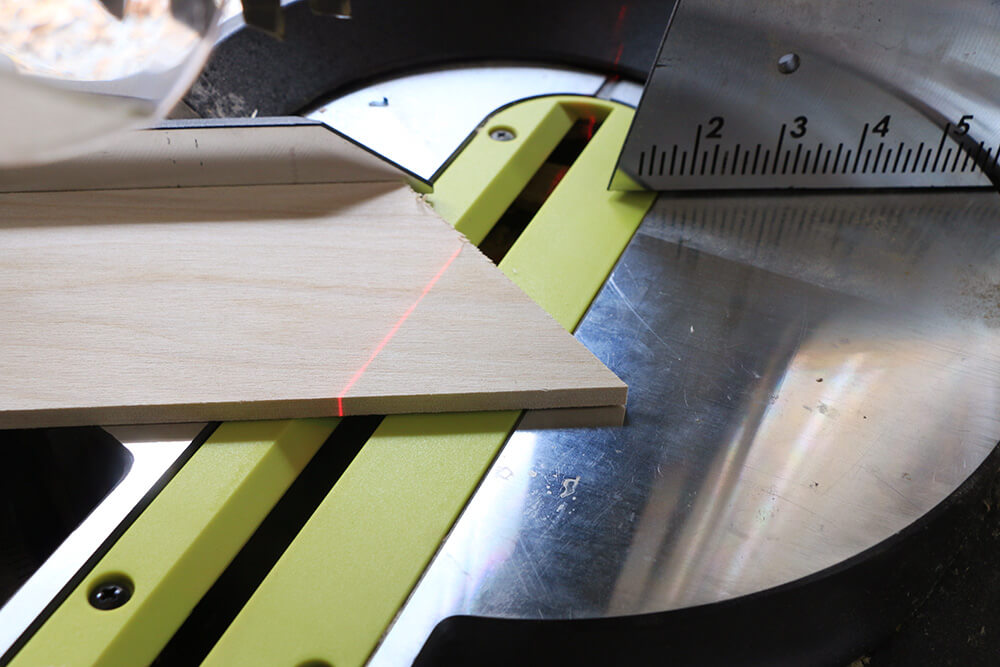
These triangles are all varying sizes, I just eyeballed it when cutting.
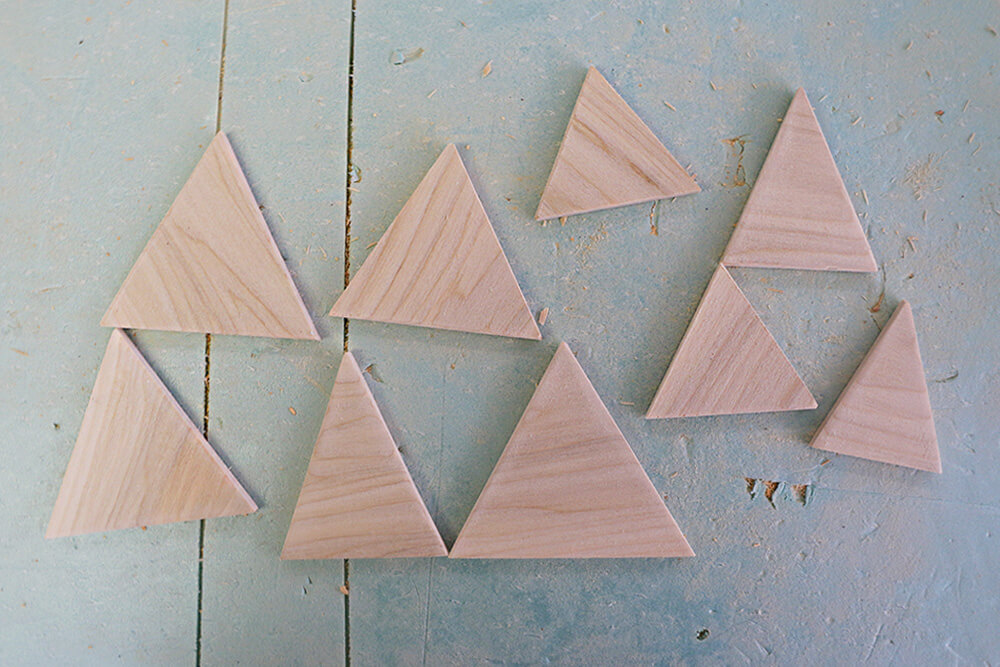
After sanding down any rough edges, I spray painted them in a white, blue, and a pale robins egg color. Then after that dried, I cut bits of painters tape to create the little mountain top ridges.
I love the gold peeks! But then again, I am a sucker for gold… Although, I bet any metallic color would be amazing on the mountains.

After adding my hooks, I glued on the mountains. Don’t be afraid to let them overhang the edges slightly, I think it adds to the charm of the box. I also layered a couple smaller mountains on top of the bigger ones. Make sure you use a good glue and do a thorough job; you don’t want them popping off when an enthusiastic little kiddo comes charging through to see whats in their stocking on Christmas morning.
Isn’t it just the cutest? I mean, it’s simple, not a huge change from the original plans (as I have been known to do in the past). But sometimes it is the simple little touches that makes something uniquely your own.
When you build yours, I’d love to know how your workshop went, and how your stocking hanger box turned out! Share pics with me on Facebook or Instagram, and tag me at Home Made by Carmona. Don’t forget to use #DIHWorkshop so The Home Depot can see how awesome you are too!
Check Out All 10 Bloggers Variations…
I’m not the only DIY blogger who enjoyed making this DIY Stocking Hanger Box. 9 of my incredibly talented blog friends also shared their unique take on this project. Pop over and check them out! We hope to inspire you with lots of ideas to make this project uniquely you.
House of Wood | That’s My Letter | All Things Thrifty | Lolly Jane | Refresh Restyle | Woodshop Diaries | Reality Daydream | Simply Designing | The Crafting Chicks
By the way, if you have previously attended any workshop at The Home Depot and would like to provide feedback, please feel free to use this form. Your experience and response helps The Home Depot make the improvements you want to see.
Happy Holidays!
*I acknowledge that The Home Depot is partnering with me to participate in this Workshops Program. As a part of the Program, I am receiving compensation in the form of products
and services, for the purpose of promoting The Home Depot. All expressed opinions and
experiences are my own words. My post complies with the Word Of Mouth Marketing
Association (WOMMA) Ethics Code and applicable Federal Trade Commission guidelines.
Like This? You’ll Love These!
DIY holiday light that doubles as a stocking hanger! | Tips for decorating for Christmas on a budget | Get inspired and craft a stunning holiday table with greenery & ornaments | Learn how to create Christmas bouquet with cranberries and flowers | Tips to style an elegant and sophisticated Christmas home | Place family pictures in fillable ornaments & preserve memories! |


I love how you added the little mountains…may have to give this project a try!
Thank you Janet! It was a ton of fun.
This is so creative and beautiful!! Love the colors, stain, and gold combo!
How fun! I love the mountains!
Haha, thanks cutie!
Carmona those mountains are the cutest little addition! Great choice of hardware too, love it all.
Thanks Jaime!