Forget basic benches, make a stylish modern bench using these free DIY outdoor bench plans. It will immediately elevate your outdoor spaces!
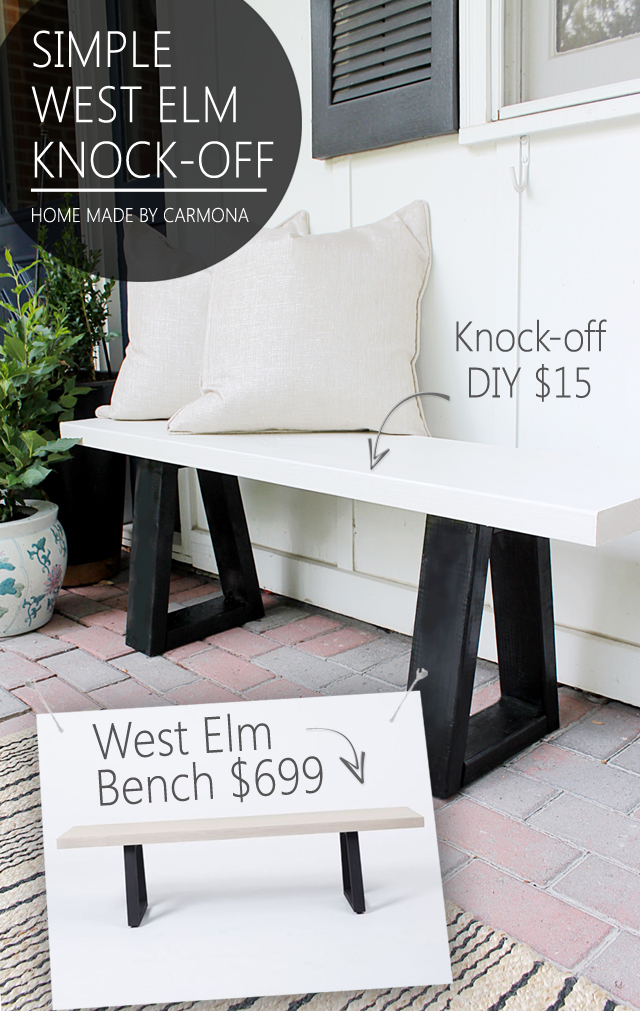
My idea of a good time is cruising through the West Elm catalog with a bag of snickerdoodles and pretending I could actually afford to buy everything in it. 😉 Like this $699 West Elm slab bench, I was pretty excited it went on sale, until I realized that on sale it costs $594…uh. okay then.
Well exciting news people. We CAN afford the stuff in the West Elm catalogs! Maybe not by always buying it outright, but this month myself and 4 other amazing bloggers are partnering up to show you how you can make your own knock-off version of that gorgeous item you wish you owned. Wishes, granted!
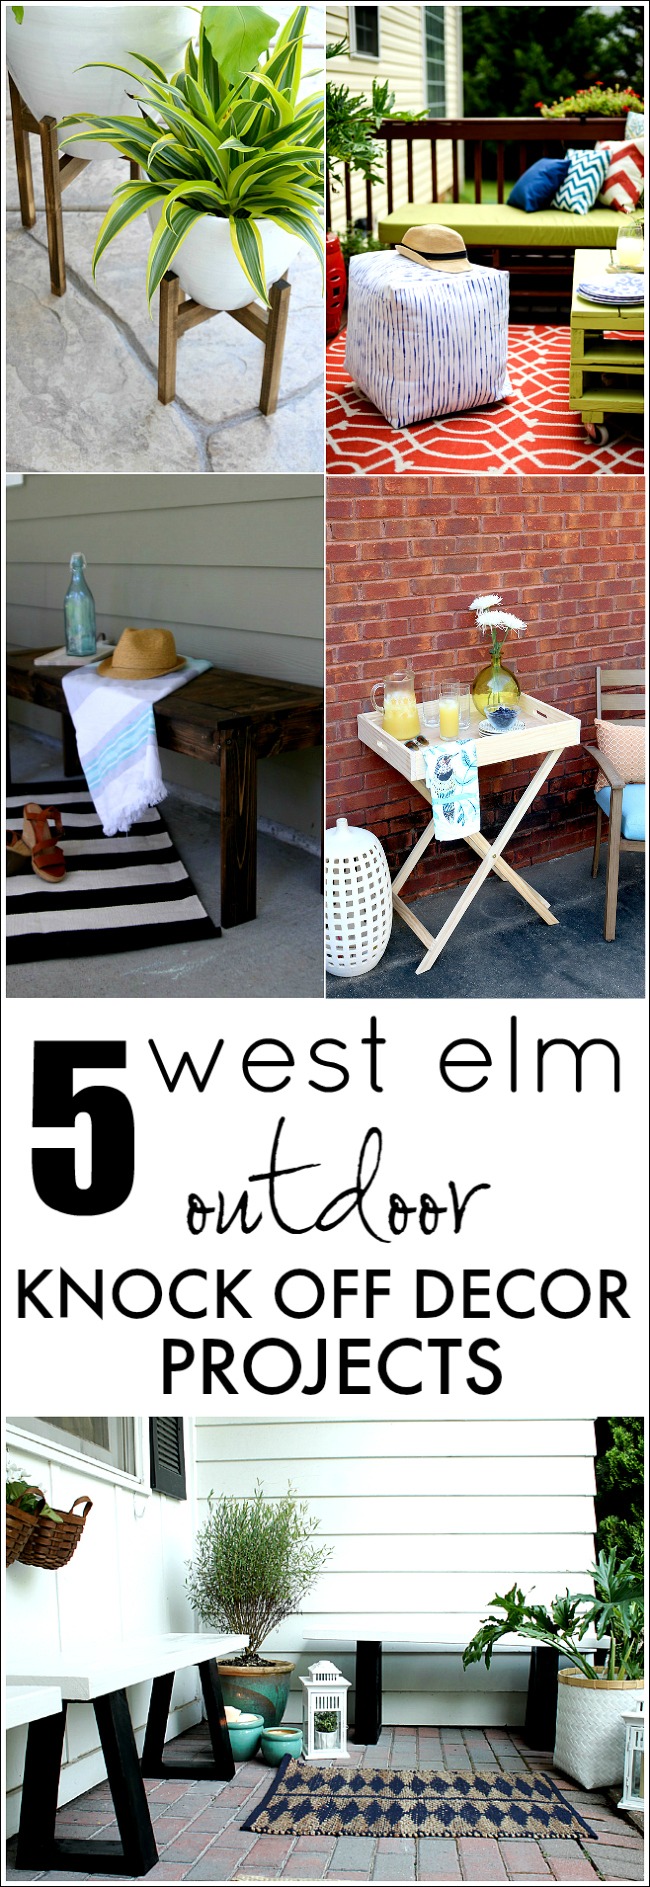
This month our theme is outdoor West Elm knock-offs, and we’ll have more for you next month!
- Corey, Tiny Sidekick – Wooden Plant Stands
- Aniko, Place Of My Taste – Striped Pouf
- Chelsea, Making Home Base – Wood Slat Bench
- Jen, The House of Wood – Butler Stand
- Ursula, Home Made By Carmona – Slab Bench
Myself and 4 other amazing bloggers are partnering up to show you how you can make your own knock-off version of that gorgeous item you wish you owned.

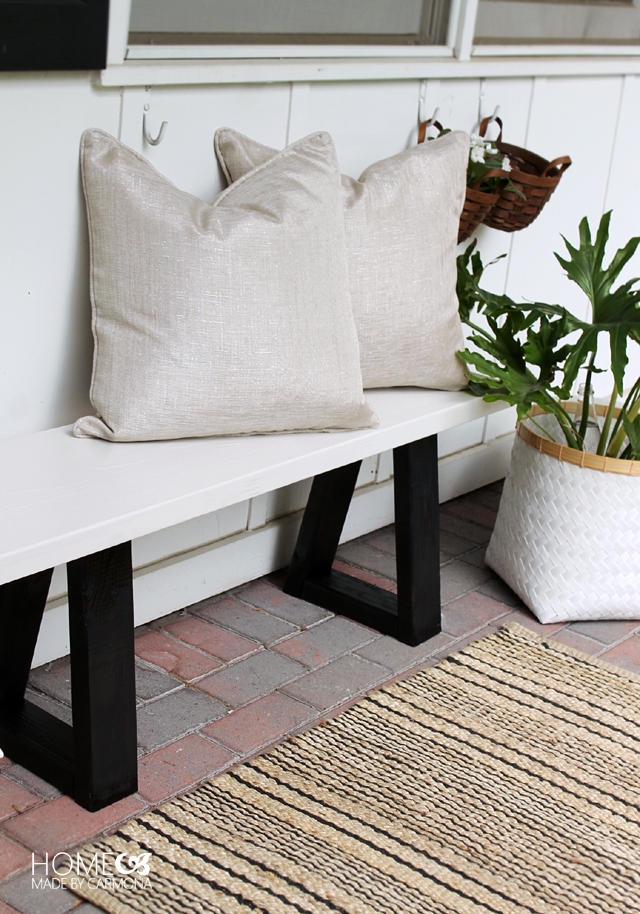
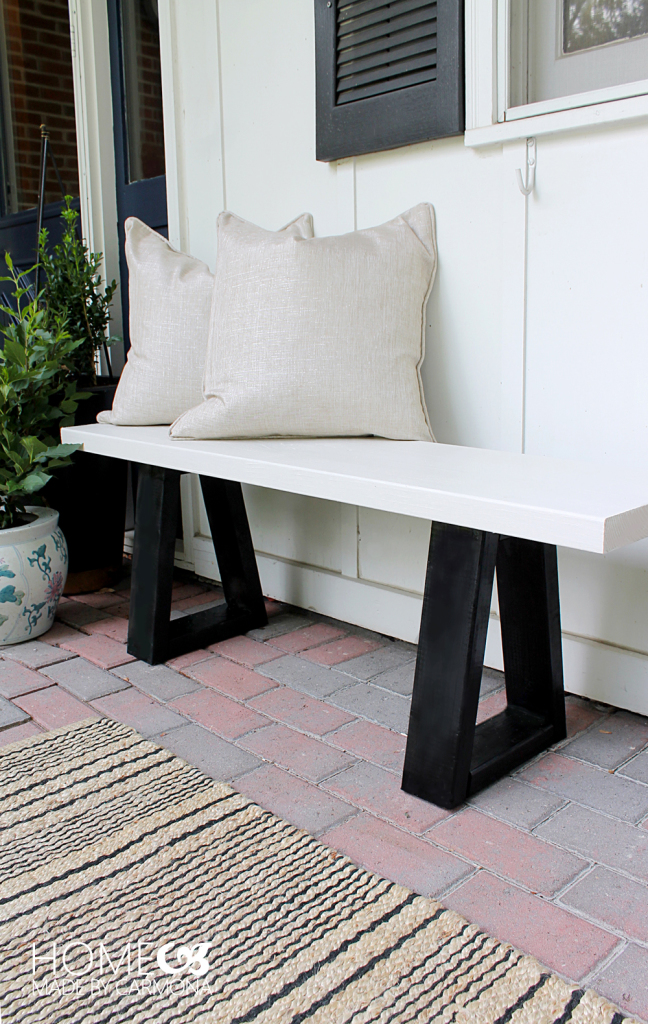
How To Make This West Elm Knock-off Bench
Today I’m showing you how to make this stylish modern West Elm bench for under $15 each! If you already have some of these materials (such as screws, paint, etc.), then it will cost even less per bench...the final total for all the materials (if you make 3 benches) will be about $45. Here’s what you’ll need:

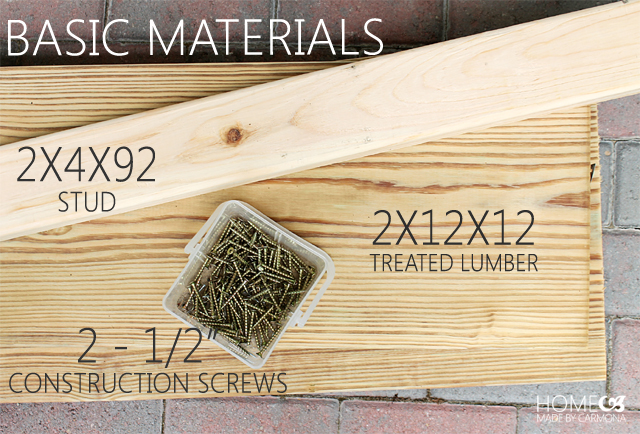
Supply List
- 2x4x92 studs (1 per bench)
- Treated lumber: 2x12x12 (to make 3 benches), OR 2x12x4 (to make 1 bench)
- 2 – 1/2″ construction screws
- Black spray paint (or paint of choice)
- Grey-white exterior paint or stain (or paint of choice)
- Ultra Polyurethane
- XL furniture foot tacks (optional)
Tool List
- Miter saw
- Drill
- Screw driver
- Measuring tape
- Paint brush
- Pocket hole jig (optional)
Make Cuts For Vertical Leg Pieces
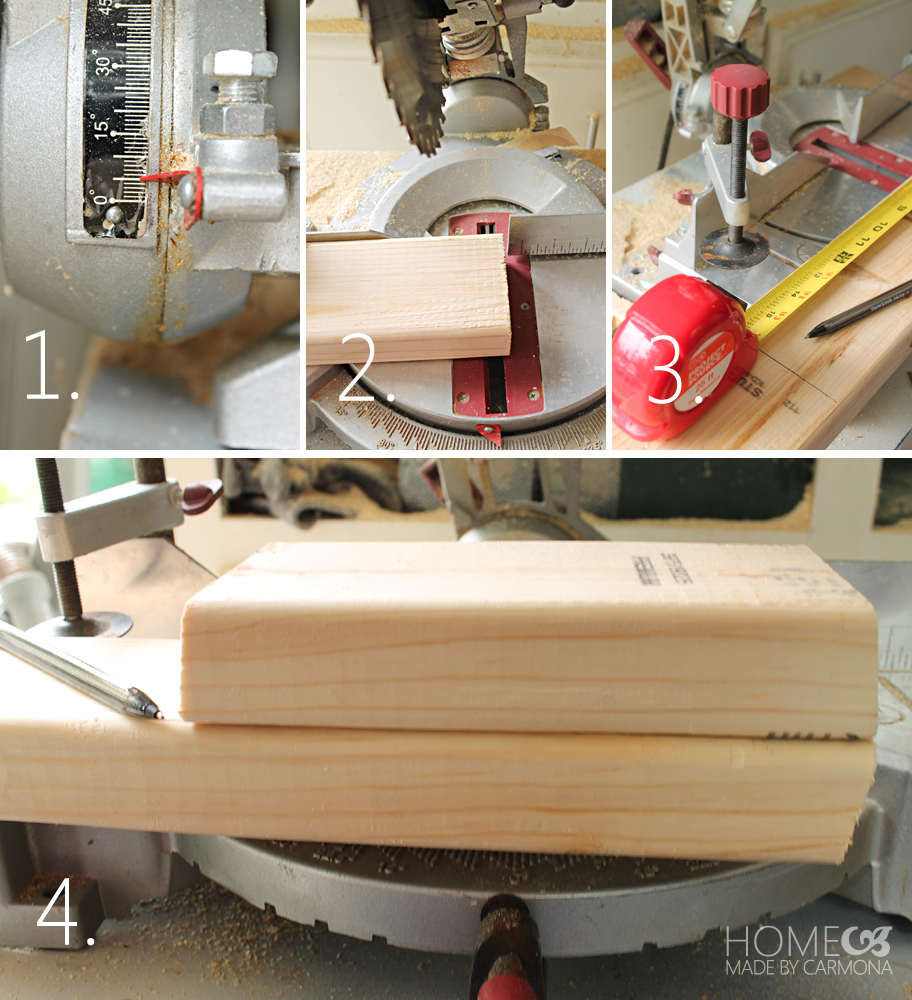
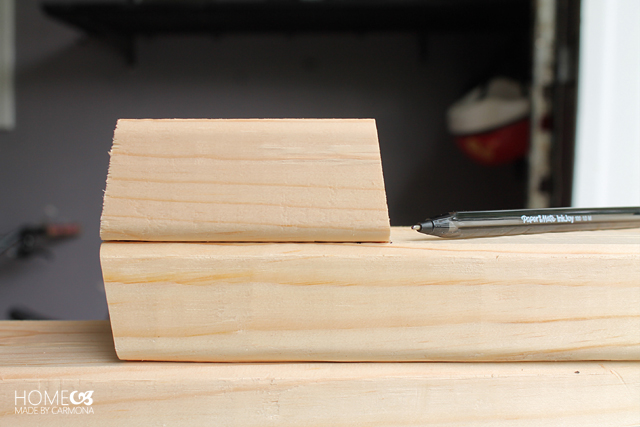
1.Set your miter saw to 10 degrees.
2. Make the first starting cut to your stud by cutting off the very end at 10 degrees
3. Measure and mark 15-3/4″ and cut, this is your first leg!
4. Just slide the wood stud down and use the first cut leg as a template. Mark and cut again. Do this 4 times for 4 vertical leg pieces (or 12 times if you are making 3 benches).
Cut Horizontal Leg Pieces & Bench Top
Next you will do the same for the horizontal leg pieces. The smaller horizontal piece measures 3-1/2″, the longer horizontal piece must measure 8-1/2″.
TIP: The trick to measuring and cutting subsequent horizontal leg pieces is to make a cut, flip the wood stud, line up both long ends of the template piece before marking and cutting.
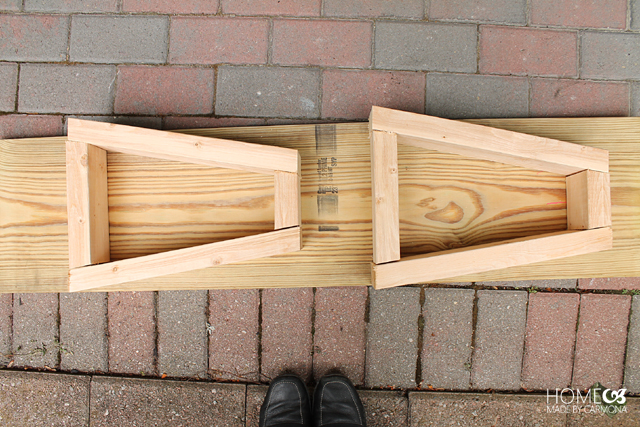
If you haven’t already had the hardware store cut your 2x12x12 treated lumber into three 4′ pieces, go ahead and cut them now. This is your bench top. Also take a moment to sand all the rough edges of your cut pieces. These are the pieces you’ll have per bench, and you should be able to line them up as A-frame legs:
Assemble Bench Legs
The most sturdy assembly is to drill pocket holes into the top and bottom horizontal leg pieces. This also hides the screws so there is no need to use wood filler.
Just drill two pocket holes in the top facing side of the small horizontal piece, and two in the bottom facing side of the bottom horizontal piece. If using pocket holes, use 1-3/4″ screws.

No Pocket Hole Jig? Do This Instead:
Drill two holes in the top and bottom of all the long vertical leg pieces.
TIP: Be sure that you drill so that the screws will go straight across into the connecting pieces (and not at an odd angle like my first ones did). Line up your A-frame legs and screw all the pieces together.
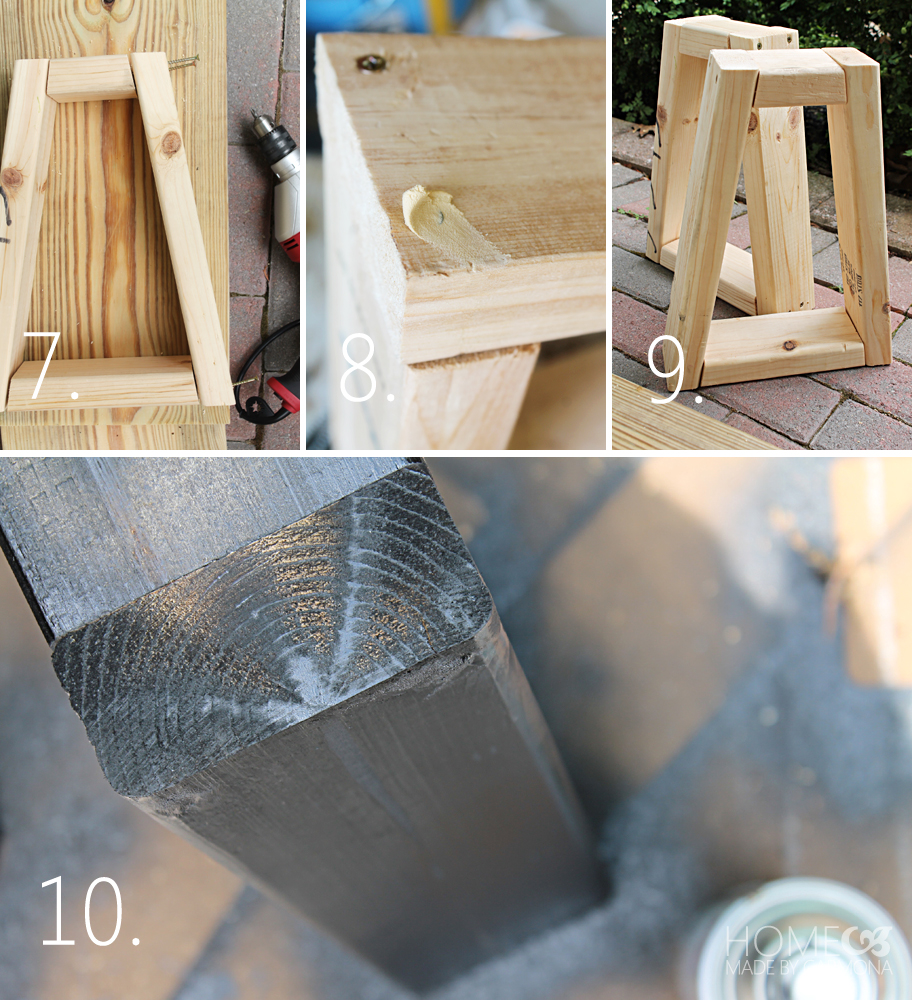
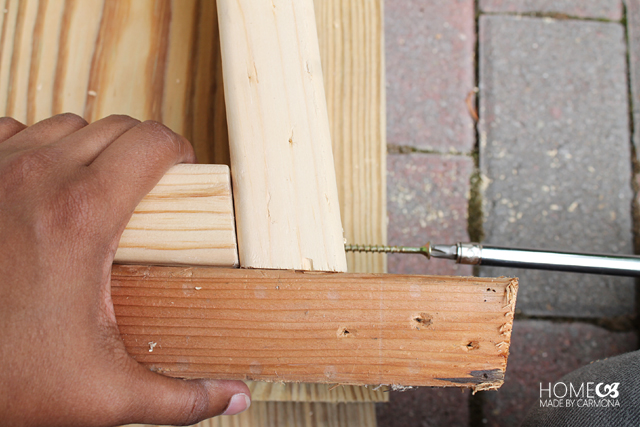
Screw it in until the connecting pieces of wood pull together (and close any large gaps) and the screw sinks deep into the soft wood. Then you can fill any other gaps and screw holes with wood filler.
TIP: To ensure everything is flush, screw the pieces in place with the A-frame lying on it’s side on a level surface. Then place a piece of wood at the top and bottom while screwing in. This helps you know it is flush even when it doesn’t look like everything is perfectly lining up. Imperfections are ok as long as it is flush at the top and bottom.
Faux Concrete Bench Top
This simple wood bench can still have a concrete benchtop look. Sift a fine cement, mix with water, and spread it thinly on the bench top (just enough for texture). Let it dry completely, then paint and seal.
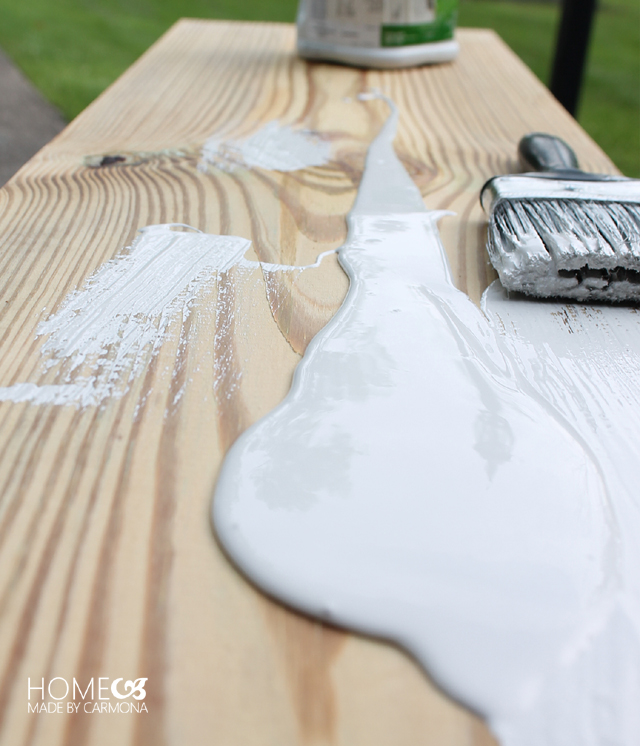
TIP: Want that concrete look without the concrete? Pour a large glob of paint on the bench and allow it to dry slightly to thicken (about 30 mins), then “spread” the paint on. It will take longer to dry than the 6 hours, and you should seal it well, but it is worth it!
Stain or spray paint the bench legs. Let everything dry completely before sealing with a polyurethane.
Finally attach the legs to the bench top by drilling four holes and screwing into place.
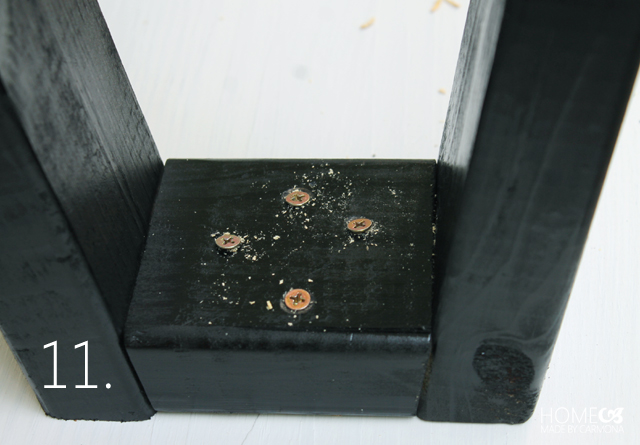
IMPORTANT NOTE: Don’t set the legs too close to each other or too far from the edge. When someone sits on the edge, you don’t want it to tip… the closer to the edge, the more sturdy.
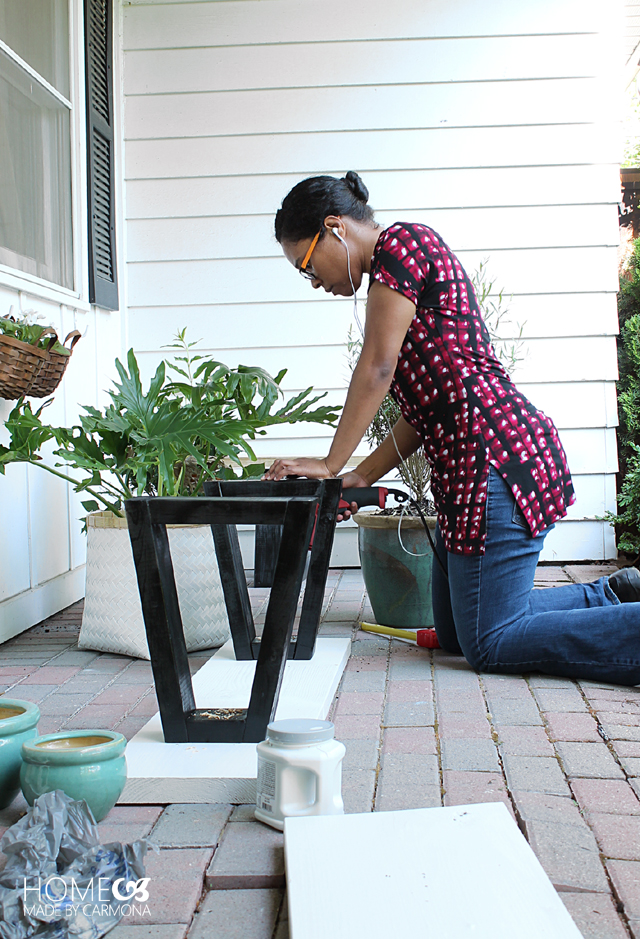
(Optional) finish with a last coat of sealant, and if you plan to use these in the outdoors exposed to the elements, I recommend nailing furniture tacks to the bottom of your benches legs. This allows some “breathing” room underneath, and moisture won’t collect and damage the wood legs. This is especially important if your finished bench will be used on a deck or porch as outdoor seating.
Enjoy Your West Elm Bench Dupe!
I hope you enjoy how amazing your new West Elm bench knock-offs look!
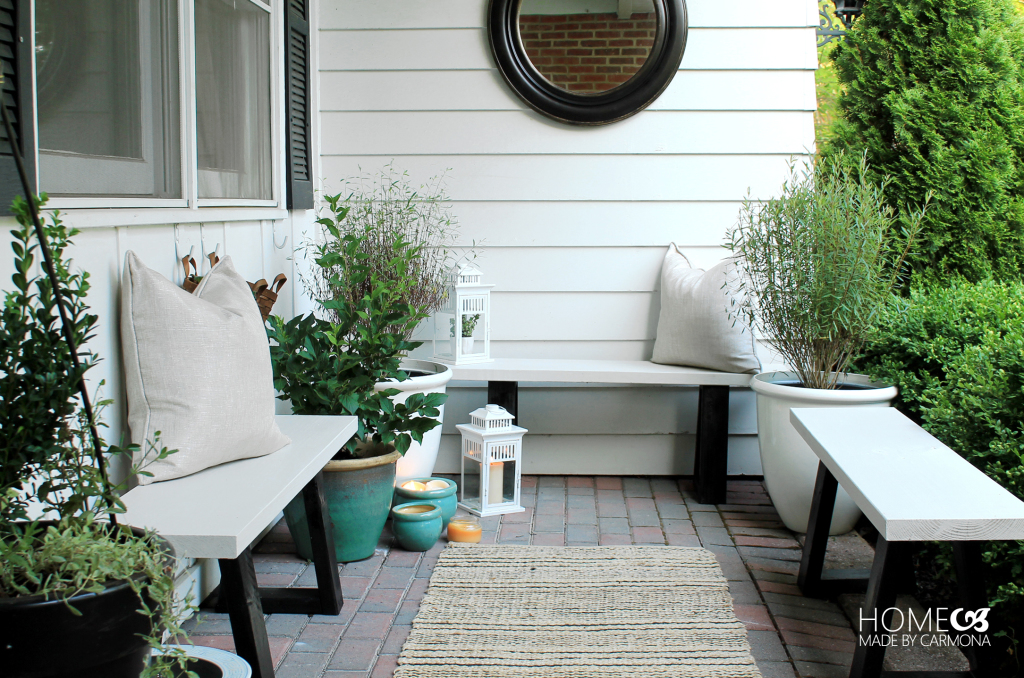
It was time to give my whole patio a nice do over, so I started sprucing it up just a tiny bit after admiring my new benches. It looked like this early in the day.
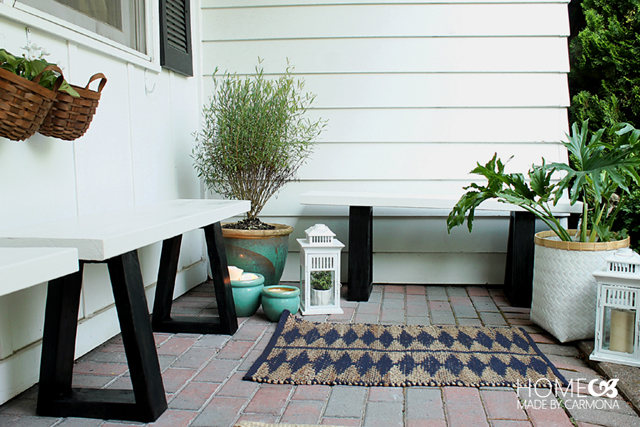
Then once I got started, it really took off and by evening I was LOVING my newly made-over space! Want to see how I gave my entire patio a whole new look in a day? It was a quick, inexpensive front porch makeover, and I’ve got some great tips for you via video! See more here.
Alternatively, use this detailed build plan not only to make a beautiful bench, but customize it to make a coffee table, console table, or
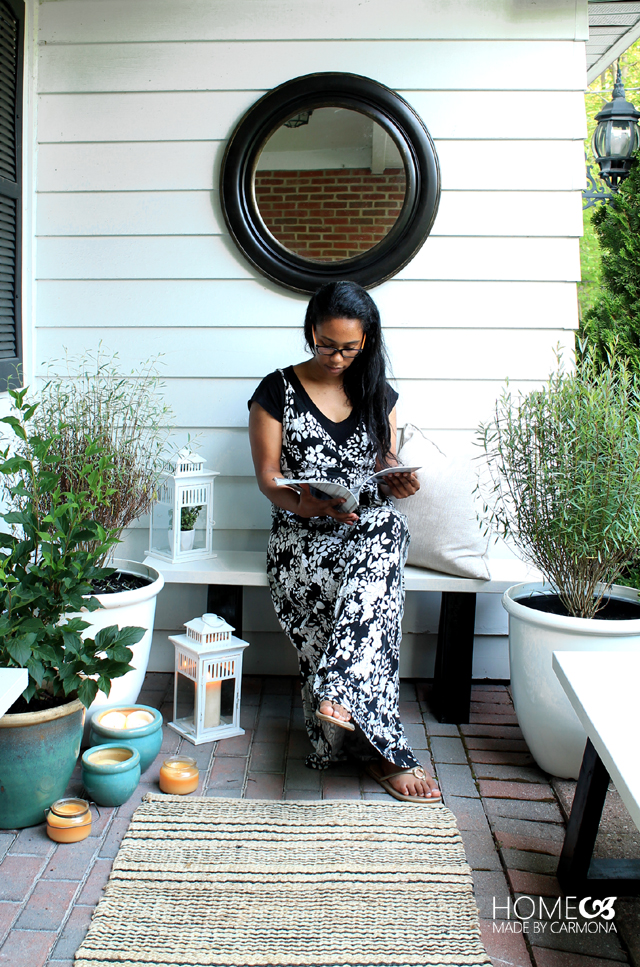
Now go check out the amazing projects below by these talented ladies. They are each showing you how to accomplish West Elm outdoor knock-offs. I’m feeling like it is going to be a West Elm kind of summer!
TINY SIDEKICK – WEST ELM INSPIRED WOODEN PLANT STAND
PLACE OF MY TASTE –WEST ELM INSPIRED STRIPED POUF
MAKING HOME BASE – DIY WOOD SLAT BENCH
HOUSE OF WOOD – DIY BUTLER STAND
HOME MADE BY CARMONA – DIY WEST ELM BENCH KNOCK OFF






Hello, I’m trying to make a console table that is exactly like this but 36 inches high…would the geometry work if I just use the 3.5 inch piece at the top but make it as wide as the bench top and adjust the bottom? Thanks.
Yes, it should work with an adjustment to the horizontal piece at the bottom of the leg (add/measure for that piece last). Since this will be taller and larger, if you can you should use pocket hole joinery instead of basic joinery (screwing through one piece of wood into the other). Good luck!
Thanks a lot for sharing, I discovered a 4 foot rectangular cool mosaic tabletop I couldn’t pass up and now my deck has a fab new desk and 4 certainly cool benches for the family to experience this summer..
Thanks for sharing this article to us…
I love this bench. Can you tell me what the height of it from the floor to top of bench seat is? Thanks a lot.
Hi Sharon, sure thing! It is 17 inches from the floor to the top of the bench.
Could I have the hardware store cut all of the wood for me? If so, would you please tell me exactly what I would need them to be. I really like this and would love to make several to place around my apartment deck. I just love it.
Hi! Just bought all the supplies for this but wondering if it would work with Kreg pocket screws?
Absolutely! That’s how I would do it now…
Thank you so much for the inspiration and awesome, empowering instructions! Just finished making three of these benches for all around my dining room table, and they are so perfect and sturdy. (And so sleek!) Thanks again.
What a fabulous diy that no one would guess cost $15! And you did such a good job with your directions, photos, etc. this might be my official first wood working project. I love it so much! Thanks.
Wow! This is really nice, Thanks for sharing.
Amazing work!
Did you use a gloss or satin sealant?
Thanks for the idea! This solution is simple and most importantly inexpensive 🙂 Tips are very helpful and gave me confidence to experiment 😉
It is so amazing DIY project. I love this bench and I can do it at home alone. But are these benches wobbly at?
No, they are not wobbly AT ALL! 🙂
I have tried to make this bench twice (having trouble with the legs). I am confused, very new to working with wood and miter saw. My question is are the cuts angle (miter) cuts are bevel cuts. The photos look like bevel cuts; however the directions say angles. Is there a video of this tutorial… Thank you…
how much polyurethane is required per bench
Not much…Just one or two coats.
Love love love this design! I am currently attempting to make this and somehow the three inches for the top piece is way too short. The sides and bottom fit perfectly what am I doing wrong
Hm, without seeing it in person I can’t be sure what is wrong… but to fix the problem, I suggest you go ahead and measure the open space where the piece doesn’t fit, and cut a piece accordingly. 😉 I hope that works for you!
Yes, 3 1/2 was short. had to make it 5 to fit.
Hi, weird question but where did you get the white braided looking plant holder? What are those called? I’m trying to find some as well but don’t know how to search for them.
They are actually woven polypropylene baskets. Since it us plastic I thought it made the perfect planter! 🙂 I purchased them from Home Goods.
Thanks so much for sharing, I found a 4 foot square cool mosaic tabletop I couldn’t pass up and now my deck has a cool new table and four really cool benches for the family to enjoy this summer
I have a very shallow porcheck and need a bench to be only about 9″ deep. How do I need to adjust the measurements for the legs?
Are these benches wobbly at ? Really want to make them
Not wobbly at all! Extremely sturdy. 🙂
I love these so much! Pinning and making these for my dining room table!
This came out amazing, make me feal I can do it. Thanks for the tutorial.
I am looking to make benches for my dining room table, and I love the look/possibilities with this bench. I don’t see in the tutorial or the comments if you mention the height of the final product. Is it tall enough for you to be able to sit at a regular table? My table is in the 29-30″ height range.
Hi Ursula,
I love this tutorial!!! I just thoroughly stalked your website for the last hour or so and love every one of your tutorials. Super creative, yet realistic! Some DIYs seem so unapproachable but yours are a good level of challenge and achievability 😸
If you have time, please stop by my site and look through my tutorials! Nothing as cool as yours but I’m still pretty proud of how far I’ve come after longingly looking through great blogs like yours! I’d appreciate any and all tips that you’d be willing to give me 🙂 thanks so much for the inspiration!!
http://www.theintermittentpinterester.com/?p=793
-Aya
Thanks so much for stopping by Aya! I’m so glad you are enjoying! 🙂
You SHOULD be proud! It takes a big step to start blogging, and I can say it is totally worth every moment! 🙂 My tip, do what you love, and don’t give up! <3
Could you tell me what the actual finished height of the West Elm bench is? I want to use it with my dining table, but don’t want it to be low.
Hi i am the maintenance man at our church. on of our people came to me with this.it looks great, and easy to make. one question,on the vertical pieces ,are the measurements from the long side of the angle cut or short? thank you
I have this same question! Were you able to figure it out?
Woops, sorry I’m just seeing this. Here is how you’ll know your cuts are correct: The top piece’s long edge is 3-3/4″, the short edge measures 3-1/2″. The bottom piece’s long measures 8-1/2″, the short edge measures 8″. Hope that helps!
This bench looks amazing! I found your tutorial and loved it so much that I made my own version of this bench! It was published on my blog today – thanks for the inspiration!! 🙂
Thank you! I’m so glad you loved it, and made your own version! You did an amazing job!! <3
You might want to fix your dimensions in the directions as you go back and forth between inches and feet with no indication of which is which. A double quote is the usual mark to denote inches, i.e. 2″ x 4″ x 96″. A single quote means a foot, i.e. 2″ x 4″ x 8′. By 2 x 12 x 12, I am sure you mean 2″ x 12″ x 12′, or 2″ x 12″ x 144″, but you’re going to mess with someone’s head like this.
Haha! Yes, I usually indicate feet versus inches…however I learned that when you look up the exact wood with dimensions online or in store, for some reason it will not search properly unless you input the dimensions exactly like this. I started using the hardware store’s method of documenting dimensions so readers would be able to easily find the material… however if it is easier for those non-carpenters I will definitely change it. 😉
I am so proud of you – look at the hundreds of dollars you saved by building them yourself! I cannot imagine anyone paying the WE price for them. Yours are gorgeous – I actually like yours better – it looks a little more sturdy and the legs on yours look a little wider. Great job! You could sell them for triple what you put in it and make some money!
Love this! I have a Ryobi circular saw and jigsaw. Do you think I can use either one of those to make the angle cuts? Or do you think a miter saw is worth adding to my collection?
Hi! I have used a jig saw to make an angle cut before…but it is really tough to do (and to get it accurate). If you have to choose, I’d say your circular saw is probably the better choice between the two. I would Google how to use a circuar saw to make angled cuts, and look for a YouTube video that shows how. 😉
I really love my miter saw (got it from a yard sale for less than $40), so it was well worth it! If you plan to do more projects that require one, then it is a great investment.
I will have to keep an eye out for a miter saw on Craigslist/Garage Sales. You scored yours for $40 bucks? That is AWESOME! I checked some out @ Home Depot and the cheapest was $89. I decided to get a mitre box ($12!) until I can find a great priced miter saw. I will definitely check out some YouTube videos for tips. Thanks for all the helpful info! You ROCK!
Sooo.. I purchased a Miter Box.. Um…Noo thanks! I attempted to do an angle cut and threw in the towel after about 5 mins. Too much work for me. I checked Craigslist and found a RYOBI for $40! It wasn’t in the best shape but it works! Excited to give it a try this weekend!
LOL! Yay, RYOBI is a great brand…good for you!
What type of polyurethane…semi gloss or gloss?
Also, all the polyurethane’s I’m looking at say not to put it on painted wood. Is this true?
Semi gloss or gloss is just your preference choice…choose whichever you prefer!
You can polyurethane over paint as long as it is a clean surface, and it has had time to cure (don’t apply until the paint has dried for couple days).
Thank you so much for the easy-to-follow instructions! I just built a couple of these benches (and a matching table). I LOVE them!
How wonderful! I’d love to see them… if you share a pic to Instagram or Facebook, I’d love it if you tagged me and add #HMCmaker so we can all enjoy your clearly incredible skills (a table too!! High five!).
Did you ever get a photo of the table that Anika made to match these benches. If so, could you post it online or email the info directly at chekela@msn.com. Thank you,
Bev
not sure about your costs. I live near Cleveland Ohio and the wood and screws cost me $20.
If you do a lot of DIY projects, a case of screws is probably a good idea. I occasionally purchase the small baggy (between $3-$5) with sufficient screws to accomplish a single project (Walmart frequently, and Home Depot for specialty screws). That way I know the actual cost readers will spend on a single project.
Definitely shop around various hardware stores for your material. I often find the same material at a Lowes or Home Depot in completely different prices…I especially say to be careful when buying your lumber, the prices can have a drastic range. Some wood types are priced per linear foot, others priced each piece…non-DIY’ers often gravitate toward the “pretty” finished product, but that will keep your prices high, search through the builder grade lumber types, especially used for framing, they are often lower in price. Just thought I’d pass that tip on while you are purchasing materials.
Thanks for mentioning it! I realize I should do an article about how to shop for frugal DIY’ing! 😉 Glad to have a fellow Ohioan reading along!
I love the tutorial! My husband bought all the stuff to make this but it really cost more like $50… 🙁
Glad you like the tutorial! So sorry to hear it cost you so much…I purchased my items at Lowes and Home Depot, some materials cost less at one store than at the other, but still it cost me well under $15 per bench. Could it be the type of screws and the pressure treated lumber slab? Those can become pricey if you don’t look for the less “fancy” version. The more refined wood types will cost more, the ones used for basic building that are more rough will cost considerably less.
Good luck on your build! I hope you love them as much as I love mine… do share via Facebook or Instagram with #HMCmaker! I’d love to see!!
My husband is a big guy and so I’m just wondering how much weight it can hold. Thanks
I can’t give you an exact #, but my hubby is lovably “fluffy” (as he likes to refer to himself), so it can hold quite a bit! 😉 I think the best thing to do is select the best quality studs, and of course the lumber used for the top is solid…no one is breaking that beast!
Love it love it love, I want made it, Thank you Lady!!!
amazing work Ursula!
My name is Vaki And I am from Greece
Maybe my question is fanny
But I can not understand the measurements
could you explain to me for example 2x4x92 ?
you mean the width height or I don’t no what….
Ian sorry for my English many kisses
Thank you Vaki! No problem! It is common woodworker dimensions (which can definitely be confusing!). It is a common stud, and it is 2 inches (thickness), by 4 inches (width), by 92 inches (length). The even more odd part is that when you purchase them from the hardware store, it is never the exact measurements written on the sticker…so don’t worry if it is a little off. 🙂
I love the simplicity of these benches and your porch looks beautiful! Thank you for supplying instructions on how to make the benches! I have some questions since I’m smack dab in the middle of making one of these. If your shortest piece is 3.5 inches, then that would make the next to shortest piece at 8.5 inches too long. Would you mind measuring that piece again for me so I know which length to cut it? Also how far in did you put each leg base from the end of the seat? Thanks so much!
Thank you, my pleasure! It seems long, but the legs make an A-frame that spreads wide enough to support a hefty bench top. The spread should be as wide as the bench top itself (slightly wider).
Here is how you’ll know your cuts are correct: The top piece’s long edge is 3-3/4″, the short edge measures 3-1/2″. The bottom piece’s long measures 8-1/2″, the short edge measures 8″.
I placed my legs 8 inches in (from the seat edge), but really I’d recommend 5 or 6 inches.
Good luck! If you take pictures, do share, we’d love to share and all admire your handiwork!
Hi! Great job on this, I am looking forward to building it this weekend. Two questions:
1. What are the long and short measurements of the vertical leg pieces?
and
2. Are all the angles you’ve cut 10 degrees? It says in step 1 to set your miter saw to 10 degrees, but in step 2 to make your first cut at 5 degrees. I am confused.
Thank you in advance for your advice and for the amazing plans! This will make a great housewarming gift for my brother and his wife!!
Woops! Thanks for catching that Brooke…step 2 should say 10 degrees. They are all cut at 10 degree angles.
The vertical leg pieces do not have a long and short side…both sides measure the same since the angles are parallel, which is why the instructions say to simply slide it forward on the saw and then make your cut 15-3/4″ down. The horizontal leg pieces have the angles slanting toward each other in a triangular fashion, which is why they have a long and short side. 😉
Good luck with your build! If you post pictures on Facebook or Instagram be sure to tag my blog and add #HMCmaker so we can see your awesome work!
These benches look great! Do you think this would work with longer legs, thus sitting at counter height?
The secret with this bench is the triangle shape of the legs. You could raise this way up to make a counter height or even a bar height bench, but the geometry of the legs would be way off and you bench would become unstable.
These are great!! And what a savings! I love your style. Thanks for the tutorial 🙂
Fantastic faux concrete tips. loving how they turned outď
Thanks Corinna!
OH MY GOODNESS! I can not believe that you made that for only $15!! High five my Friend!! What an amazing Knock Off!! Thank you for being part of this fun series!! Xo
Thanks so much for having me! I had a great time, and my porch needed it desperately, so it thanks you too! 😀
I can’t believe how much seating (and style) you added for so little money! These benches are amazing and your entire outdoor space looks so inviting! Excited to be joining forces with you once again Ursula!
Wow! What an awesome knockoff – looks great, Ursula! You made wood look like concrete. Amazing.
Thanks Jen! I actually made one with a thin layer of concrete, but it turns out a simple painting technique has the same exact look for half the energy! 😀
We have similar ideas of a good time 😉 Love your version of the slab bench! I also love how you did a few of them – they look great in your outdoor space!
Thank you Chelsea! Finally the motivation I needed to start my outdoor space! lol!