I love gardening—but let’s be honest, buying seeds can get expensive fast.
That’s why I make a point of saving seeds from my own plants each year. It’s a great way to stretch your gardening budget. But between collecting seeds and indulging in the occasional seed-buying spree (I know you know what I mean!), I’ve ended up with quite the collection.
If you’re anything like me, you have a lot of seeds and need a good amount of space for your seed storage, as well as a reliable way to organize your seeds. Because if you don’t know what you have, it’s easy to miss the right planting window, buy duplicates, or let good seeds go to waste.

So if you want to step up your seed storage game, stay tuned. In this post, I’m going to share the seed organizer that’s completely changed how I store and keep track of my seeds—so you can get the most out of yours too.
But before I share what I believe is the best way to organize seeds, let’s quickly go over a few simple principles of proper seed storage.
The Fundamentals of Seed Storage
There’s no point treating yourself to a garden seed organizer if you don’t have the fundamentals of seed storage nailed down. So, whether you’re saving your own seeds from your garden or simply looking after your store-bought packets, make sure you follow these basic principles for storing seeds:
1. Keep Seeds Dry
The most important rule you need to be aware of is this: seeds must be completely dry before they go into storage. If they’re even a little bit damp, they can develop mold, rot, or lose their ability to germinate.
If you’re saving seeds from your own plants, make sure you let them dry thoroughly before putting them away for next year. Spread them out in a dry, shaded place and stir them occasionally, so they dry evenly.
This step might take several days depending on the types of seeds you have.
2. Store Seeds in a Cool, Dry Place
Once your seeds are dry, keep them that way by storing them in a cool, dry location out of direct sunlight.
A consistent room temperature is often fine, but if you live in a humid climate, you might want to store your seed collection in a dehumidified room or use moisture-absorbing packets to your seed storage container. Silica packs or calcium chloride (the kind used in DIY dehumidifiers) are both good choices.
3. Use Airtight Containers
While paper seed envelopes are great for organizing and labeling seeds, unfortunately, they’re not airtight. For long-term seed storage, your seeds need to be kept in an airtight container.
You can still keep them in their original packets or in paper envelopes, but putting those inside a larger airtight container will help preserve your seeds.
4. Label Your Seeds
Trust me—when you’re rummaging through your entire collection of seeds in the future, you’ll be glad you took the time to do this!
Include the seed type and date collected or purchased, plus any other information you like to have on hand, such as planting time or season.
How to Store Seeds
There are loads of different ways to store seeds, and they don’t all require spending money on a fancy seed storage container! Chances are, you already have something around the house that could be repurposed into a seed storage box.
Here are some of the most popular and practical seed storage ideas I’ve come across:
- Shoe boxes – Simple, budget-friendly, and easy to stack.
- Mason jars or other glass jars – Great for keeping moisture out, especially with a desiccant packet inside.
- Ring binders or folders – Use clear sleeves to hold packets of seeds.
- Bead or craft organizers – Clear, stackable containters with lots of compartments.
- CD binders – A simple way to keep your seed collection organized, if you can get your hands on some.
- Photo albums – Very easy to flip through!
All of these seed storage ideas have their merits. It really depends on how many seeds you’re working with and how often you need to access them.
But my personal favorite way to store seeds? A photo storage organizer box!
Let me show you why…
Why Photograph Organizer Boxes?
Photograph organizer boxes have been an absolute game-changer for me! As the name suggests, these boxes are originally designed to store and protect photos, but they’ve turned out to be the perfect seed storage solution for me.
So what is a photo storage box, exactly? Well, it’s a sturdy plastic carry case with lots of smaller plastic individual cases inside.
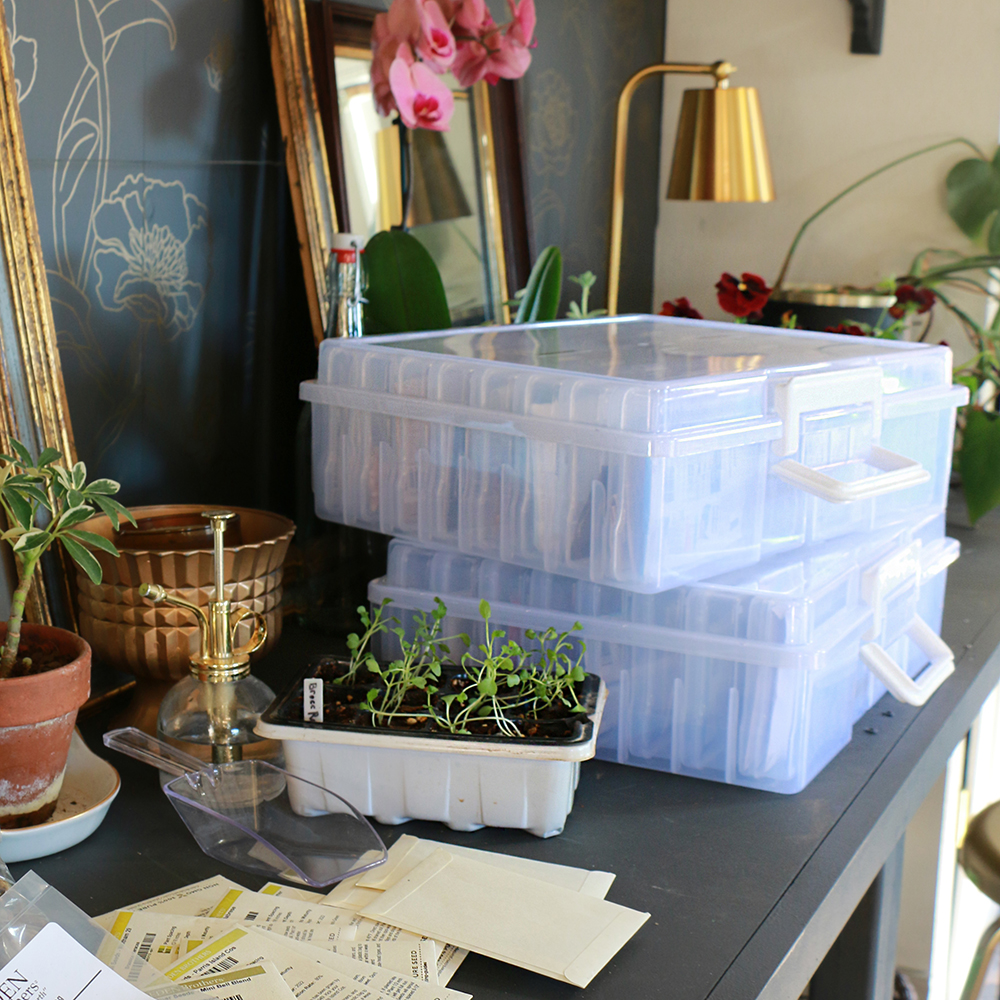
Here’s why I think they’re the best way to store seeds:
- Protection: Since these boxes are meant to keep photographs safe from light, moisture, and dust, they do a great job of protecting seeds from these same elements.
- Organization: The individual plastic containers are perfect for grouping seeds by type—like herbs, flowers, salad greens, or root veggies—or by planting season.
- Portability: Most photo storage boxes come with a handle, so they’re easy to carry out to the garden. And the small inner cases are removable, so you can just grab the ones you need for the day instead of hauling out your entire collection.
- Perfect Fit: Seed packets fit surprisingly well inside the smaller containers.
If you ask me, this is one of the easiest ways to organize seeds, because you can always find what you’re looking for!
How to Organize Seeds Using Photo Boxes
Now that you know why I love using photo organizers for seed storage, let me walk you through how I actually use mine. My system is simple, but it’s made a huge difference in how I store seeds and—more importantly—how I actually use them.
I have two photo storage boxes:
- Box One: This is mostly for my flowers and plants. I organize the cases by warm-season flowers and cool-season flowers, and I also have a section for seeds I’ve collected from my own garden.
- Box Two: This one’s mostly for my fruit and vegetable seeds. On one side, I keep warm-season vegetables and fruits, and on the other side, cool-season crops, plus a section for herbs and any unique or experimental plants I’m trying out.
Finally, I’ve labeled each case using my label maker with clear plastic labels—just in case anything gets wet while I’m gardening.
But obviously, you don’t need to copy my exact system. Here are a few other ways you could sort your different types of seeds:
- By plant type (herbs, flowers, veggies)
- By planting date or season
- By plant family
- Alphabetically
- By variety, e.g. heirlooms vs hybrids
- By source—store-bought vs. home-saved
You can keep your labels clean and simple or go all in with detailed labels that include whether a plant is annual or perennial, planting tips, expiration dates, and so on. You could even use colored stickers as a kind of short hand—for example, green for seeds you’ve saved yourself, and yellow for ones you’ve bought.
And here’s a little seed storage tip: if you’re not sure how you’ll want to organize everything, don’t stress about it at first. Get your seed packets into the boxes, start using them, and let your system evolve naturally. Once you’ve figured out what works for you, then you can finalize your setup and make your final labels.
Recommended Seed Storage Containers & Accessories
If you browse Amazon or your local craft stores, you’ll see there are loads of seed storage boxes, organizers, and containers out there. To save you a little time, here are some of the best options I’ve come across.
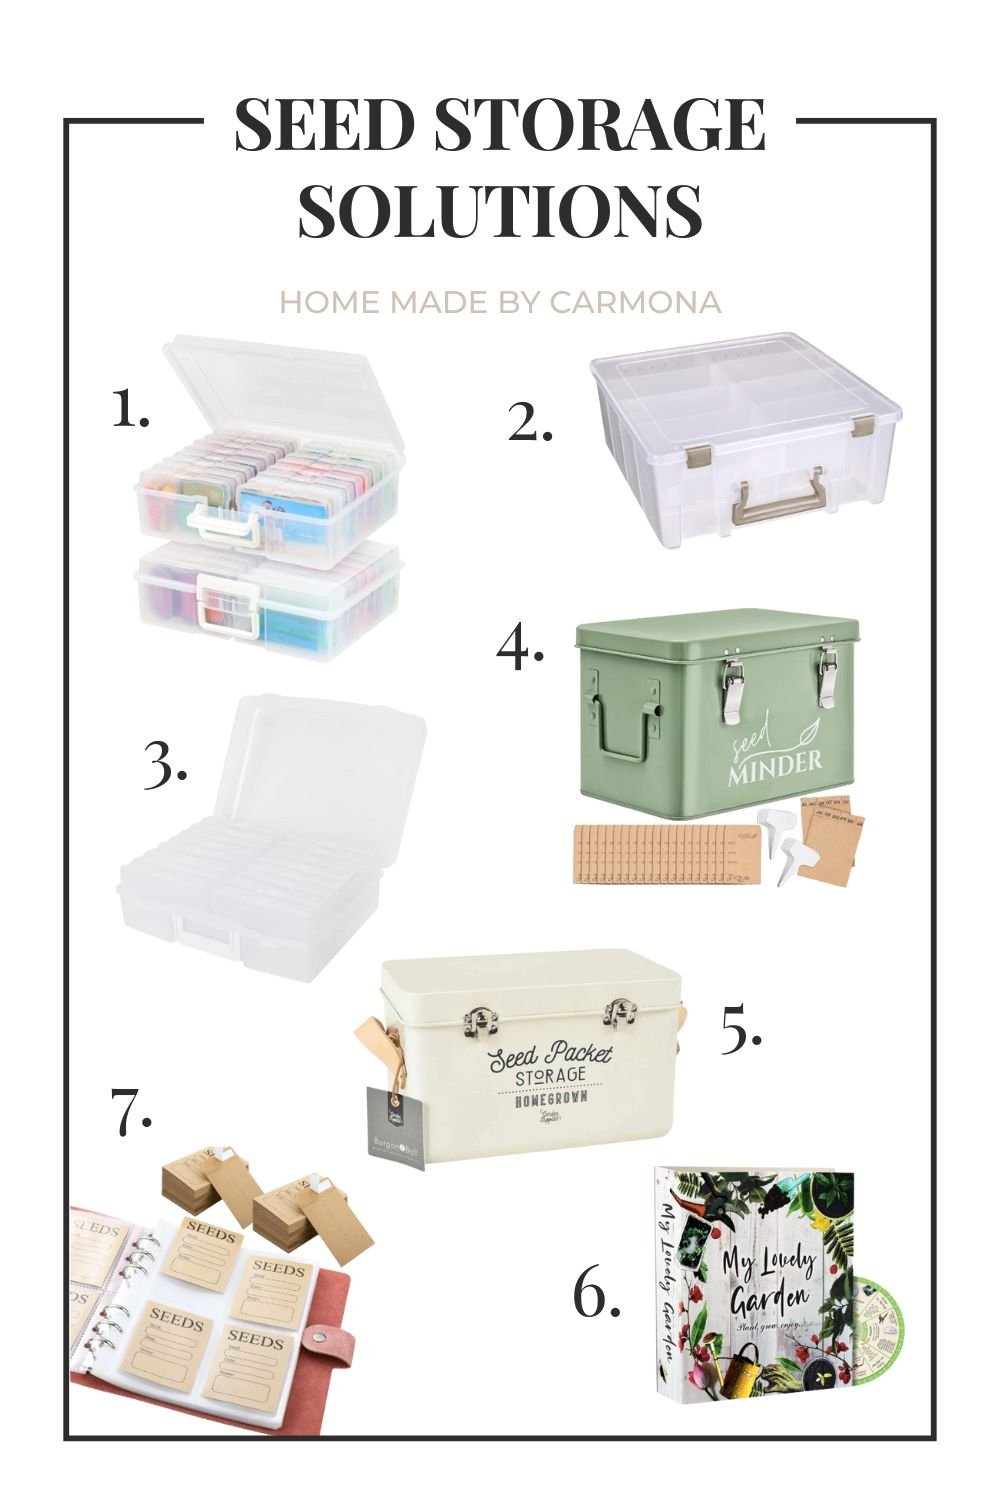
1. IRIS USA 4″ x 6″ Photo Storage Craft Keeper
- Comes in various sizes depending on how many inserts you need
- Durable construction with secure snap closures
2. ArtBin Super Satchel Double Deep Compartment Box
- Available in different colors
- Deep compartments and removable dividers for custom sizing
3. novelinks Transparent 4″ x 6″ Photo Cases and Craft Keeper with Handle
- Comes in clear or with different-colored handles and inserts
- Multi-color inserts help you color code your seeds
4. Little Mindings Seed Storage Box
- A more aesthetic option
- Sage green iron box with sturdy metal clasps
- Comes with monthly dividers, seed envelopes, and plant labels
5. Burgon & Ball Seed Packet Storage Box
- Cream-colored steel with natural leather handles
- Strong metal clasps and a hinged lid
- Three interior compartments (one long enough for oversized seed packets)
- Binder format with labeled dividers, seed sleeves, envelopes, and even a gardening moon calendar
- Space for up to 100 packets
- A great way to flip through your seed packet organizer like a photo album
7. Seed Storage Organizers – Clear or Faux Leather Binder
- Binder with clear plastic sleeves and paper envelopes
- Best for small to medium collections (large seeds might not fit)
Final Thoughts on Seed Storage and Organization
Whether you’re an avid gardener, saving seeds from your own garden, or more of a hobby planter, slowly building a collection through impulse buys (guilty!), having a solid seed storage system can make a huge difference to your gardening. It helps you actually use the seeds you’ve collected and not let any go to waste.
There’s no one “right” way to store seeds and no perfect seed storage organizer for everyone. What matters most is keeping seeds in optimal conditions – somewhere that’s dry, cool, and out of direct light -, and that you can find what you need when you need it.
Whether you go with a full seed organizer box with dividers, a simple ring binder, or your own creative spin any of the seed storage ideas I’ve shared in this post, make sure you choose something that works for the way you like to do things.
I hope this post has given you a few helpful ideas for how to store garden seeds and inspired you to give your current stash a little refresh. Happy growing!
Like This? You’ll Love These!

Related Posts: The perfect seed starting station | How to grow avocado plants from seed | How to get plants for free | Vertical hanging garden DIY | Plants that are easy to propagate | How to keep plants watered when you’re away | Indoor wall planter DIY |


Leave a Reply