Why Raised? Why Sub-Irrigated?
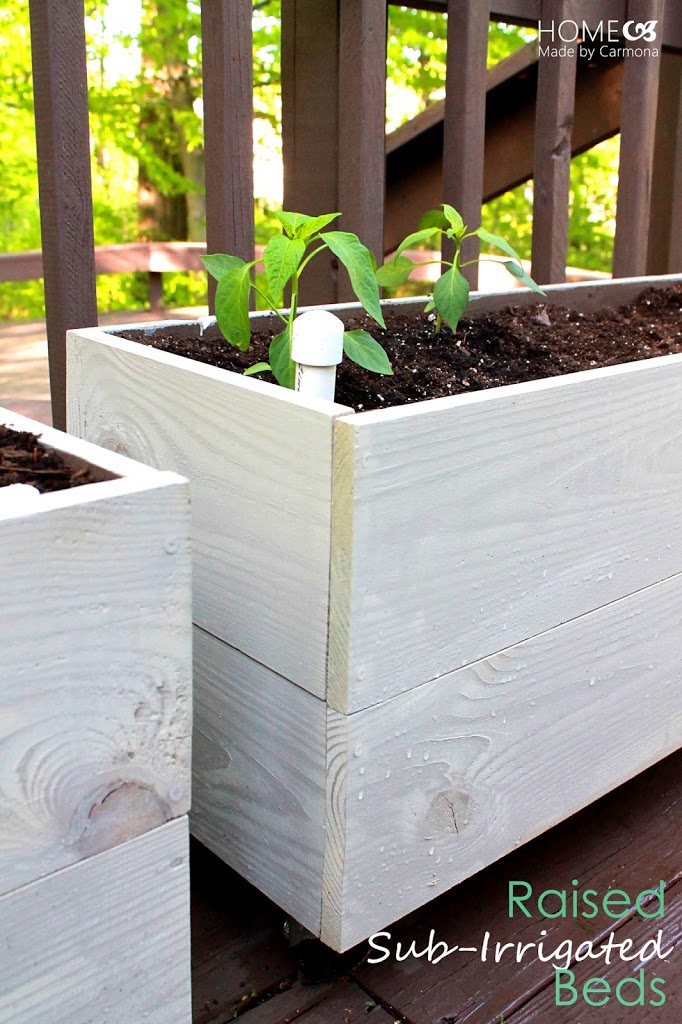
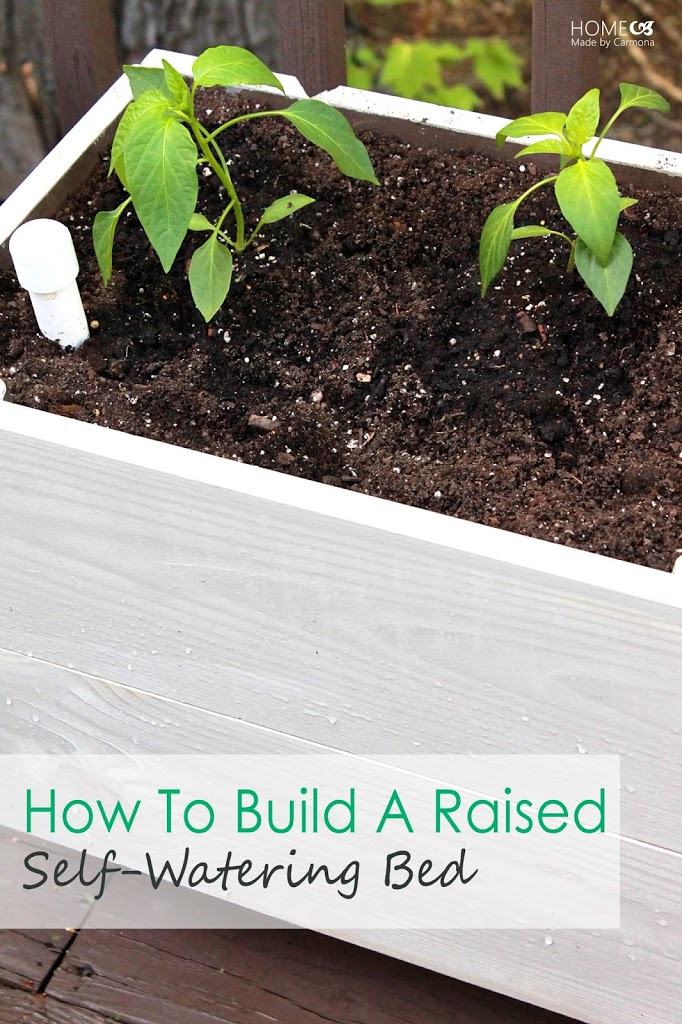
Do you really have to ask? My raised beds sit on my deck and are as work-free as a garden can get! They are self watering, requiring a refill once every two months, and they help extend my summer planting season. Oh, and as for weeding, well…what weeding? *swoon* I love my little deck garden! I promise to give you another peak later in the summer when all my little seedlings are fully grown.
Soooo, have you created your self-watering container garden yet? Wait what? You didn’t see that post? Well ok, then you must start with Part 1: Starting Seedlings of my Garden Fever series, then go to Part 2: Container Gardening, and this is the last post in this 3 part series. If you have, then please, by all means…onward!
Necessary Materials
Bed Building Materials
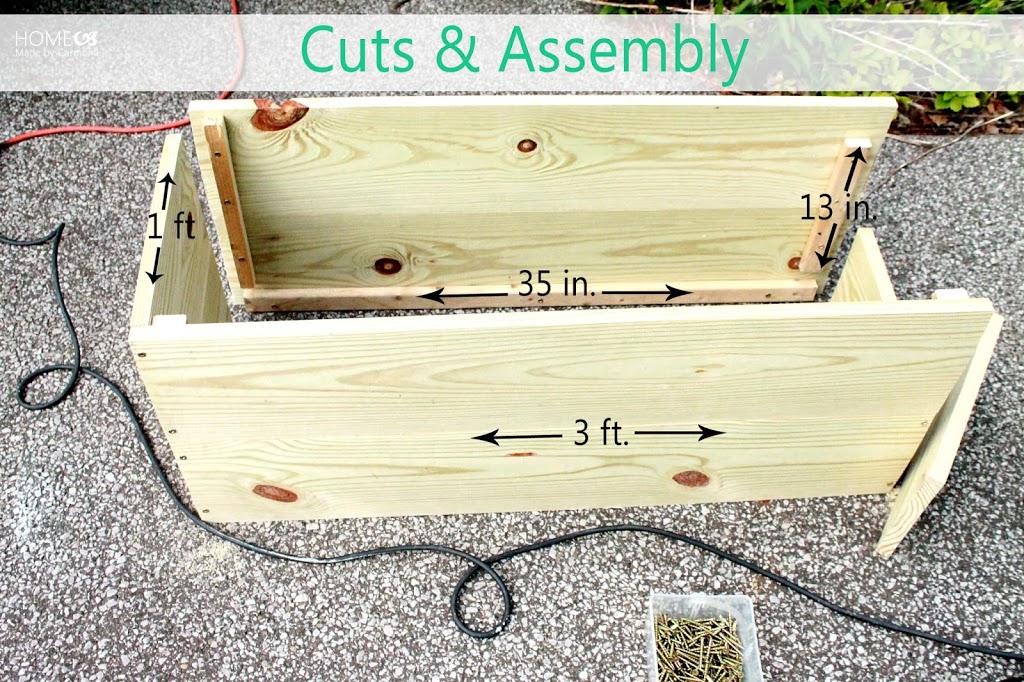
These are the materials I used to build one raised bed, however you can simply adjust the dimensions to suit materials on sale or your desired height, length, and width. There is one reason alone why I chose the type of wood I did…it was cheap. It was $1.89 per 8 ft. board cheap!!! So believe me, if I could have found taller cedar boards at that smashtastic price, I would have used them. *wink* Basically I spent $12 to build two raised beds after purchasing 4 – 8 ft. boards, one piece of framing wood, and some soil . I used leftover deck stain & seal left in my garage by the previous owners, and I salvaged castors from a piece of roadside furniture.
To Build One Raised Bed
- 2 – 1 in. x 7.25 in. x 8 ft. Cedar Board
- 1 – 1 in. x 1.5 in. x 8 ft. Framing Lumber
- One Salvaged Pallet
- 1 1/2 in. Deck Screws
- Deck Stain & Seal
- Castors (optional)
Sub-Irrigation System Materials
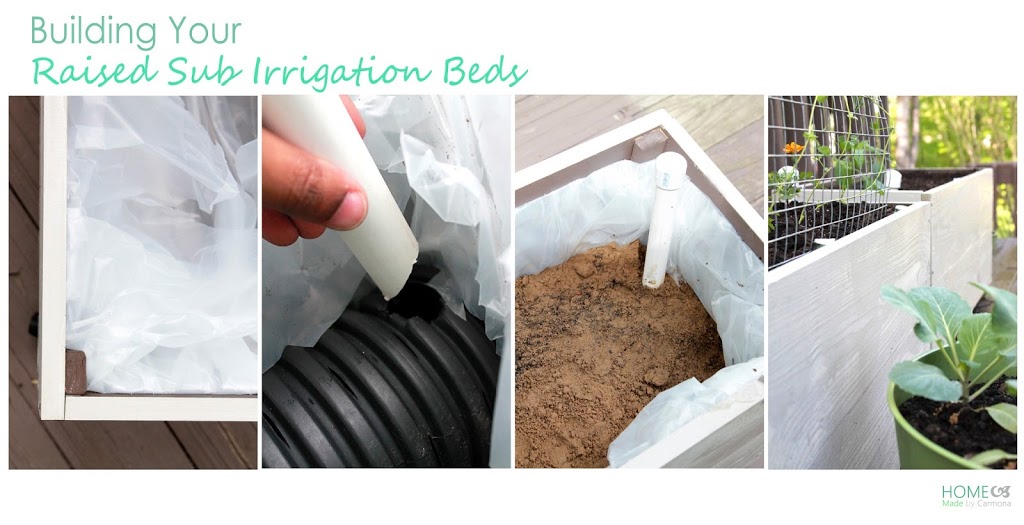
- 3/4″ PVC Pipe & Cap
- 4″ Drain Pipe
- Thick Plastic Sheeting (vapor barrier)
- 1/2″ Vinyl Tubing
- Top Soil
- Garden Soil
How-To Build Your Own Raised Sub-Irrigation Bed
Again, some things are just better shown in action…so I will show you via video how to build your bed, and install the sub-irrigation system. If you watched the video I did on how to create self-watering planters here then you should know the idea is the same, however the materials are a little different.
Drainage Tip
If your garden is on a second story deck, or you just don’t want it draining all over your deck floor, be sure to place a plastic drip pan under your vinyl drain tube. Or you can just do what I do, allow it to overflow into one of my planters.
Create a Shade/Greenhouse Covering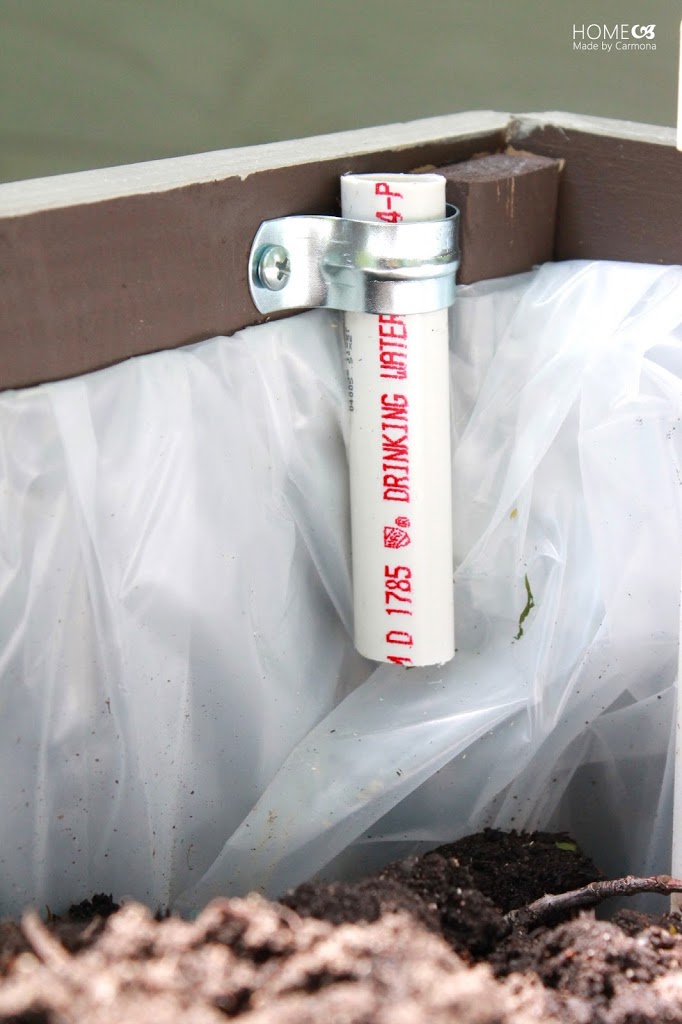
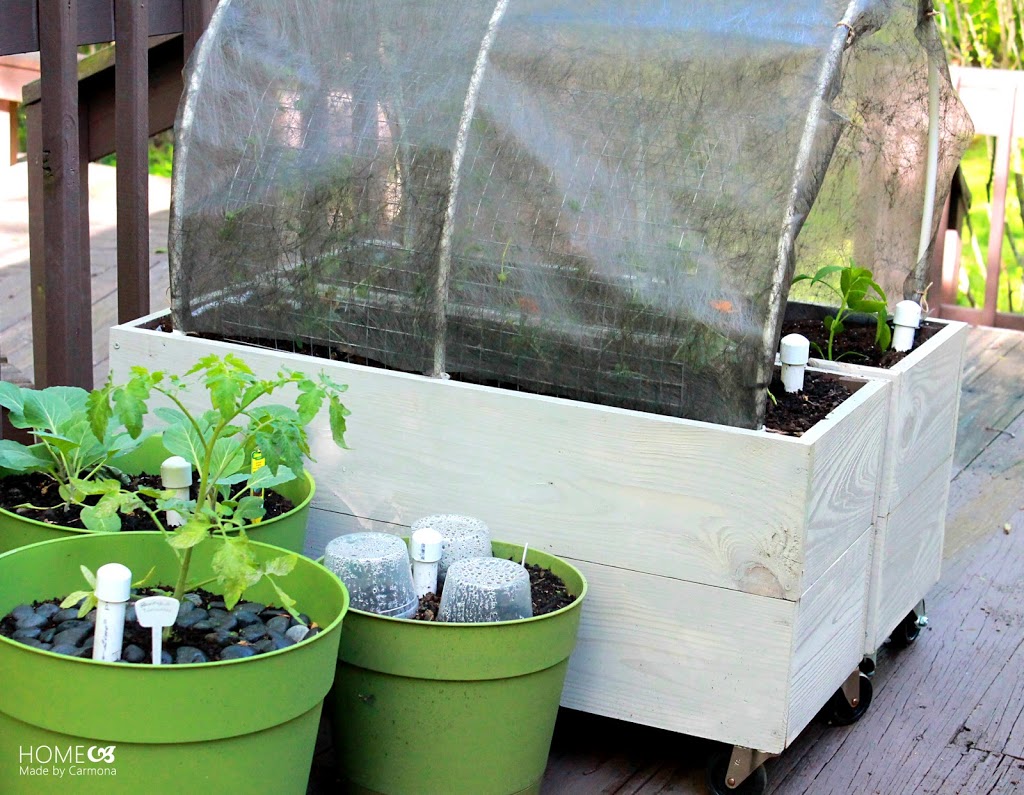
Use the leftover PVC pipe to create holders for a “shade” useful for those especially hot days.
This will be very helpful for your transplanted seedlings as they acclimate. They usually can’t withstand an entire day of sun, but now that they are being kept moist from the roots up, and have a shade until they are ready, nothing can get them down!
- Use Two Hole Straps to attach the PVC to your beds. You can attach them to the outside of your bed. Or attach them hidden on the inside of your bed before filling with garden soil.
- Purchase a thinner bendable PVC that can loop over top of your raised bed.
- Create a shade by cutting garden cloth to size over the loops.
- **TIP: if you created long narrow beds like I did, push them side by side and loop your shade over both as in the picture below.
Even better, late fall replace the garden cloth with the leftover plastic sheeting to transform your bed into a greenhouse and extend your growing season. Use your plastic sheeting in the early spring and even into the summer for heat-loving plants… it also can help to warm the soil up in spring before seeding into it.
Like This? You’ll Love These!
Learn how to make a DIY greenhouse out of salvaged windows | Start seeds indoors to get a head start gardening | Get 10 tips from gardeners on getting garden ready | Create a potted herb garden perfect for a small balcony or patio | How to keep plants watered on vacation






Hello, I’m trying to view your tutorial (YouTube video) on How to Build a raised self watering bed, but the video will not play. Other videos keep popping up and playing. While interesting, I’m focusing on the self watering bed at the moment, lol. I need help with the self watering bit. I keep refeshing the page and trying to click on the video, to no avail. Could you please send please me the link? I’m a visual learner and would like to see the video instead of just reading about it. Would greatly appreciate it. Please and thank you!
Hi! Sorry about that, it might have been a glitch with my automatic player. Feel free to watch it here directly on YouTube.
Thanks for the tutorial, this was my first successful container year. Two tomato plants and 6 dozen tomatoes. Now I’m ready to up my game and this seems to be just the way!
I’m a bit concerned about the drainage tube. Did you use silicone to seal gaps between the liner and the tube? Also have you given any thought to a water level sight tube?
Most of the raised flower beds which I either built or purchased have, after a few years, separated or pushed apart at the upper corners of the side and they look unsightly. It is as if the weight or pressure of the soil over time pushes apart the joints of the box, esp., the top corners. Any suggestion of ways to avoid this separation? My location is Western Oregon so lots of rain during Fall and Spring.
Hi – Thanks for the post. Once question – how often do you need to add water assuming it rains once per week in your region? Thx.
Run a test to see what it is like in your area… You can always add water and see if excess pours out of the drainage pipe on the side. That will help you know if it needs filling up again, and how much, and how quickly. Just check every week for a few weeks, and you’ll be able to tell.
Hi! Thank you for this amazing tutorial! I have back problems so I built it on higher standing legs and it looks great. I have a question though: why did you use two separate drain tubes instead of one long connected one? Home Depot sells the perforated and flexible drainage tube that I can bend to cover the entire bottom. Could I essentially just use a single one so that it can be filled all at once and I don’t have to wait for it to transfer to the other reserve and then add more water? Thank you in advance!
Absolutely! If you can fit it when bent in your bed, definitely do that. My bed size was too small to bend it and have it fit, but this was the bed size that worked best for my deck… you use what you have! 🙂 Good luck on your raised garden!
I love this idea! I have one question for you. The drain pipe you used, it is corrugated or solid, does it matter?
Thank you!
It doesn’t matter whether it is corrugated or solid. I have used both…
I love this post, thanks! Planning on making a few. Just had a question about the bottom scrap wood pieces, what size were the, and how many did you use?
I actually used scrap pallet wood, and other scrap pieces of board that were varying sizes. So the width of your board doesn’t really matter…just that the length is 1 ft (or however wide you want your bed to be).
Love the tutorial. I just purchased a house and I’m going to make the raised planters and have chicken tunnel underneith. Same amount of space but twice the use! Thank you!!!
Are you concerned about the plastic from the liner and the pipes leaching into the soil and plants?
Thanks for the question Chris! Yes, that was a concern for me, so I chose plastics that are rated for weather, and consumer safety. 😉
Hi Ursula, Few questions:
1) For how long have you used these self watering beds?
2) Will the garden soil eventually get into the pipes and clog?
3) Do you not water it form the top at all and completely rely on the water in the pipes?
Thanks for the inquiry! In answer to your questions:
1) It has been 3 years (built them back in May of 2013)
2) In 3 years I have never had a problem with clogs. Remember, the dirt at the bottom has a higher content of sand than soil.
3) I only rely on the water in the pipes. I have never watered from the top…but remember that I live in the Midwest where it does rain during the summer (at least every few weeks). If you live in a drier area and your plant has shallow roots until it grows in, you may want to additionally water from the top until it recovers from replanting. 😉
This was a great video! I currently have two raised garden beds that unfortunately have been taken over by tree roots. I was looking for ways to keep my garden beds contained so that the tree roots wont find the water and nutrients in my garden. Does it matter what soil you use to surround the pipes? I’ve emptied one entire garden bed that just contains fill dirt. I was going to surround the pipes with the fill dirt and then do the top 5 inches with a good nutrient rich garden soil. Would that be okay?
Thank you! I also used nutrient rich garden soil at the top! It is absolutely ok! 🙂
Love this! We did this with some teenage girls as an activity and they loved it. They will no longer be afraid of tools! Thank you!
I Love This! Can’t wait to make one.
I like this. I would like to add a couple of twist. I’d like to use the Raised Sub-Irrigation Beds with a rain barrel and the Square foot gardening method for a hassle-free
community Garden. (Many Sr. Citizens). What do you think?
LOVE it!! A DIY rain barrel is next on my list of things to do too…such a great way to save money and water! 😉
In your video you spoke about a secondary pipe. The only three items I saw you use were the black drainage line, the pvc pipe and the clear drainage tube. Did I miss something?
No, you are right on the money. 😉 I used TWO black irrigation pipes side-by-side, but only once pvc (fill) pipe installed into one of the black pipe, and one clear drainage tube which I installed in the OTHER black pipe. Hmmm, I hope that helps make things a little clearer. Haha! 😉
So how’s the water ever get to the drain tube? I assume the water will only flow out of the end of the drain tubes and there’s no holes in the drain tube itself
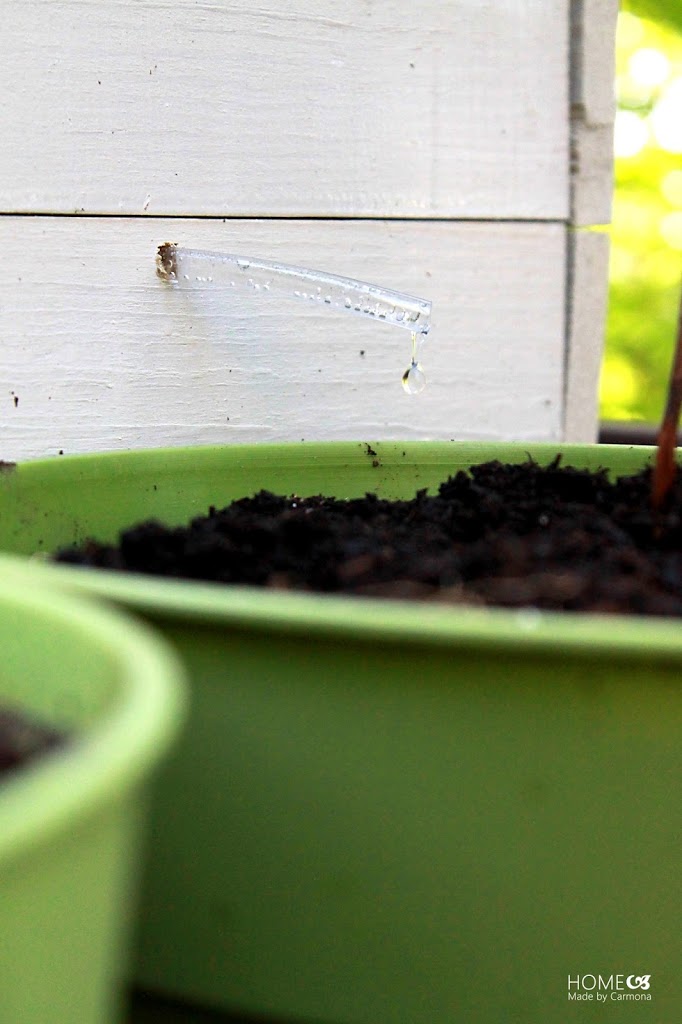
Actually the corrugated drainage tubes DO have holes. They are small slits all along the edges of each corrugated ridge… The tubes simply act as a water reservoir that holds the dirt back, but allows the water to wick up to the plants. The small drainage tube lets out excess water so the whole bed doesn’t fill to the top and become stagnant water.
This is such a neat project. I kept it simple this year and opted for container gardening and tomato towers, but I’d love to try these self-watering planters someday!
Hi, I love this idea and am thinking about trying it this summer. I have two questions though. Is the small overflow pipe large enough during lengthy rain storms? Would you recommend either increasing the diameter of the overflow pipe or adding an another pipe somewhere? Additionally if I wanted to make my box twice as large e.g. 3ftx2ft would I put double the perforated drain pipes and add an additional overflow pipe? The reason I ask is because I am on a top floor apartment and would love to have a balcony garden but want to make sure my downstairs neighbors don’t get my extra water. Thanks again for posting this!
Thank you!
The small overflow tube is large enough. It pours out like a torrent! Just be sure there are no kinks or the possibility of kinks forming (keep it short enough), and it should go near the top and inside of your irrigation pipes…then when you overfill it will pour out. If you have neighbors below be sure to have a substantial bucket to catch the run off. The amount and size of pipe is only determined by how much water (and for how long) you want to store…you could absolutely do double the perforated pipe if desired.
Hi there, thank you for that great tutorial! – Two questions: What are those thick black hoses called? Do they already have holes in them, or did you have to make them that way?
They are called “HDPE pipes”, or in my hardware store “perforated drain pipe”. They are drainage system tubes for sewer and storm. You can purchase them already perforated or solid in a variety of sizes, and you can find them in the plumbing section of your hardware store.
Hope that helps!
I’ve seen others also recycle plastic water bottles rather than buying the pipe.
this was great! thank you so much!
i really like the content of this blog. feeling great to see such kind of blogs.
Internet based Beds Company
Hallo, ich muss sagen, dass Sie ein paar gute Punkte in der Post. Ich führte Recherchen zum Thema und fand die meisten Leute mit Ihrem Blog zustimmen. Vielen Dank für diese Informationen.
Hochbeet
Such a great idea! I love your blog, you have many wonderful ideas. I am going to try this!!