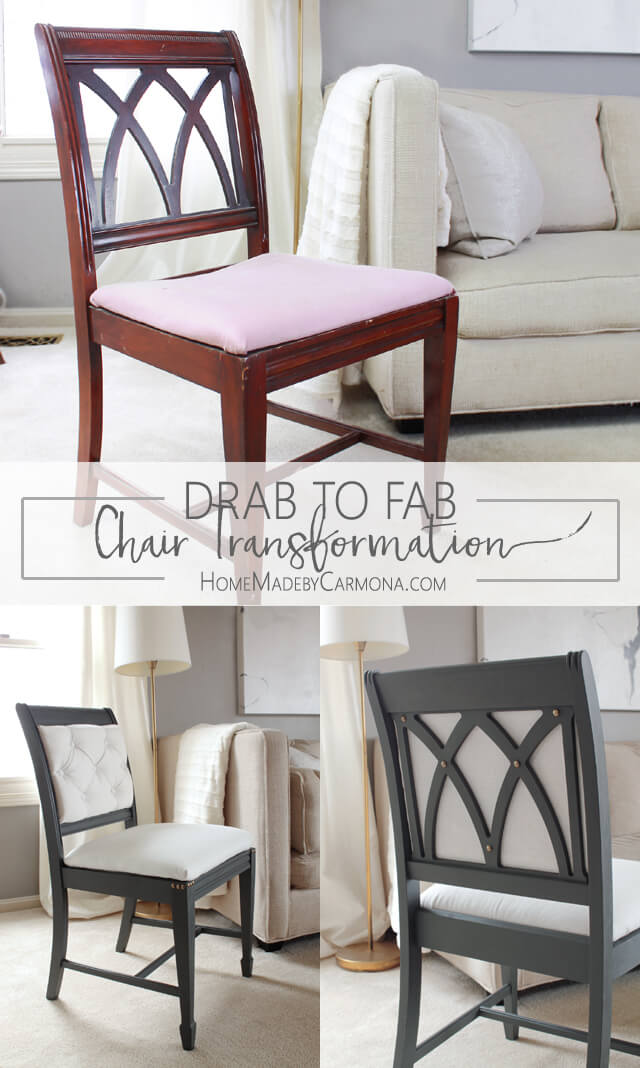
With a little vision and elbow grease, you can transform outdated furniture into masterpieces! This thrifted dining room chair was no exception, and made for an incredible chair makeover!
Instead of spending big bucks purchasing all new chairs, why not see if a second-hand set will do the trick? Over the years I’ve learned that you can get much higher quality when on a budget thrifting pieces then transforming them!
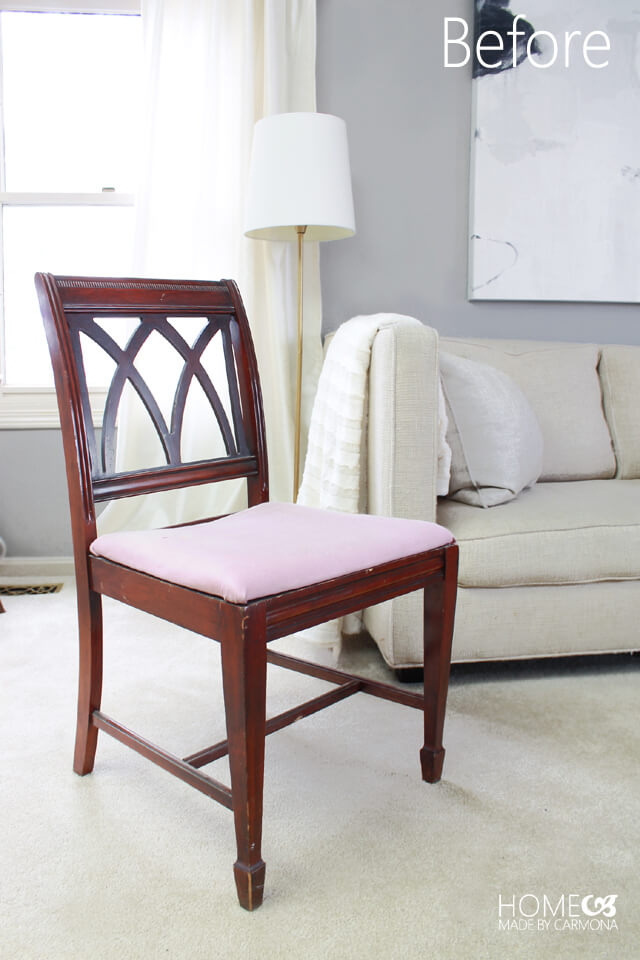
This little chair was a $20 find from a salvage shop that had promise. It was all wood, and had good sturdy bones, making it the perfect piece for a DIY furniture flip!
Giving It A Paint-Over
I admit, sometimes I hate to paint wood, but with all the knicks and scratches it is a good option. If you love a natural wood grain look, and don’t want to paint it, then use a palm sander to sand it, or a paint stripper. Then re-stain it to the desired hue.
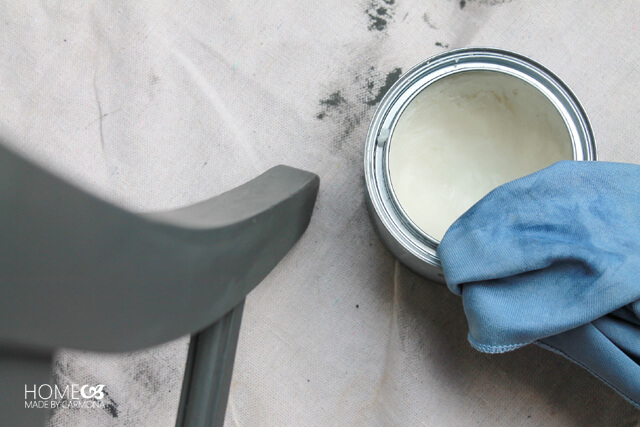
I’m starting with this beautiful grey Vintage Farmhouse paint, which is a type of chalk paint. The beauty of quality chalk paint, is not having to sand or prime for most projects.
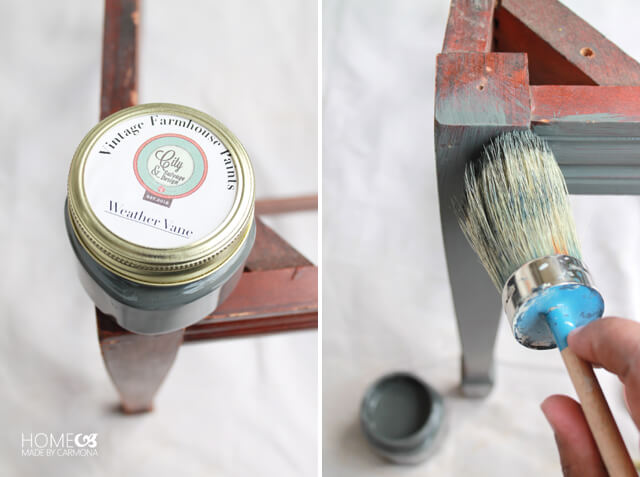
Typically I would distress the finish a bit for a nice farmhouse vibe, but I don’t know what style of home this chair will be going to live in, plus if they have children it is likely to obtain some “roughing up” naturally. I’ll go ahead and finish it off with a furniture wax to seal it.
Adding An Upholstered Backing & Seat Cushion
Not every makeover is going to require new upholstery, but in this case there wasn’t any real upholstery to salvage. The original fabric was long gone and replaced with some pink garment fabric. I
f you happen to have good upholstery on your chair, you can always use a special fabric paint to give it a new color instead of replacing it. Just be sure to go for high quality material… the right fabric can be easily cleaned so you aren’t replacing the material again too soon.
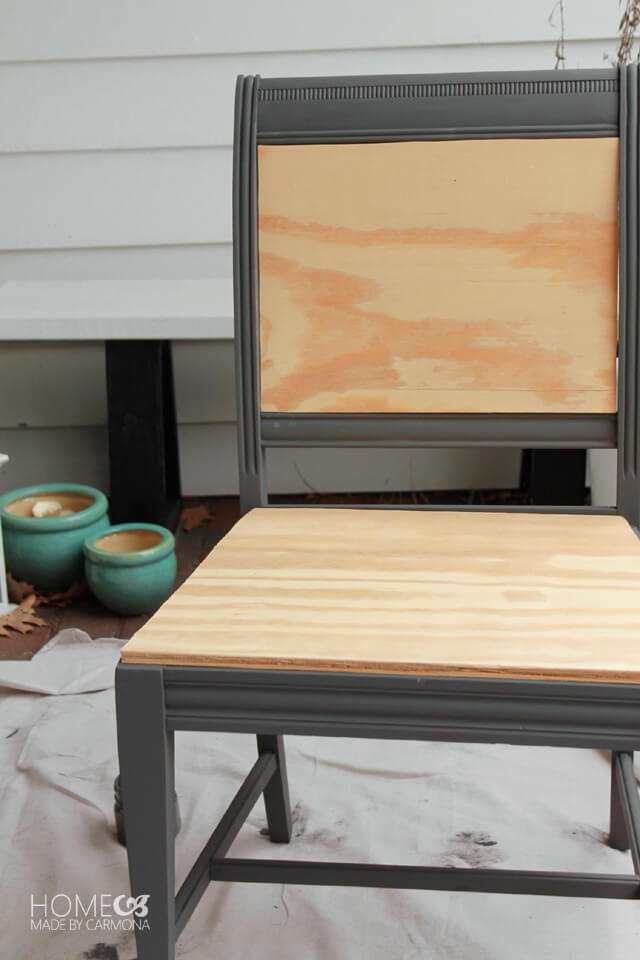
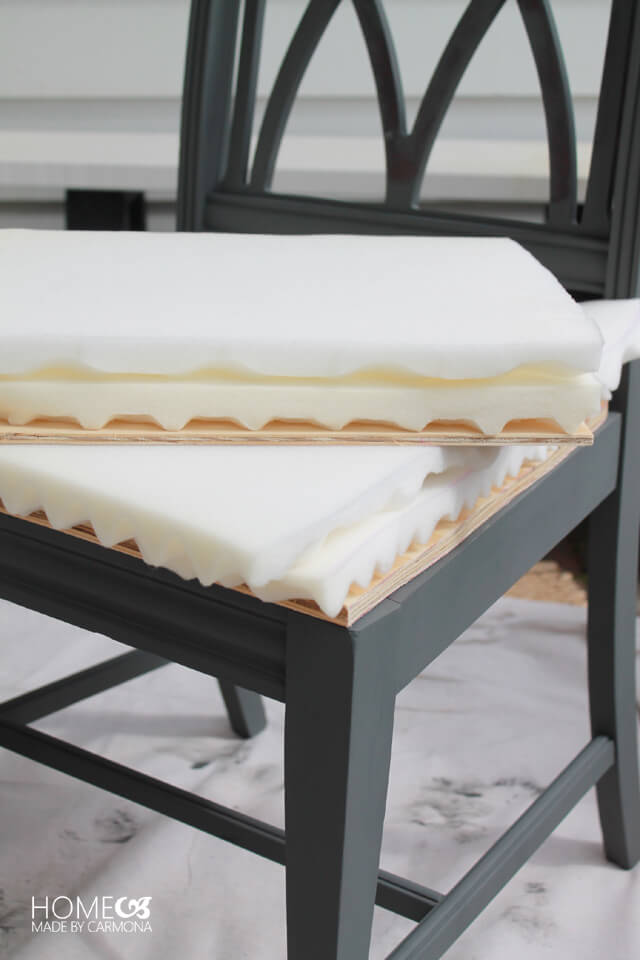
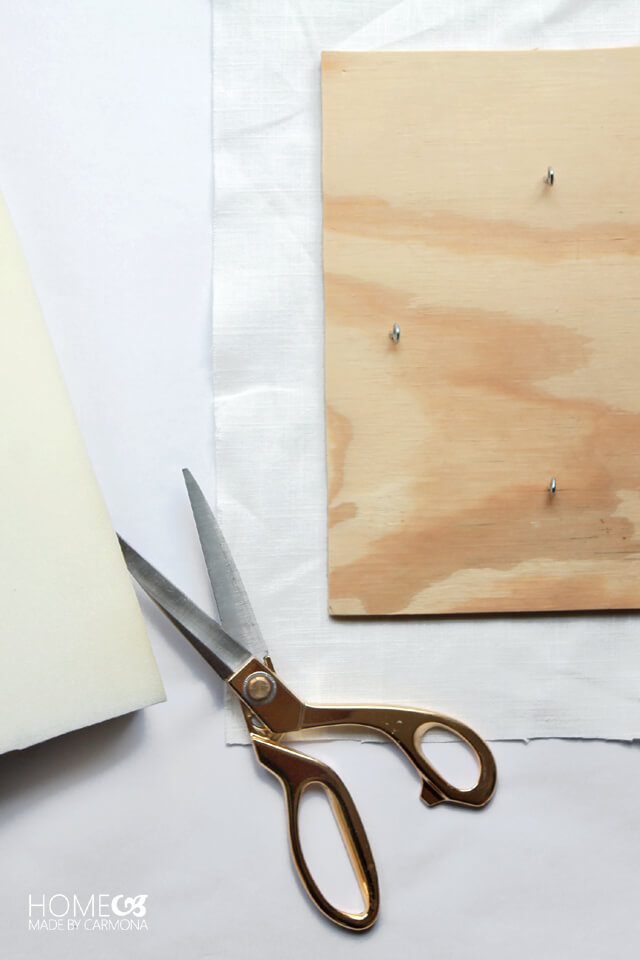
The original wood seat was water damaged, and beyond repair. I cut out a new seat bottom from a piece of plywood, and a thin 1/4″ plywood piece as a chair backing.
A twin sized egg crate mattress foam for $11 makes for great padding, especially since I’ll be adding an upholstered backing to add charm and comfort to this chair makeover.
Adding A Chair Backing
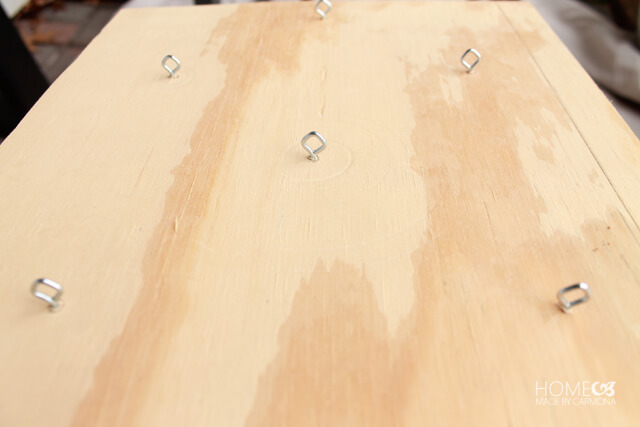
In order to create a diamond tuft on the chair backing, I need to create a template on the thin plywood sheet I cut for it. As I usually do when making a template for diamond tufting, I used a pegboard over top the plywood to mark where each hole should be to make up a diamond.
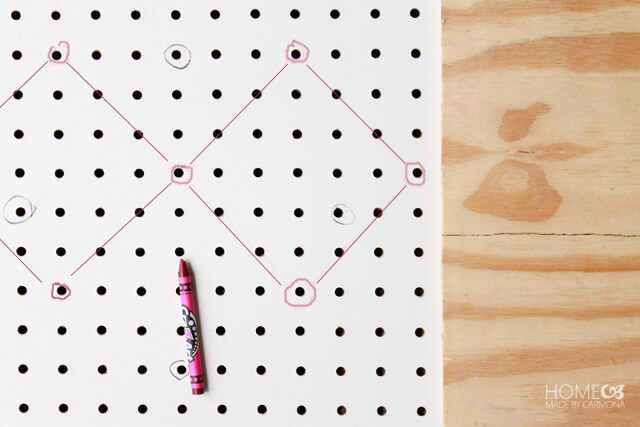
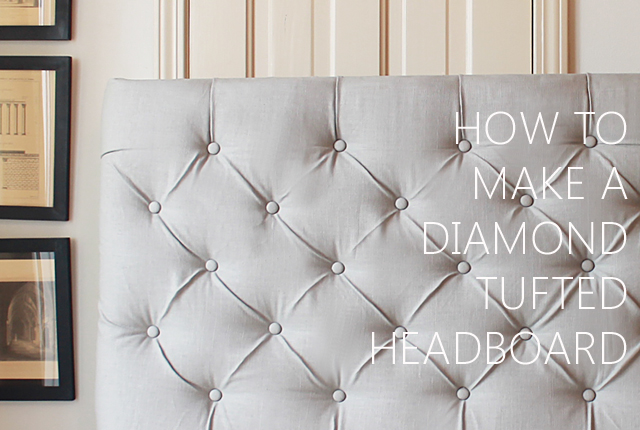
When I made my diamond tufted headboard, and a diamond tufted dining room bench, I drilled holes through the wood. This time, since this tufted chair back will show through the design on the back of the chair, that isn’t going to work. So instead I’m attaching screw eye hooks to each mark to do all my threading from.
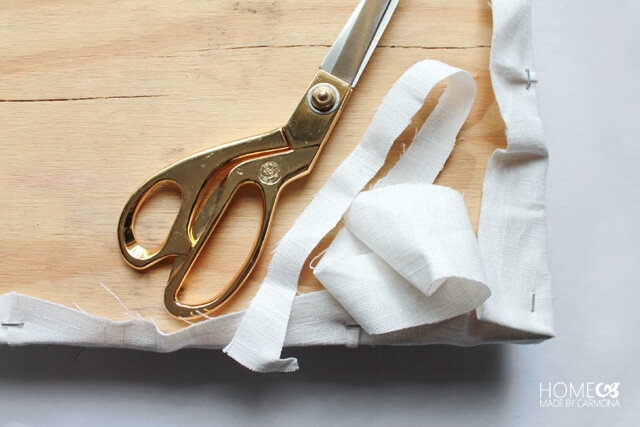
Now to cut my material to size that will go over the egg crate mattress foam.
Tufting Techniques
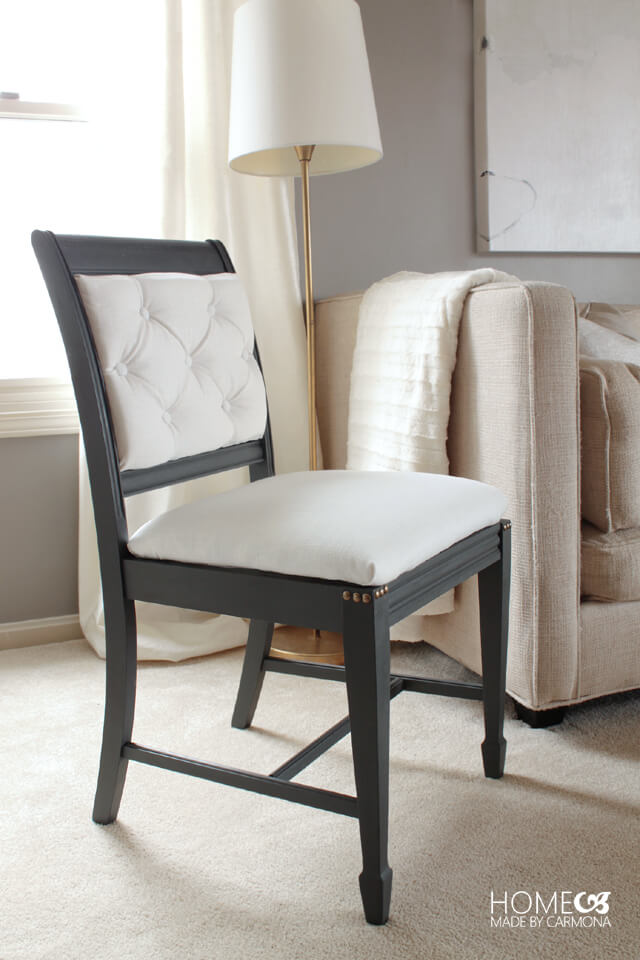
A simple upholstered back would be beautiful, but for this chair makeover I wanted something elegant.
For the tufting task, you’ll need waxed thread, and curved upholstery needles in addition to your covered buttons. Want to learn how to cover buttons? Check out my full tufting tutorial here.
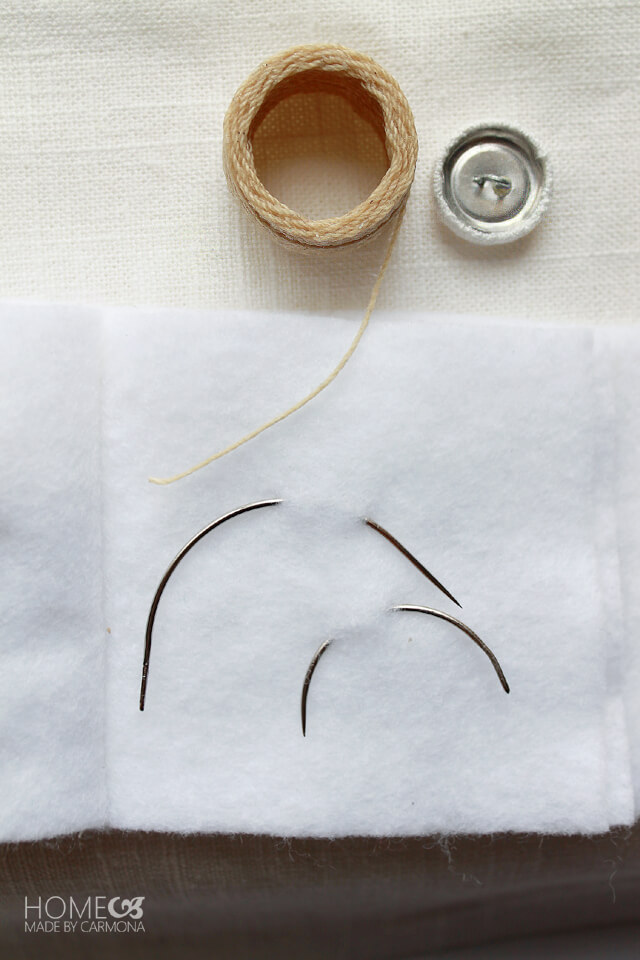
I use the curved needle to thread through the eye hooks. With the right tools, this isn’t a hard task, otherwise it can be a bit of a pain.
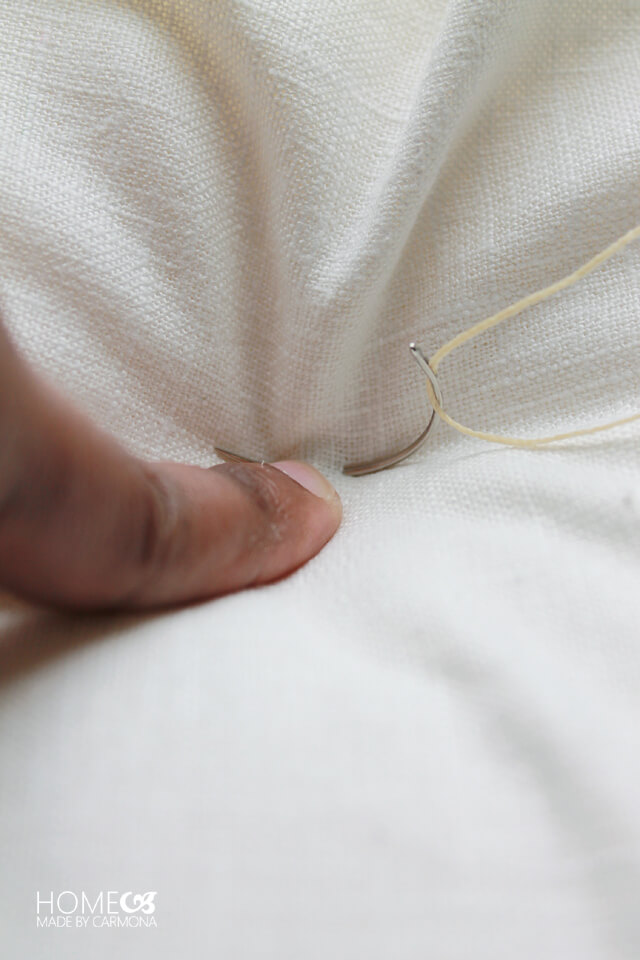
Pull the needle through, then one of the thread pieces as I remove the needle.

Place the button through one side of the thread, then tie it off several times on either side. Finally clip the excess thread.
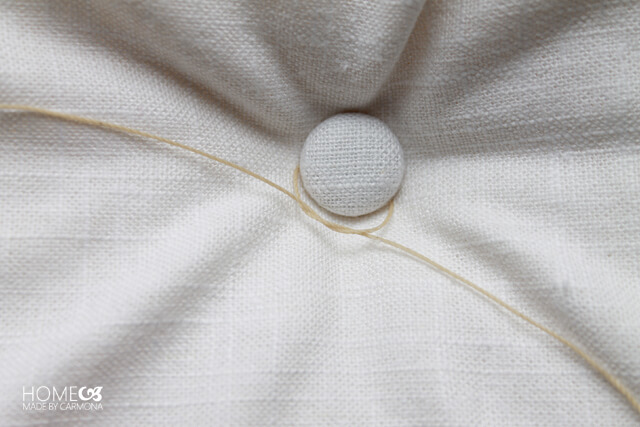
The tuft lines will come naturally as you add each button. I simply pinch them to add a little definition as I go.
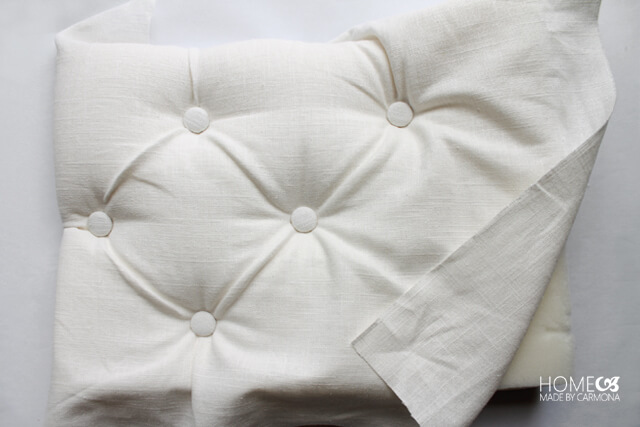
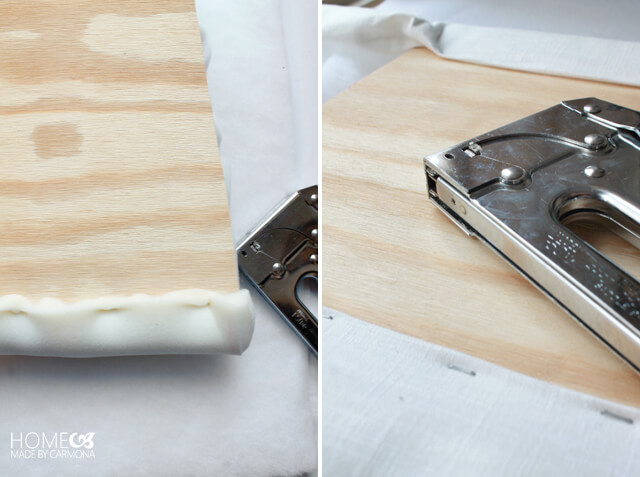
Once the tufting is done, I flip it over on the back and trim any excess fabric.
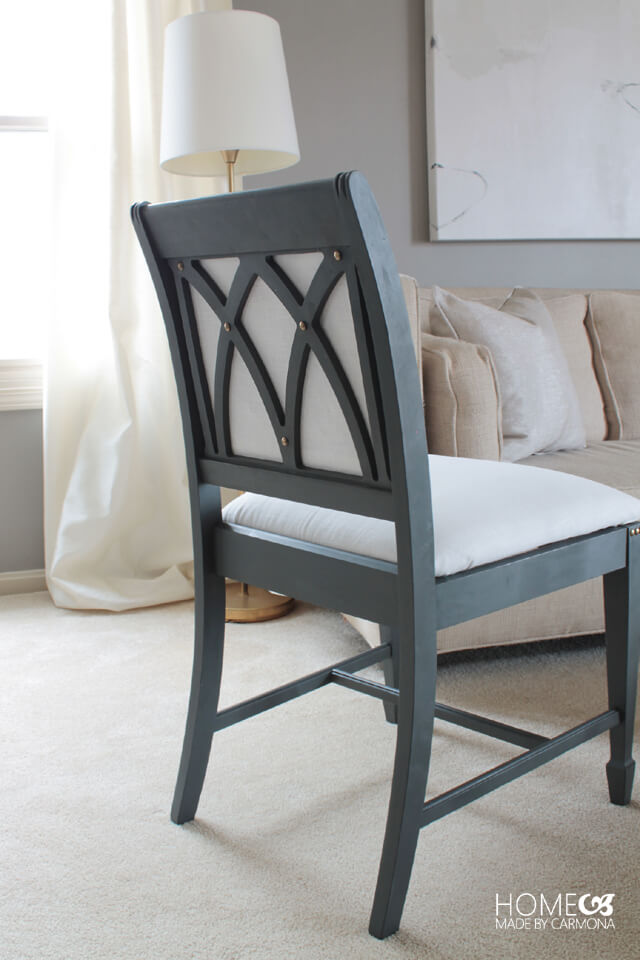
Staple the fabric backing in place, then fold a piece of fabric to lay on top and hide the stapes. This tufted inlay will show through the design on the back of the chair, so it was important all sides of this back is fabric covered.
Embellish With Decorative Tacks
To secure the new upholstered chair back, I used a nail gun to drive nails through the back of the chair into the upholstered back.
The last thing I did was embellish the chair with a few decorative upholstery tacks to cover up the tiny nail heads that attach the inlaid tufted piece to the back.
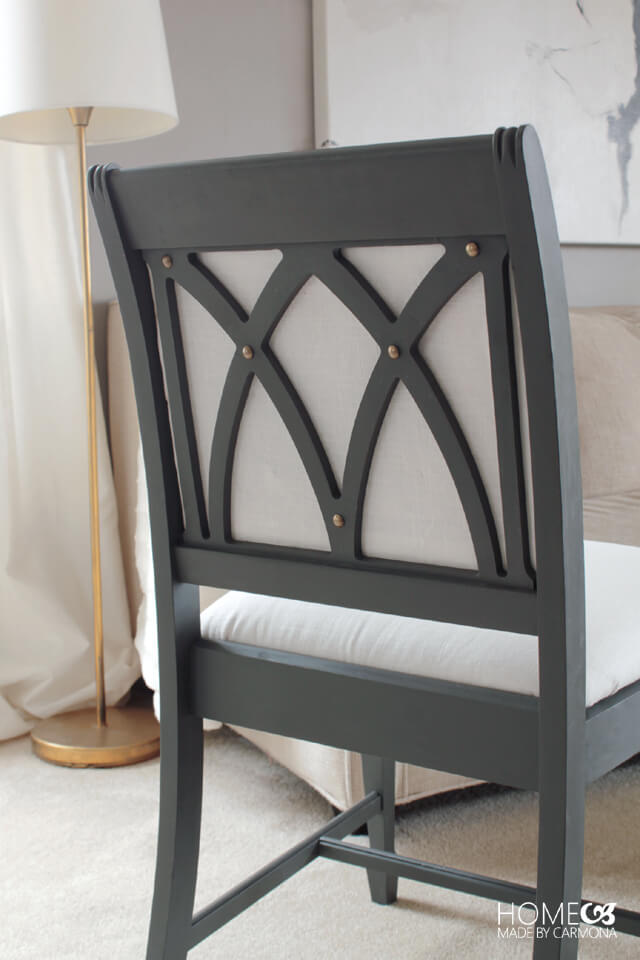
The fabric covered back shows through the beautiful wood design. Now that it has a backrest, it will be more comfortable, but also adds an air of elegance.
This chair makeover cost me under $30 total materials, and about 1 hour of work (not counting drying time). Not bad for a thrift store chair, right?!
I hope this also inspires you to look at your existing pieces of furniture with new eyes. You can take a boring chair and turn it into something amazing! Garage sale or thrifted furniture will have more promise now too.
It means you can also turn any existing outdated chairs into modern chairs with a bit of fresh paint, new fabric, and a little imagination!
Like This? You’ll Love These Furniture Makeover Tips!
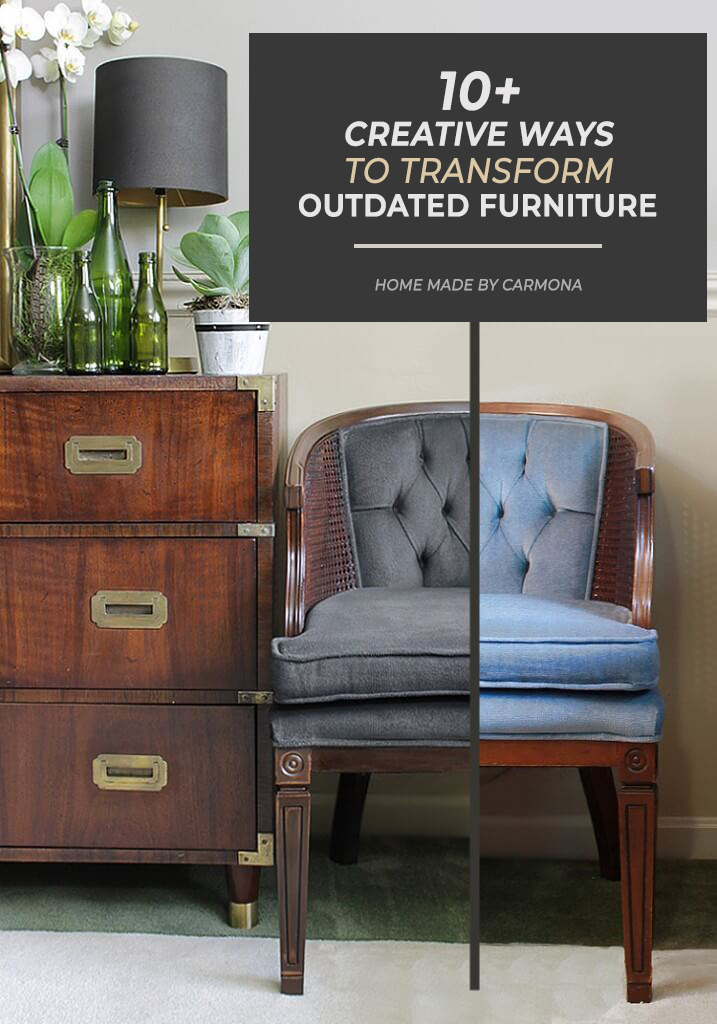
Learn 10+ Creative Ways To Transform Furniture!
Has your furniture seen better days? Transform them for a whole new look! A simple update can go a long way.


Stumbled on and all I can say is Brilliant! Using eye hooks is inspired!
Hi there! wondering where you got these eyehooks from as I’ve looked at the major craft stores and cant find them? also wondering what size they are? Would appreciate the help! thank you-
You can find them near the picture frame hanging hardware section of a store like Walmart, or in a hardware store. They are mini “eye hooks” or “screw eyes”. You can also find an assorted pack here on Amazon (affiliate link). The size really depends on what works best for your project (how thick your material is).
Love this! I’m using this as inspiration to revamp my dining room table chairs. My question: how is the fabric on the back of the chair back cushion attached? Is it strategically stapled? Glued? My chairs have horizontal slats, so I’m thinking the slats at the top and bottom will hide any staples. As for the sides, maybe a strip of hot glue? Thanks for any advice!
I placed just a couple tacks on the side of the plywood to hold the fabric in place, and as I inserted the plywood, it holds pretty snugly and pulls that fabric taut. and of course the slats on the back continue to hold it in place. Then the finishing nails go through the wooden slats into the plywood piece to secure it even further, and decorative tack nails cover up the nail heads.
Wow. That is just beautiful
Did you mail the new tufted back to the chair from the back?
Yes, I used screws from the back.
What an ingenious chair idea! Your blog is amazing! One question that I’m curious about: what made you use nails to place the new tufted back onto the chair instead of screws? Wouldn’t the screws have secured the back into place a little better?
Thank you! Great question…screws would probably make it even more secure, but it would also twist the fabric going in and has the higher possibility of messing up your fabric backing.
Nice project. I think I would have stopped with the seat padding. That back looks a bit tricky.
Where did you buy the egg foam padding?
Thanks! I got a twin sized egg crate foam padding for $11 from Walmart.
Just ask your question and Keep your judgments to yourself maybe?
I just can’t get over the before and after! Such a great job!! Pinned!
You are a seriously super fab chica! And a true DIY queen. May I ask if its possible going forward to include a list of all materials used at the top or bottom of post? Personally I like to be able to have easy to reference shopping / checklist.
Thank you! You are super sweet! Whenever possible, I will try to add a materials list…occasionally I find local items and thrifted items, but other than those… 😉
Just beautiful and such an amazing idea! I saw you in an article in the March 2016 BH&G mag and I was so impressed that on the same day I came to check out your website. Your DIY inspires me, thank you!
Thank you so much! You are so sweet, and I’m so happy you stopped by!
You are amazing!! Maybe I will see you at the home show this weekend.. and Ill be sure to vote for your chair!!