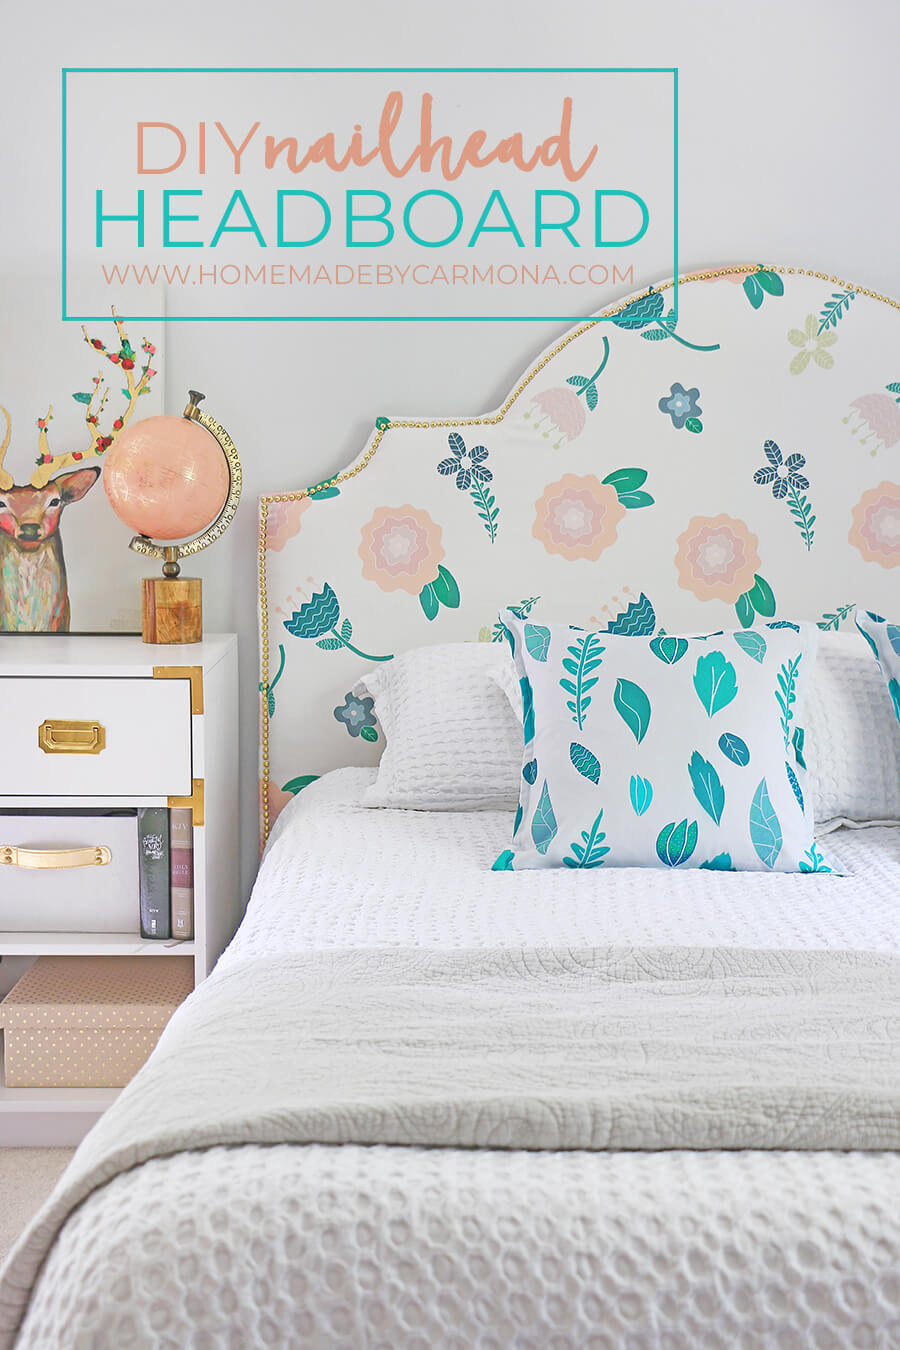
Can’t find the perfect nailhead headboard that fits your style or budget? We’ve got the perfect solution!
Learn how to custom make your own nailhead headboard (at a fraction of the cost).
*Sponsored by our friends at Spoonflower. Woop woop!
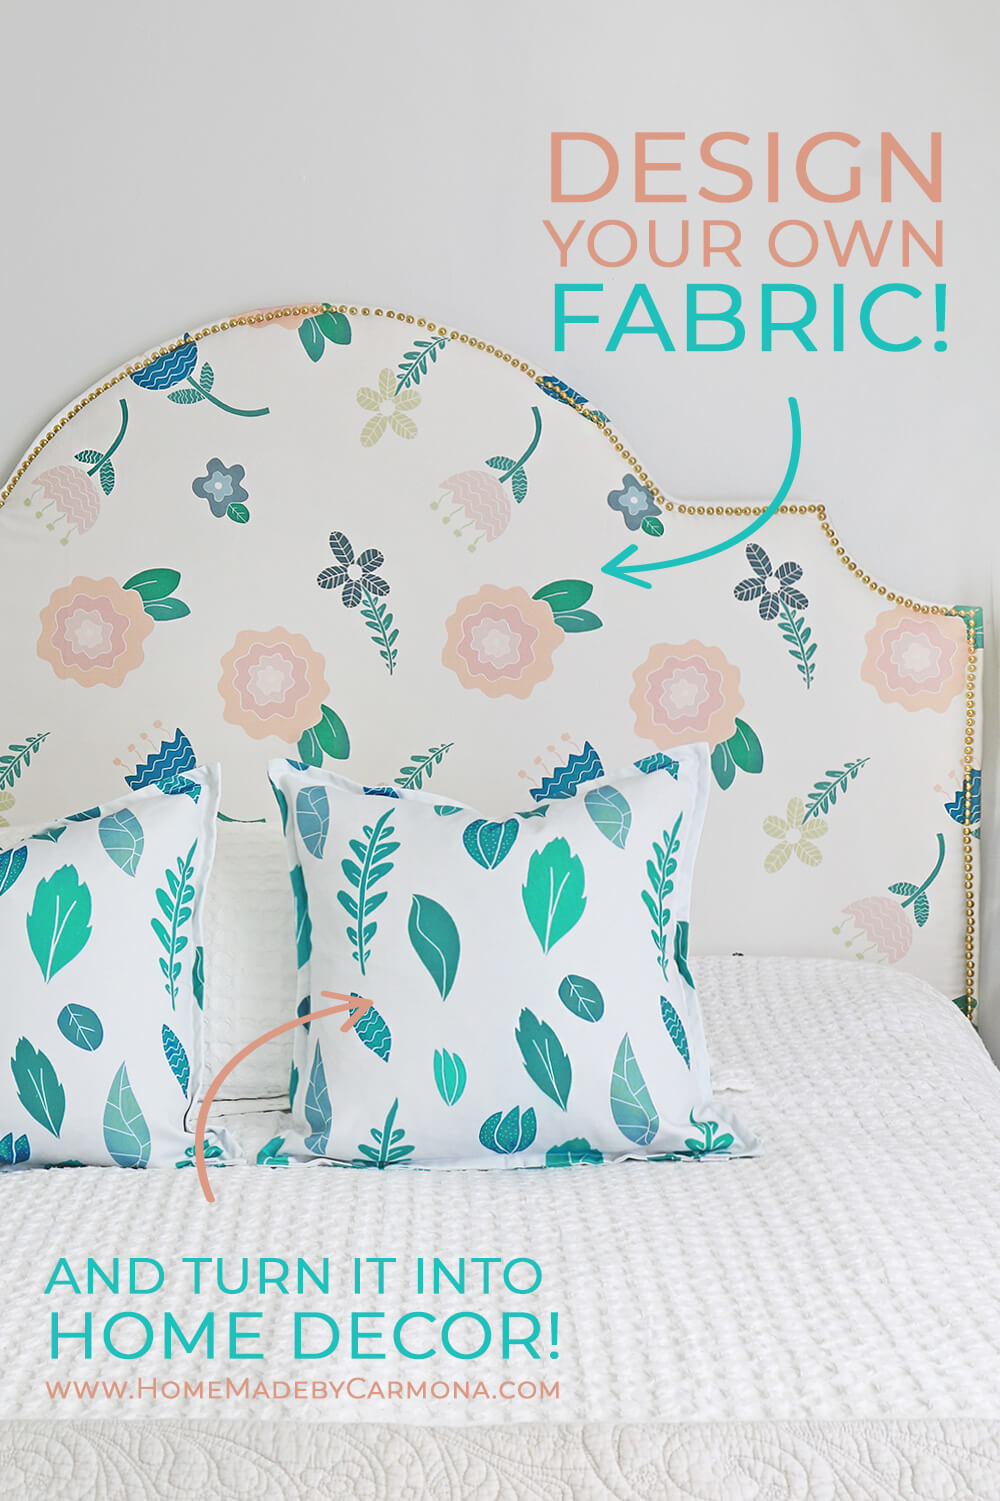
I’m feeling all the feels about how awesome it is to create a truly custom headboard! Did you ever imagine you could customize the fabric, the headboard shape, the size, the height…every little detail? I knew I could “build” a headboard (although, let’s be honest, this barely counts as a build). I didn’t know you could literally design your own fabric, and even have throw pillows made in a custom design!
A Truly Custom Nailhead Headboard
At Spoonflower you can choose from hundreds of stylish and trendy fabric selections, OR you can create your own design. They will turn into the fabric type of choice for you! How awesome is that?
Wait, that’s not all. You can sell your own design, turn it into wallpaper, or even gift wrap. Guys. guys. I can’t even. Why did I not hear about this before?
‘Whimsy Girl’ Design Collection
I love that my 12-year-old daughter Priya got to have complete creative control and design fabric for her own headboard and pillows. It is her bedroom, why shouldn’t it reflect her style and taste?
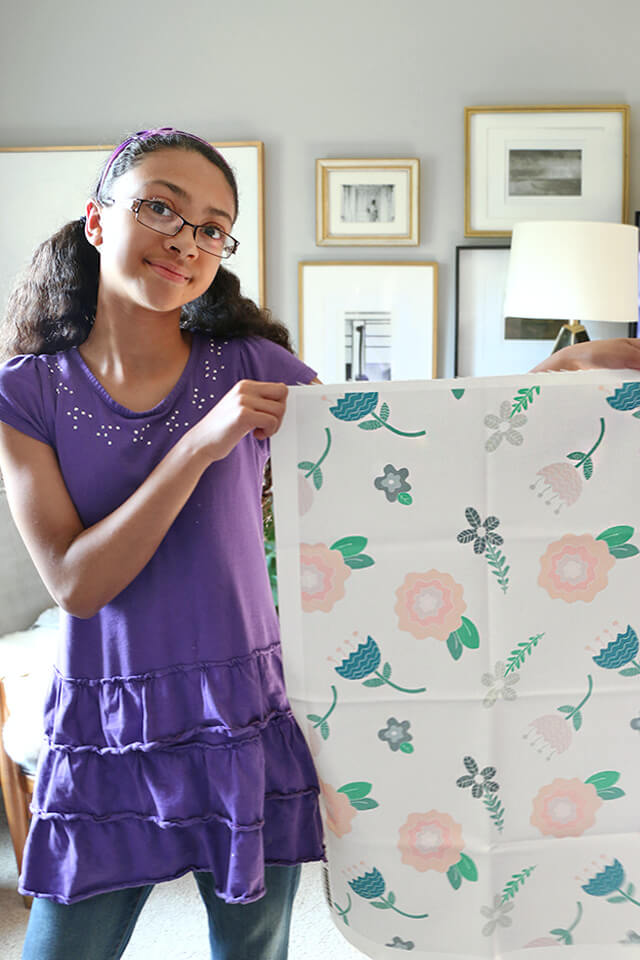
Priya is my little artist, so she was thrilled to be able design her own floral fabric and watch it become a headboard. Then via Spoonflower we ordered throw pillows made from one of her leaf designs.
If you can let your child turn their drawings into throw pillows, wall paper, gift wrap, or a headboard…definitely go for it!
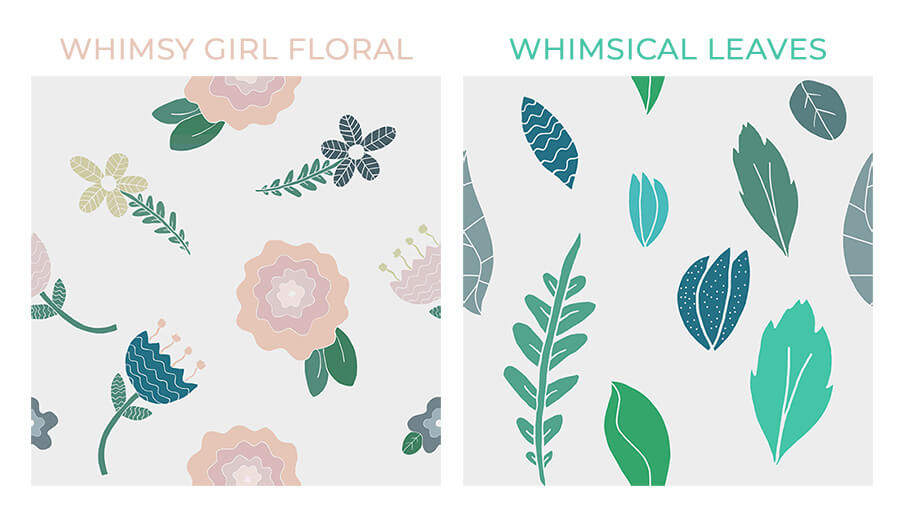
OR you can buy Priya’s Whimsy Girl collection, and the percentage she receives from the sale via Spoonflower will go into her college fund (she plans to become an artist!).
Shop Priya’s prints here: Whimsy Girl Floral and Whimsical Leaves

How To Make Your Own Headboard
This tutorial really is super simple. The video shared at the beginning of this post gives you the how-to, but for those of you who prefer to read than watch, never fear! Instructions are below!
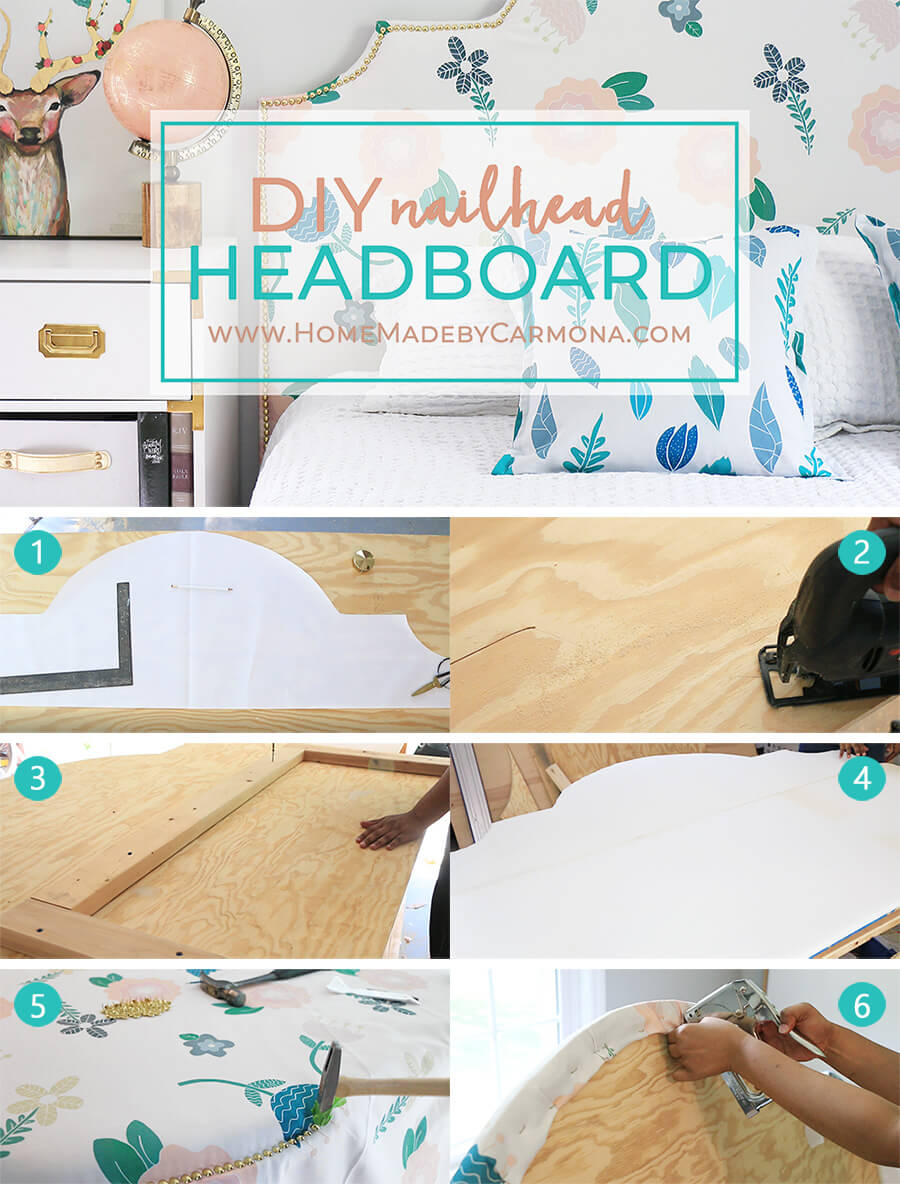
- Determine Headboard Shape: Use a roll of paper (kraft paper or gift wrap will do) cut to the desired width you want your headboard to be. Fold in half, and trace the half shape you want for the headboard. Cut it out, open it on your plywood, and use painters tape to hold it in place. Trace the shape onto the plywood.
- Cut Plywood: use a jig saw to cut the shape you have just traced onto your plywood. Sand any overly rough edges.
- Add Legs To Give Height (Optional): Add two 2×4’s (or the thinner 1×4’s) the same distance from the edges of your headboard (5 inches recommended). Simply screw on the legs to the plywood. It is recommended you add a support across the top or middle between those two legs.
- Cut Foam To Size: Cut out 3/4″ upholstery foam to the shape of the plywood. Be sure to cover the full plywood front (remember, the back has legs). Place fabric over top, center, and smooth it out.
- Nail on Upholstery Tacks: Nail upholstery tacks around the edge of your headboard starting from the top and working outward. Don’t forget to pull the fabric taut as you go. You can nail tacks right on the edge, or leave a 1/2″ space. Check the “Tack Tip” below for details on this step.
- Staple Fabric Edges: Pull the fabric tight around to the back of the headboard and staple in place. You may need to trim fabric pieces in order to shape around curved areas. Optionally add a backing.
Super Secret Nailhead Trick
You could use a nailhead strip (as long as your curves aren’t too curvey). But I think applying individual nailheads looks much more chic than the faux strip version.
The Problem: Because you are hammering nailhead tacks into plywood, this harder wood tends to leave you with more bent tacks than straight ones. They also don’t drive in straight, resulting in a crooked line. I have a nifty little trick to help you achieve a beautiful and perfectly curved or straight line.
The Solution: Think of this solution as similar to pre-drilling holes to place your tacks in. You can’t actually use a drill bit if your fabric has a tight weave…it will just spin and get caught in the drill bit. Instead hammer nails to create holes half the depth of the tack, then pull the nail out. Now you can insert the tack into the hole you just made and drive it the rest of the way in.
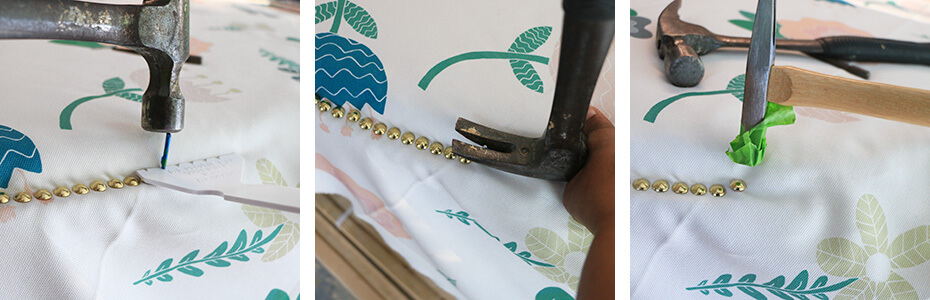
Use a nailhead spacer to get those pre-hammered holes lined up just right. You’ll want to use a a finishing nail (the thinnest one you get, and still easily hold to hammer). To get the depth right without guessing each time, use a little piece of painters tape around the nail as a “stop” point, or mark the nail with a sharpie. While you will use a regular hammer to drive the nails, but a special tack hammer to drive the tacks. Keep your tacks from being scratched by layering painters tape on the end of the tack hammer. When it gets bare, just slap on even more.
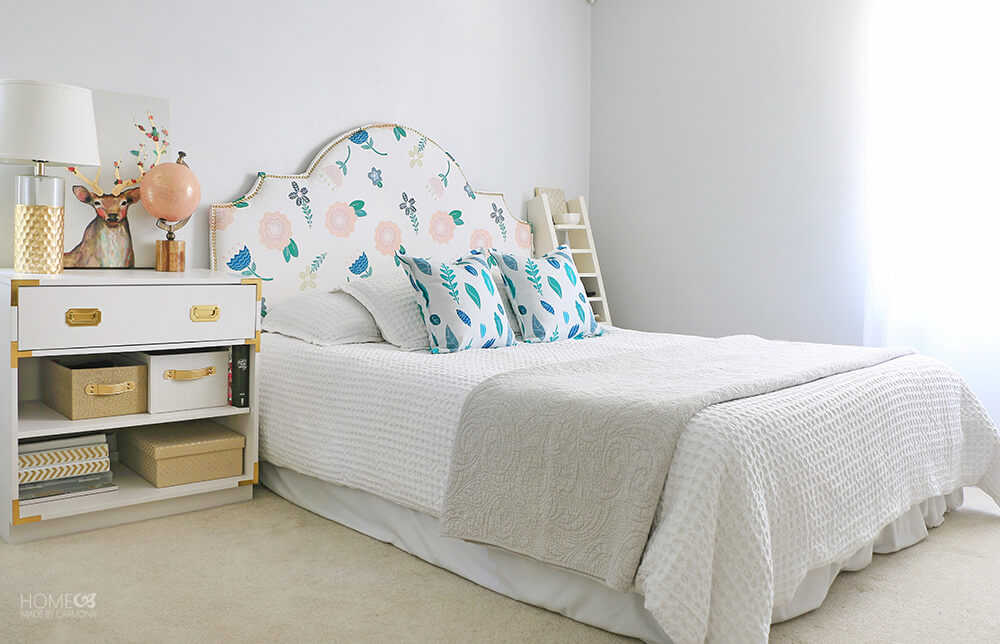
The Final Results + Materials
Priya is loving her nailhead headboard! If you make your own, please be sure to share with us on Facebook. Also tag Home Made by Carmona and Spoonflower so we can see your handiwork.
Wondering how much of everything you’ll need? Or where I got my tools? Here is what you’ll need:

- Upholstery fabric (how many yards? You’ll need to measure…a yard is 36 inches)
- Priya’s fabric: Whimsy Girl Floral or Whimsical Leaves in Cypress Cotton Canvas
- 6″ Nailhead spacer
- Magnetic tack hammer
- 100 pcs upholstery nail tacks (I used three of these packages for a queen sized bed, with tacks going 3/4 way down the sides)
- 1″ Project foam roll (I used two of these rolls for a queen)
- ALT: 1″ Project foam/mattress topper (this is a better solution than the one I bought. You only need one, and it can be used for King sized headboards)(FYI foam doesn’t need to go to the very bottom of the headboard)
Both Priya and I have plans to continue creating gorgeous fabric designs, so follow our Spoonflower shop here for the latest and greatest!
For other great designers and product, follow Spoonflower on Instagram, Facebook, Pinterest, and check out their blog here.
*Special thanks to Spoonflower for sponsoring this post and making this awesome project possible! All opinions, projects, and images are that of Home Made by Carmona.


RELATED POSTS: How to make a DIY diamond tufted headboard


Beautiful! You must be so proud of your daughter. What a fun project to do together! I love her comforter too- what brand is it?
Thank you! I am totally a proud mama. 🙂 It is actually a duvet cover (which is perfect when it goes on a kiddoe’s bed). It was a Home Goods find.
this is beautiful, thanks
I love the handmade look! Love the imperfection of individual nailheads!
Thanks! I’m a fan of handmade as well!