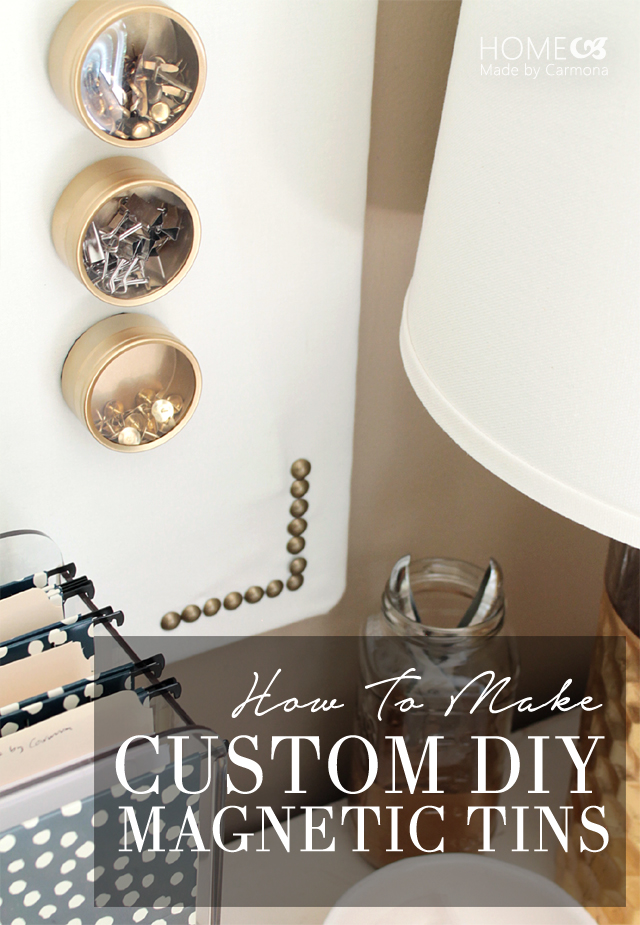
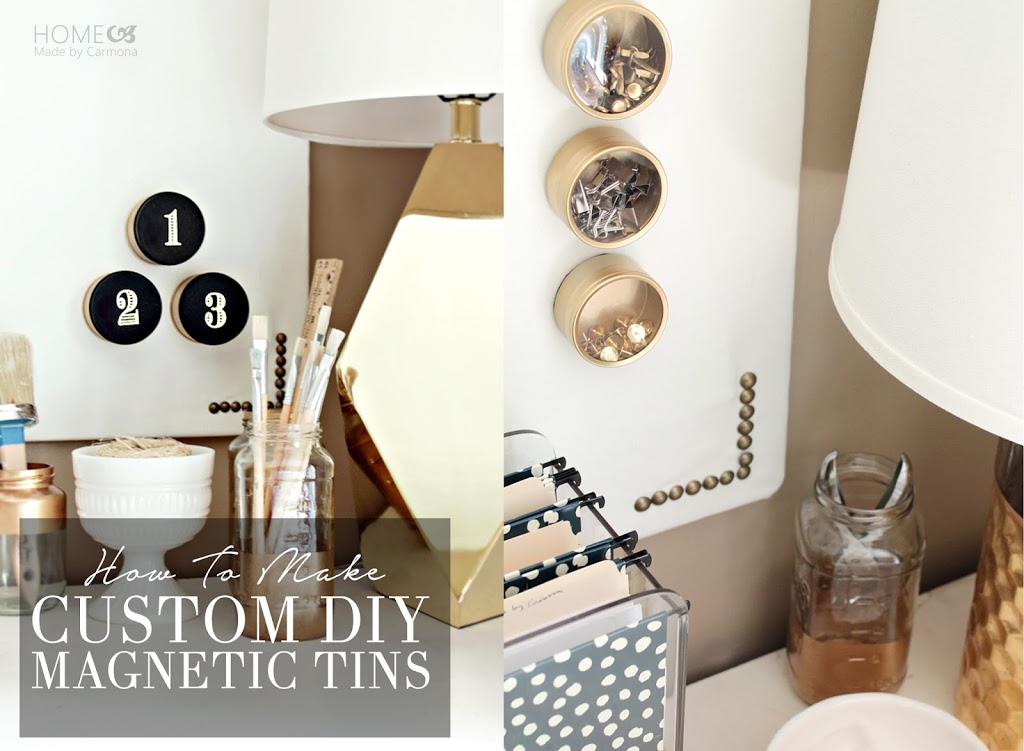
Looking for stylish DIY magnetic tins for storing little office knick-knacks or craft items, but can’t quite find the color, shape, and style you are looking for? Make your own!
These custom tins cost about a $1 each, and can be made to perfectly suit your space.
Supplies You’ll Need:
(Affiliate Links Below)
- Party favor tins: I found mine on sale at a party store at $5 for a 10 pk.
- OR Unpainted metal tins: Found at any craft store, usually under $1 each.
- OR Small plastic containers: Found at the dollar or craft stores for 50 cents to $1 each.
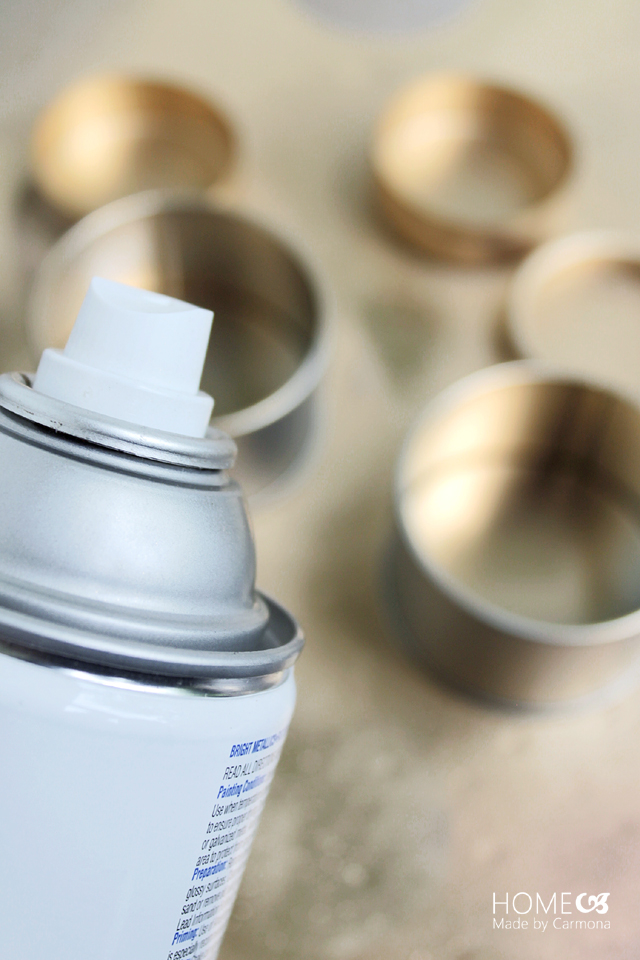
- High gloss spray paint: In your favorite colors, plus Clear spray paint for sealing.
- Magnetic adhesive sheets: Look for 8.5 x 11″ sheets, 26mil thick for lightweight use, or round magnetic dots for heavy duty use.

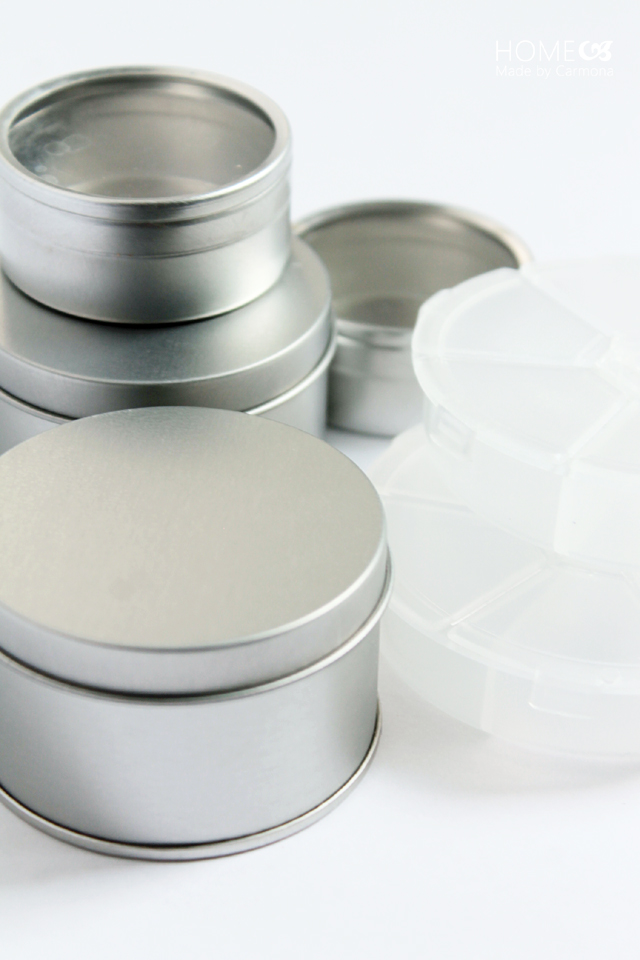
Don’t limit yourself to tins, you can use any small storage container.
1. Spray Paint Tins To Your Color Of Choice
Remove the clear plastic window inserts (if applicable). Spray paint the tins with the lid still on…this ensures the inside lip isn’t painted so it will continue to open and close easily. Before each painting session clear your spray can’s nozzle by spraying away from your tins first. Allow it to dry completely between coats, and finish with a clear protective coat of paint.
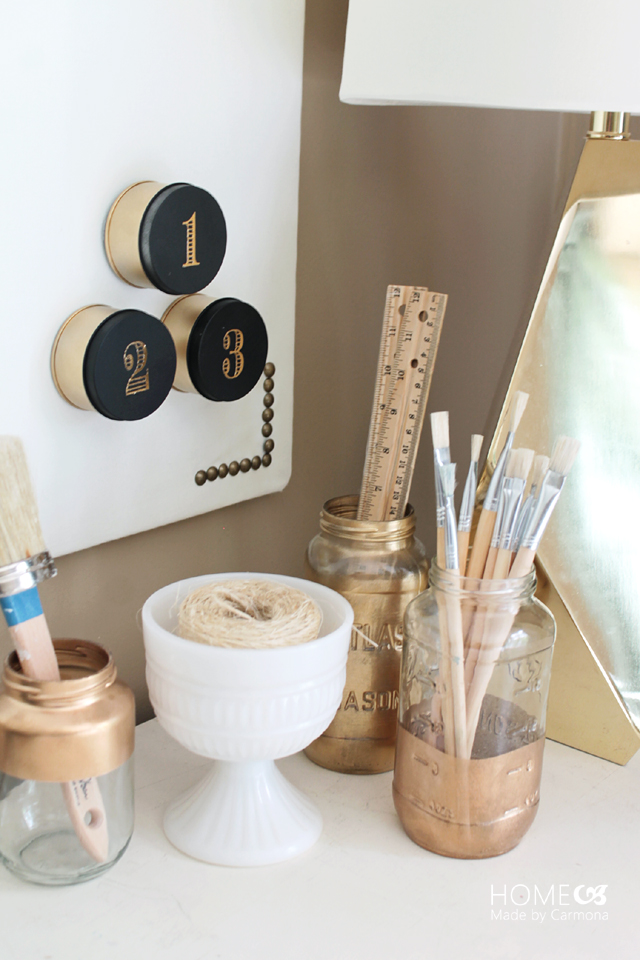
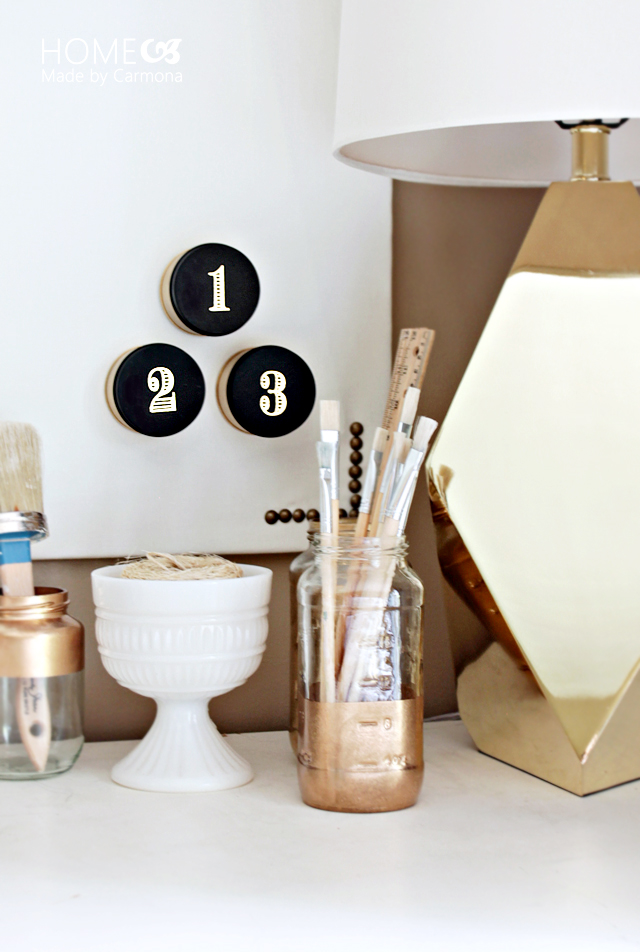
2. Zhush It Up To Bring On The Wow Factor!
Make it your own with other fun customizations. Get creative with your designs!
Use rub-on transfers, creating spray painted designs, jazz it up with washi tape, and more! You are only limited by your imagination.
For these metal tins I spray painted the base gold, the cap black, and labeled them with rub-on transfer numbers.
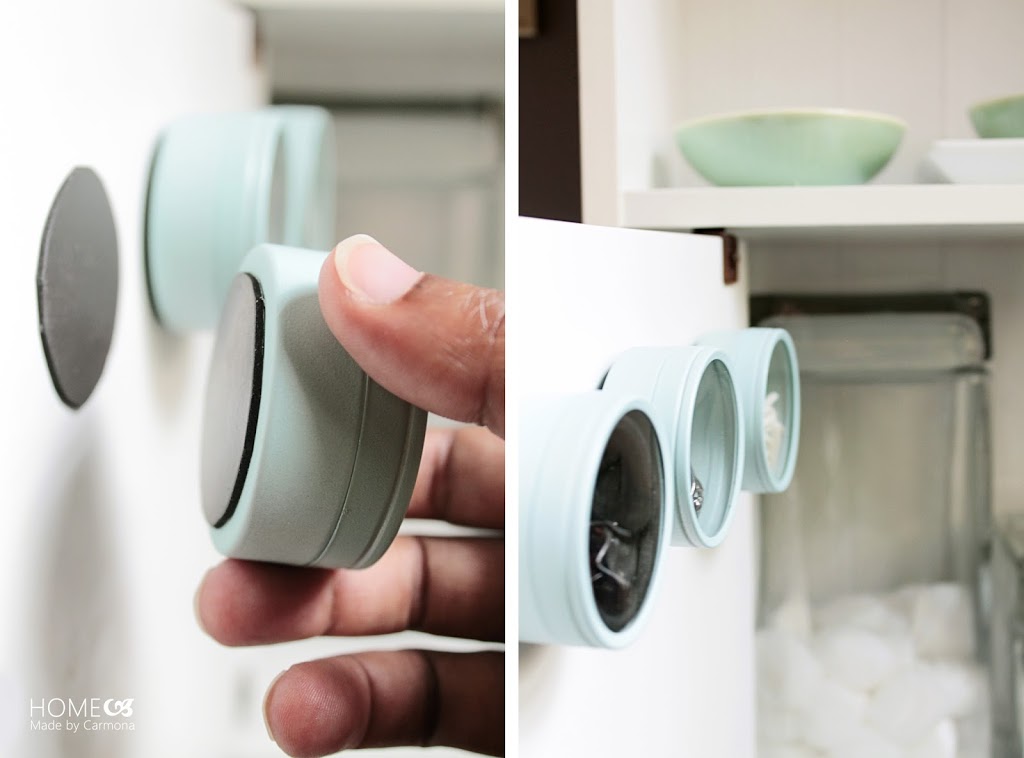
3. Attach Magnets
For Lightweight Tins:
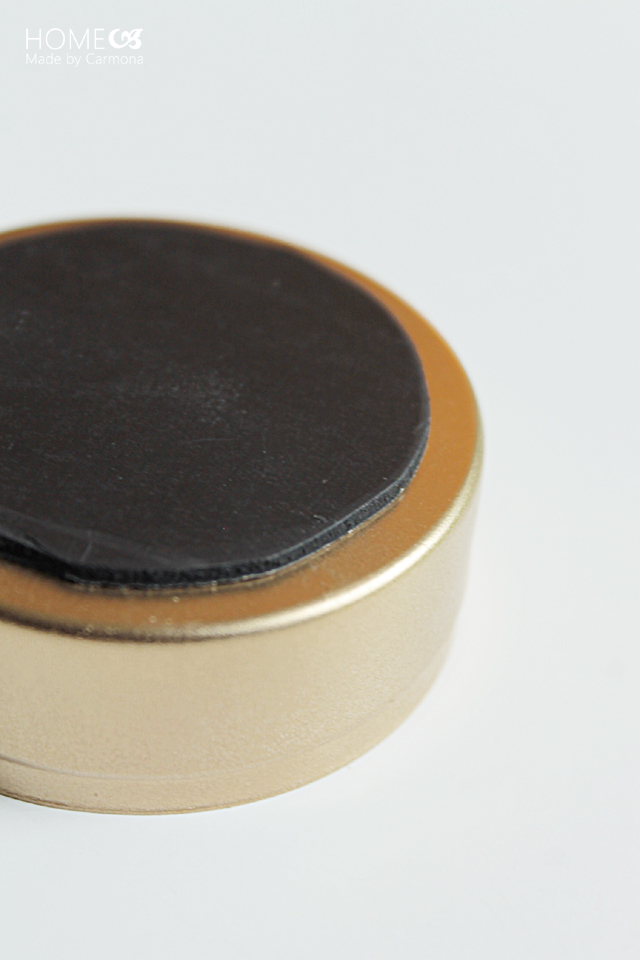
Use 8.5″ x 11″ 26 mil magnetic sheets. Choose sheets that have an adhesive backing that you can easily peel and stick to your tin.
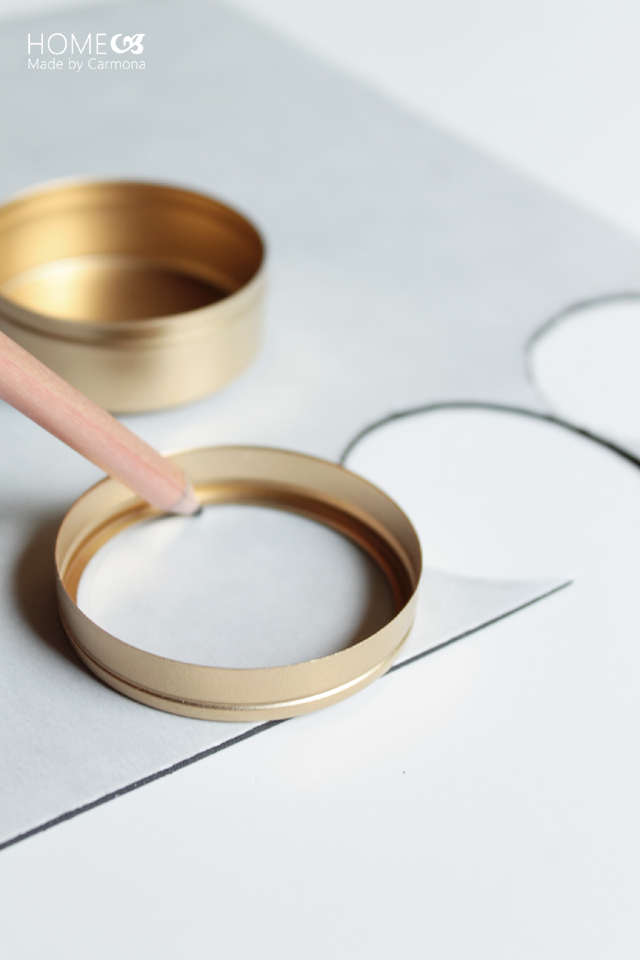
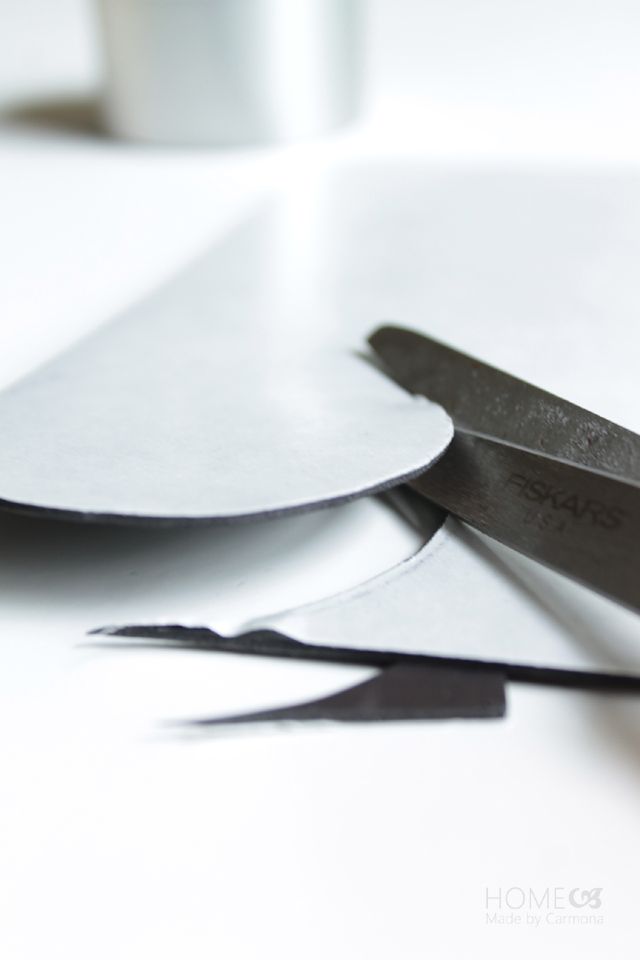
Trace and cut the circle (or other shape) to cover the base of your tin / container. Make the area of circle you are cutting just slightly smaller than the area of the base of the tin. You want to use as much surface spaces as possible for stronger adhesion. Then simply peel the backing and adhere to your tin!
For heavier larger tins / cannisters:
Use heavy duty magnetic rounds… They are thicker, but also more secure for slightly heavier items. However the 26mil sheets will be more than adequate for most items like paper clips, hair bands, and more.
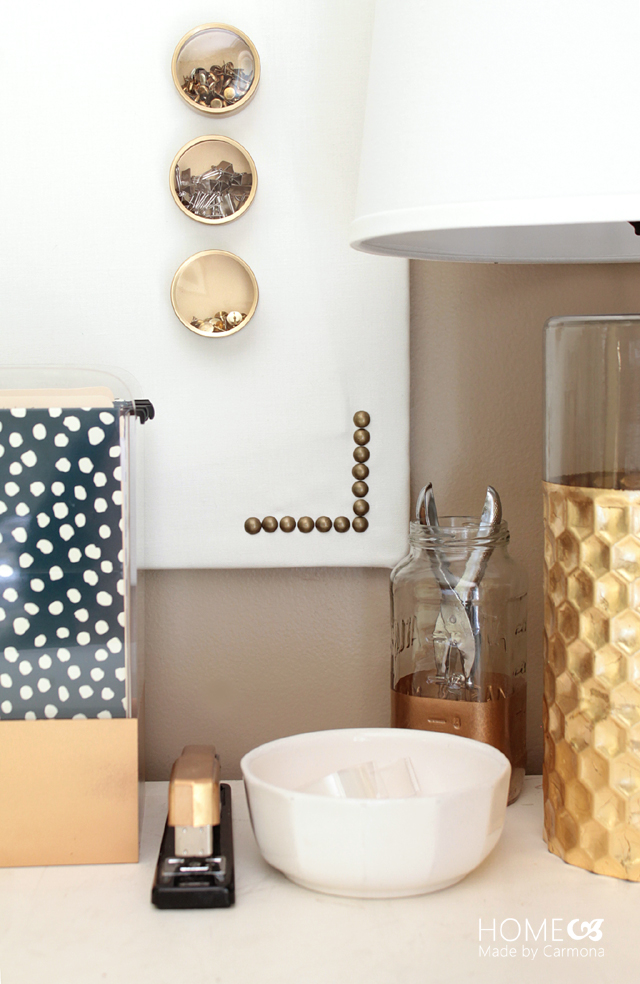
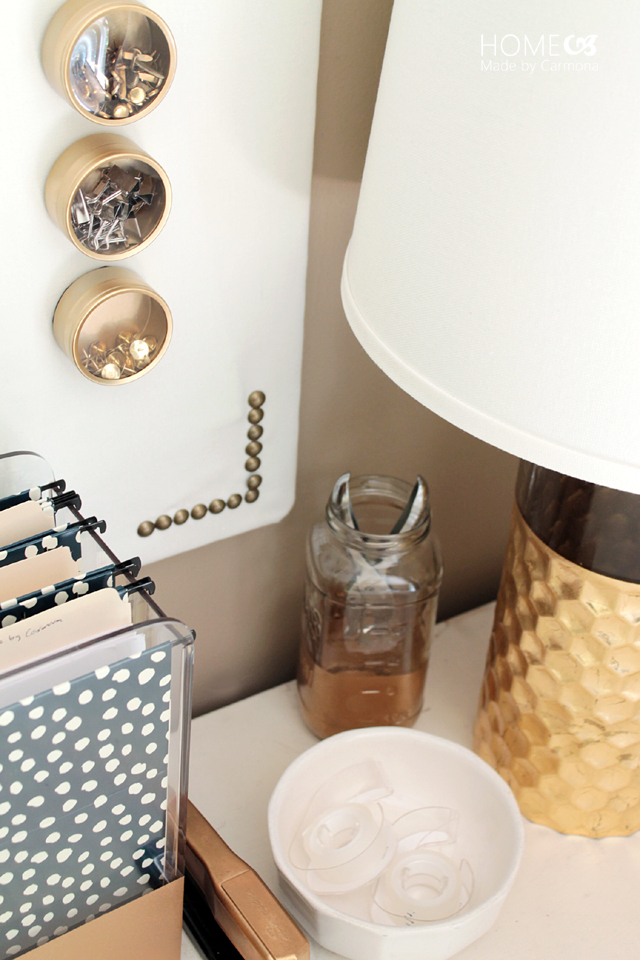
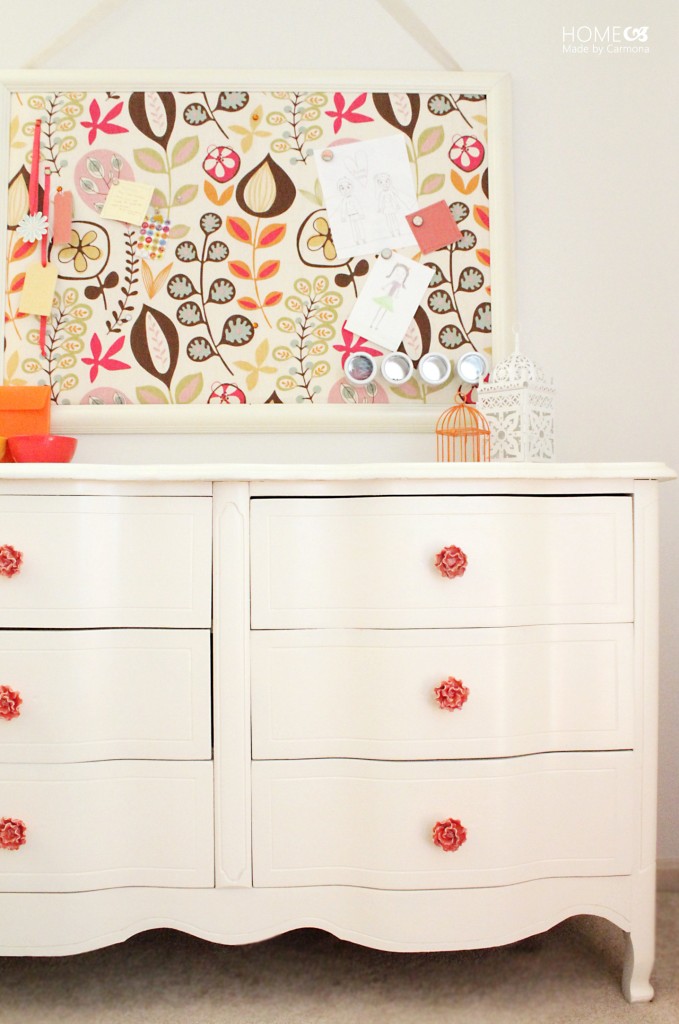
Use With A Magnetic Board OR Place Anywhere!
Whatever your colors of choice, whatever your room’s decor, you’ll love having storage to match! Oh, and a little trick for the rooms without a magnetic board…cut extra circles to adhere to the surface you want to store your tins. Neat huh?
Another clever solution is to place a magnetic strip behind the fabric on your DIY covered pinboard.
Use It In A Variety Of Spaces
These are a great way to save space, go vertical with storage, and get organized. I’ve created quite a few magnetic container solutions for various spaces in my home.
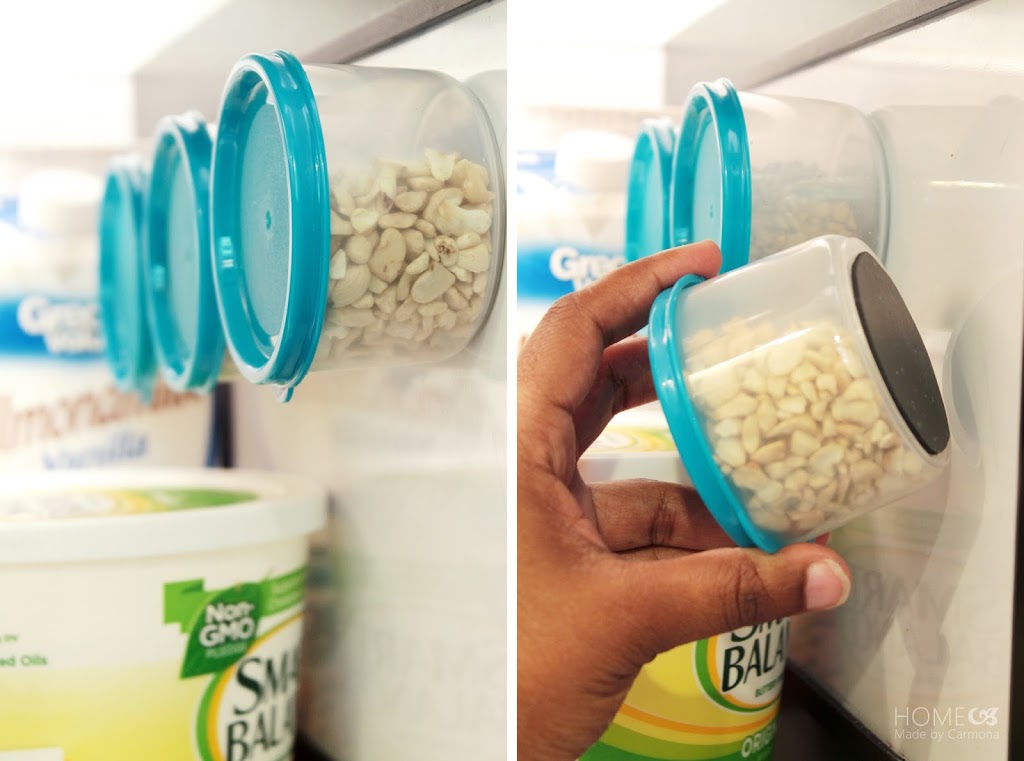
Try placing it in any of these spaces:
- Kitchen Refrigerator: place a magnetic strip on the inside walls of the refrigerator
- Kitchen Pantry / Cabinets: store
- Craft Room: great for organizing beads, safety pins, and all your small items
- Bathroom: store items like nail clippers, hair clips, bobby pins, etc.
- Office Supplies: organize rubber bands, paper clips, etc.
- Wardrobe Closet: keep jewelry, cufflinks, pins, and more!
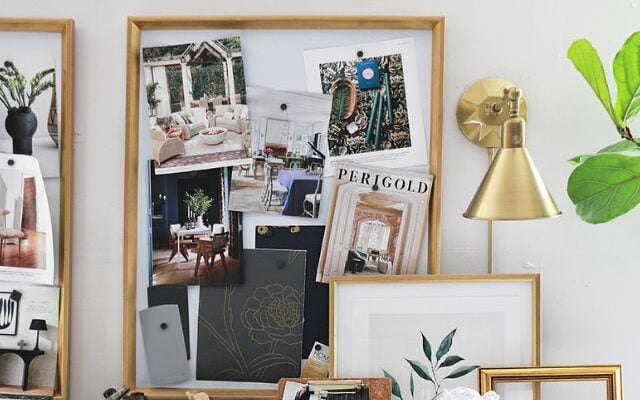
Like This? You’ll Love This…
Learn how to make a fabric covered magnetic board here. The best part of this magnetic board? It is half magnetic, half cork…perfect for your new magnetic tins!!
Or learn how to style a pin board using decorative push pins!


Love these! I am always on the hunt for great storage ideas for all those ‘little’ things.
Thanks for sharing,
Suzanne
Pieced Pastimes
Lovely project. My office are the same colors. I love!
Thank you!
These are so beautiful and functional, I LOVE how they turned out and your photos are amazing too!
Thank you Katie! Yeah, I’m one of those people who wants to be practical and organized, but isn’t too keen on the storage item if it isn’t also pretty. Lol! 😀
Wow, Ursula. These are gorgeous. What a great tutorial. I’m so glad you shared at Think and Make Thursday. Thanks!
I love it all!! So glam! Thanks for sharing at Think and Make Thursday 🙂
Thanks for hosting! 😉
I’m with Leigh Anne, I love this! I’ll be pinning it. Thanks for sharing on Think and Make Thursdays 🙂
Definitely loving this project Ursula! Thank you for linking up to the Pretty Preppy Party!
Thank you Sarah! Thank you for hosting!! 🙂
So chic & cute! Love all the gold!
I love these tins Ursula. Everything you do is so pretty. 🙂
Aw, thank you Kathy! That is so sweet of you to say!
OK, this is right up my alley! I am in the middle of creating a “cloffice” and obsessed with office supplies! Thanks for linking up to the Pretty Preppy Party! http://www.southernstateofmindblog.com/
Thank you Heather! I’m glad I was able to link up! Thank you for hosting.