Once upon a time there was a sad lonely door, and it was the ugly duckling of all the doors at the Habitat for Humanity ReStore. There was also a crazy DIY chick who loved to craft and do happy dances after every project (her husband and children often stared at her with heads cocked to the side, eye brows raised). She occasionally got carried away buying random things at amazingly low prices thinking, “this is longing to be something, but what?”. Then she met the ugly lonely warped door, and it was only $3 because it had been passed over time and time again. Much to the warped ugly door-lings delight, the crazy DIY chick happily picked that door up and declared “ugly door-ling, you are longing to be something, but what?”. Then the nice customer in the same aisle raised his eyebrows and slowly backed out of the aisle. 😀
[left]Yeah, ok, I occasionally alarm nice customers. And sometimes my inner DIY’er goes to war with my desire to be more minimal, then I find myself saving ugly duckling items from thrift stores and roadside trash cans. It might just ends up in my own trash can, but sometimes…well sometimes it pays off big time! So today I’m going to help you create your own tale of an ugly duckling door turning into a swan headboard. Ahem, a headboard. No swans attached…that would be just ugly (and I wouldn’t rescue that one).[/left]
[right][pullquote width=”250″ float=”left”]The crazy DIY chick happily picked that door up and declared “ugly door-ling, you are longing to be something, but what?”. Then the nice customer in the same aisle raised his eyebrows and slowly backed out of the aisle.[/pullquote][/right]


Materials
These materials all together only cost me $9.98… I got the nailhead trim at Joann’s with a 50% off coupon, the door for $3 from a ReStore, and the rest of the items are only a dollar or two (and you might already have some of them!).
- Extra large hollow door
- Batting
- Fiberfill (**money saving tip: buy 2 cheap pillows at Walmart for $2 each, and use the fluff!)
- Upholstery Nailhead trim strip
- Fabric of choice
Required Tools
- Staple gun
- Hammer
- Optional: (depending on door size: saw and screw driver)

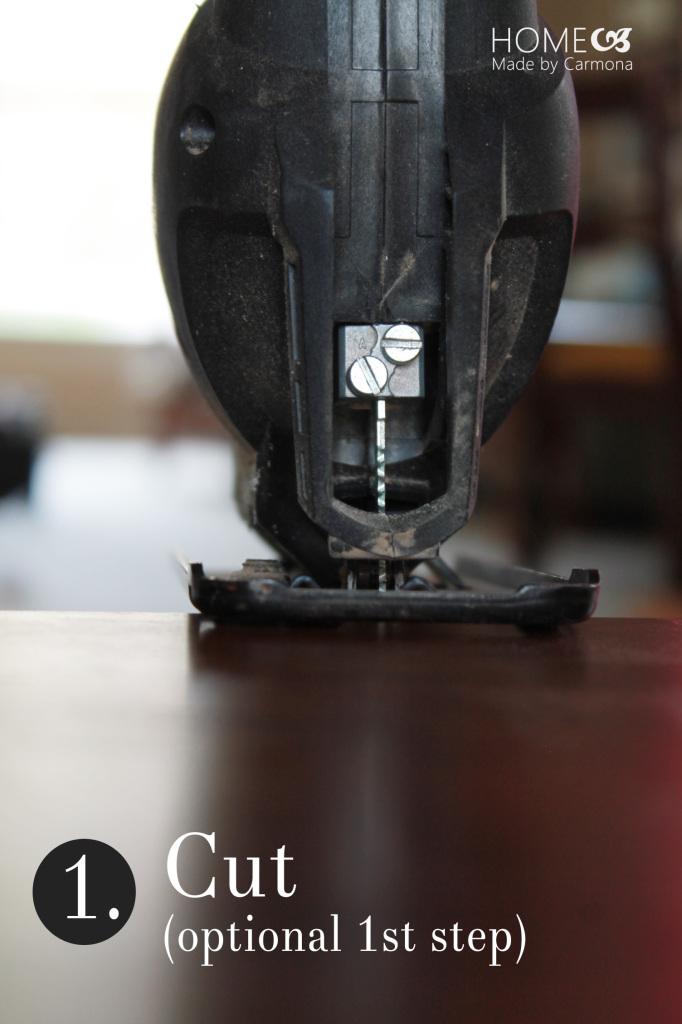
1. CUT
This is only necessary if the door isn’t long enough to span the length of your bed. Then I employ an extra wide door (as oppose to an extra long door), and cut it down the middle in order to stand the two pieces upright side-by-side. Now it will fit the length of the bed to make a proper headboard.
2. SECURE
This step is only necessary if you did step 1.
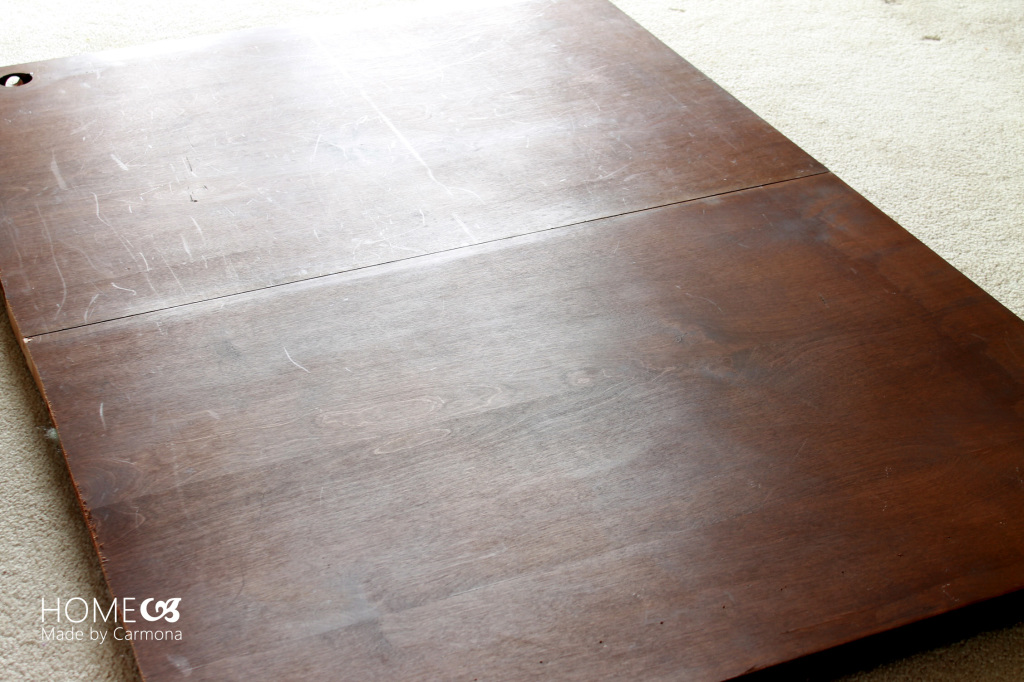
You could use normal connectors (a piece of wood, or metal connectors) to attach the two cut door pieces. Or if your door came with a few hinges attached like mine did, you could just use that! Waste not want not, my mother always said.
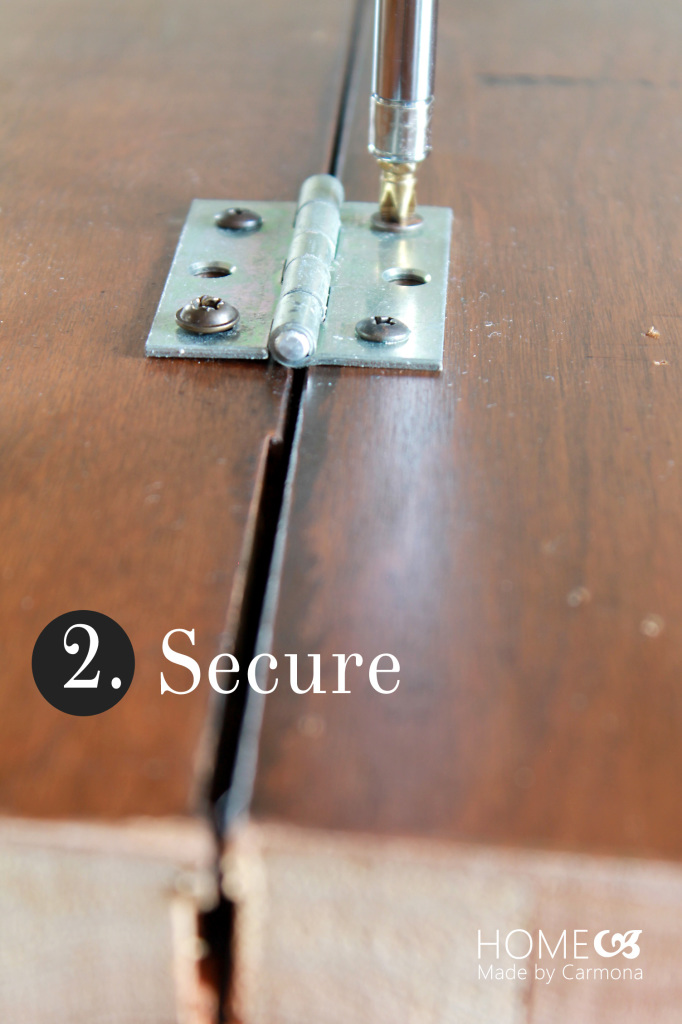
Be sure place the door so that the cut part will facing the floor, and the hole where the door knob was will be at the bottom. You’ll also want the hinge marks to face inward. Only have the prettiest parts of the door on the outer edges which will be left exposed. The entire front-middle section (even the top middle) will be covered by fabric.
Yep, we’re basically wrapping the middle portion of the door with batting, fiberfill, and fabric!
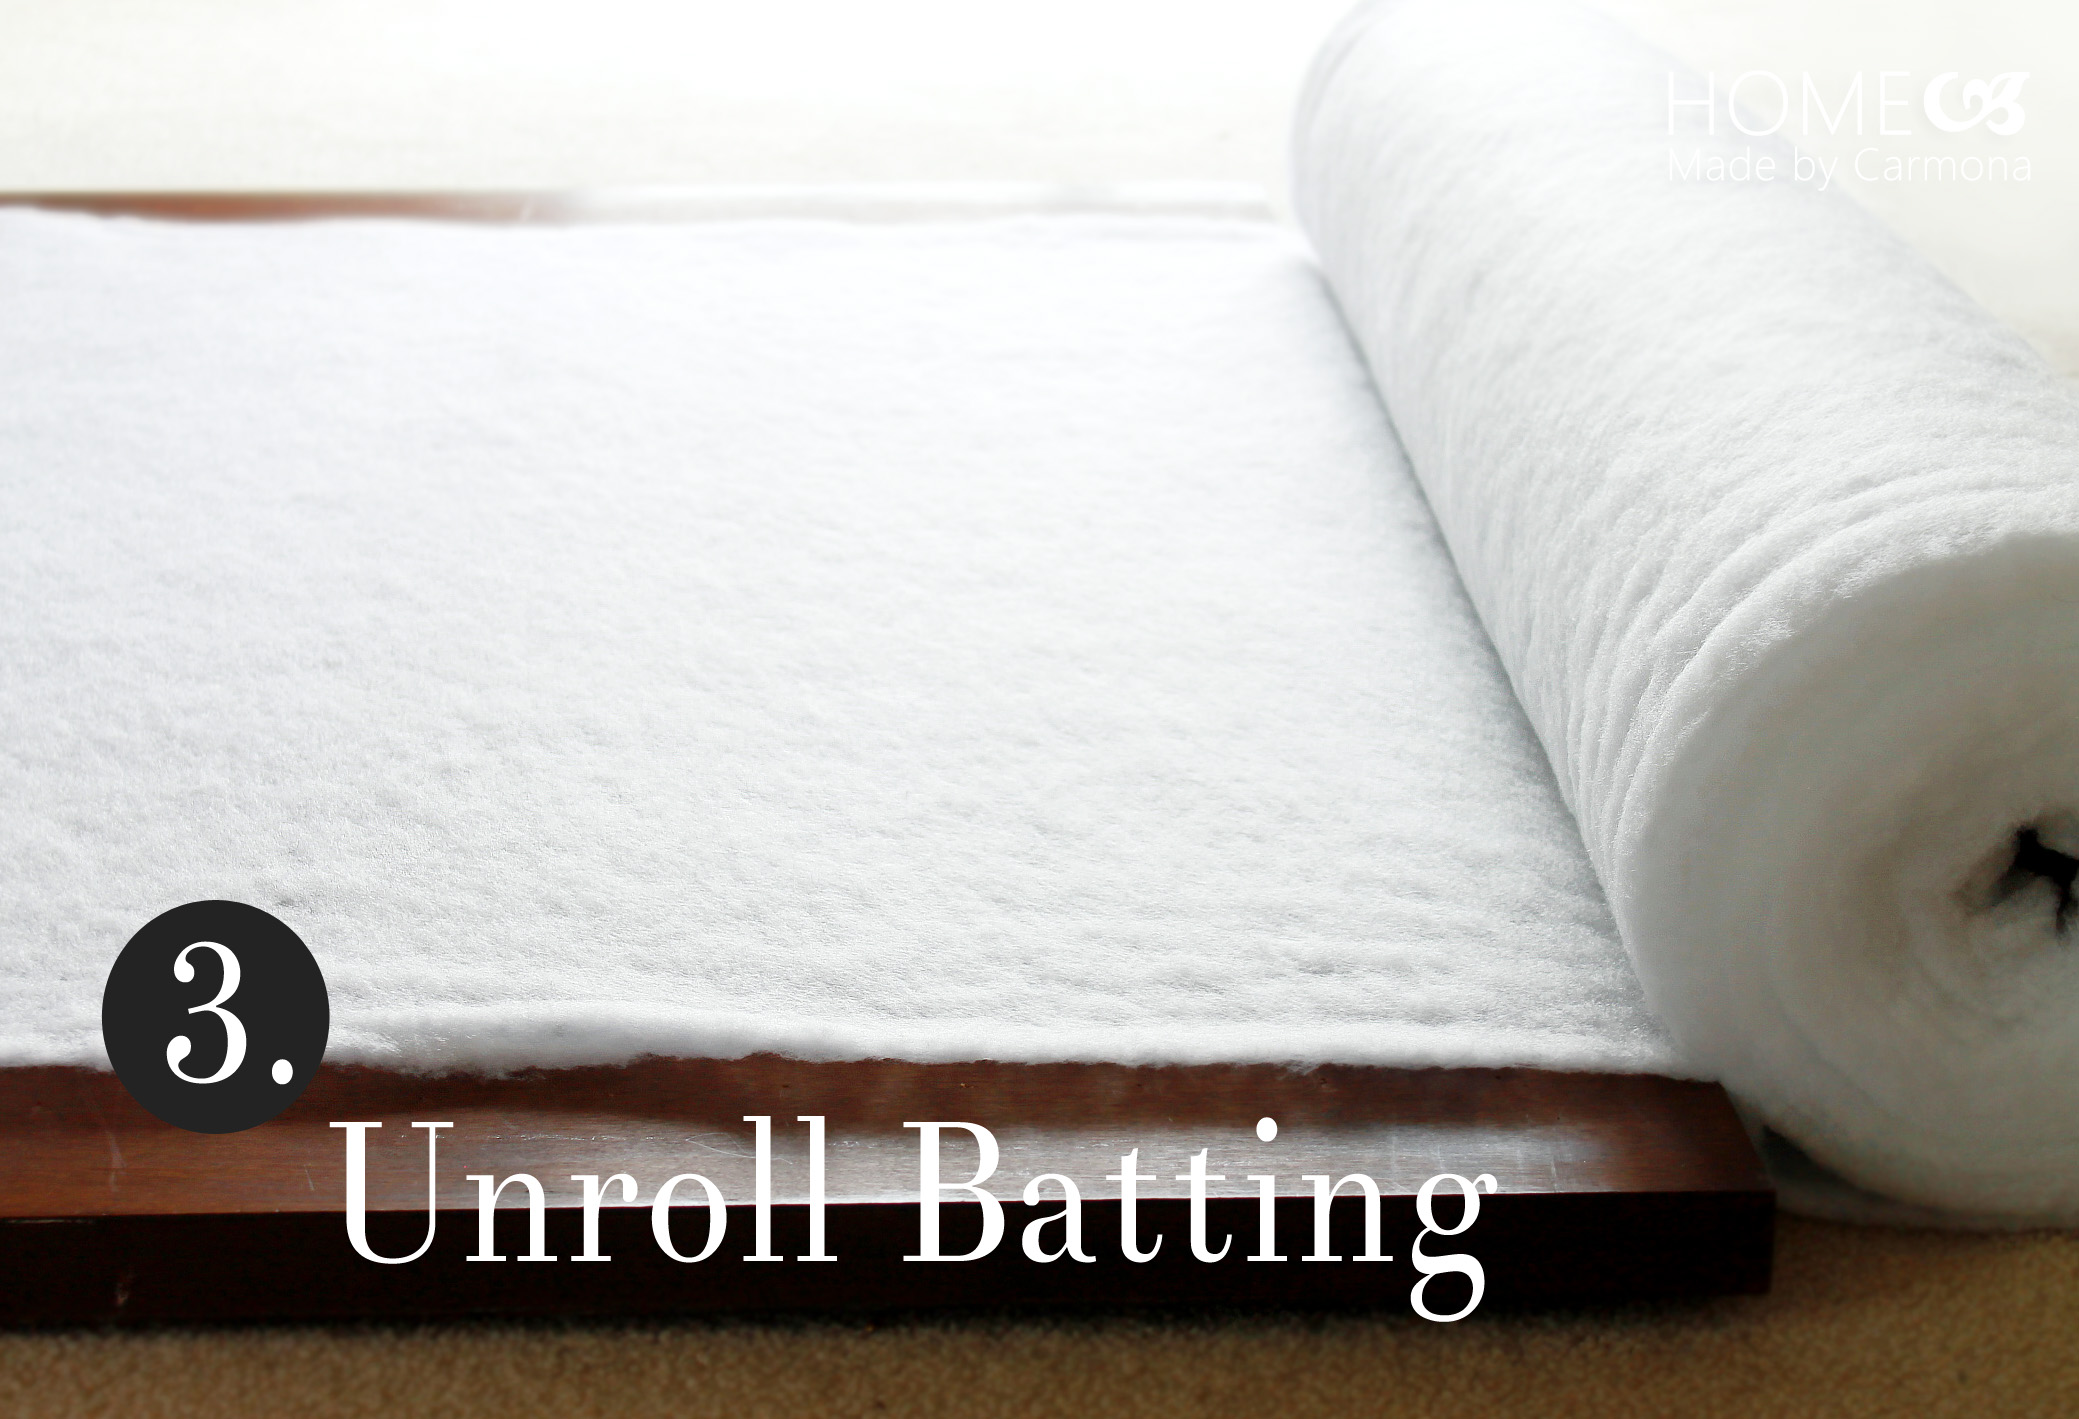
3. UNROLL BATTING
Unroll the batting across the mid section of your door-headboard, with wood showing on either vertical side (if necessary fold to create desired size). But don’t cut it yet! You’re going to fill it with fiberfill for more thickness, then roll it back over top to contain the fiberfill. This is a nifty little trick for a wonderfully soft headboard, the inexpensive way!
4. WRAP FIBERFILL
Think of it like a taco. Well, a taco shell made out of batting and filled with fiberfill. Hmm, that just killed my appetite for a taco. You’ll pull the batting back up to the top, then cut it up at the top of the headboard.

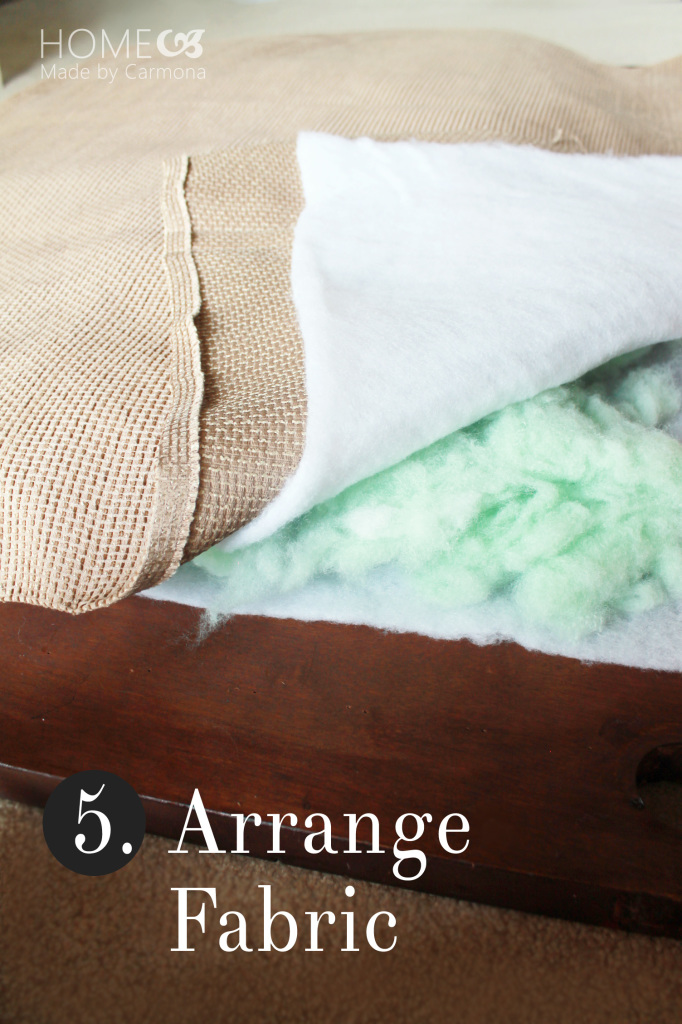
5. ARRANGE THE FABRIC
Now you’ll place your fabric of choice on top of the batting/fiberfill taco so that it overlaps the batting slightly (by half an inch) on the sides, and overlaps the top and bottom by at least 6 inches. You can cut the fabric to size right there on the door if you need to, just remember that you need extra to fold under so no raw edges are exposed… more is better than too little. Also remember to leave the wood exposed on the two vertical headboard sides. Tuck raw fabric edges under…and if you like, iron them down (right there on the headboard) to make a nice straight and crisp fold. Once everything is straightened and arranged as you like it you can move on to the next step, stapling it in place.
6. STAPLE
Now start on one side, and vertically staple the fabric down to the door in approximately 6 inch increments. The upholstery tack strip will cover your staples, so keep it in a consistently straight line. You can decide whether you want it right on the edge of the fabric, or whether to allow a little allowance. I chose to staple it leaving about half an inch of fabric.
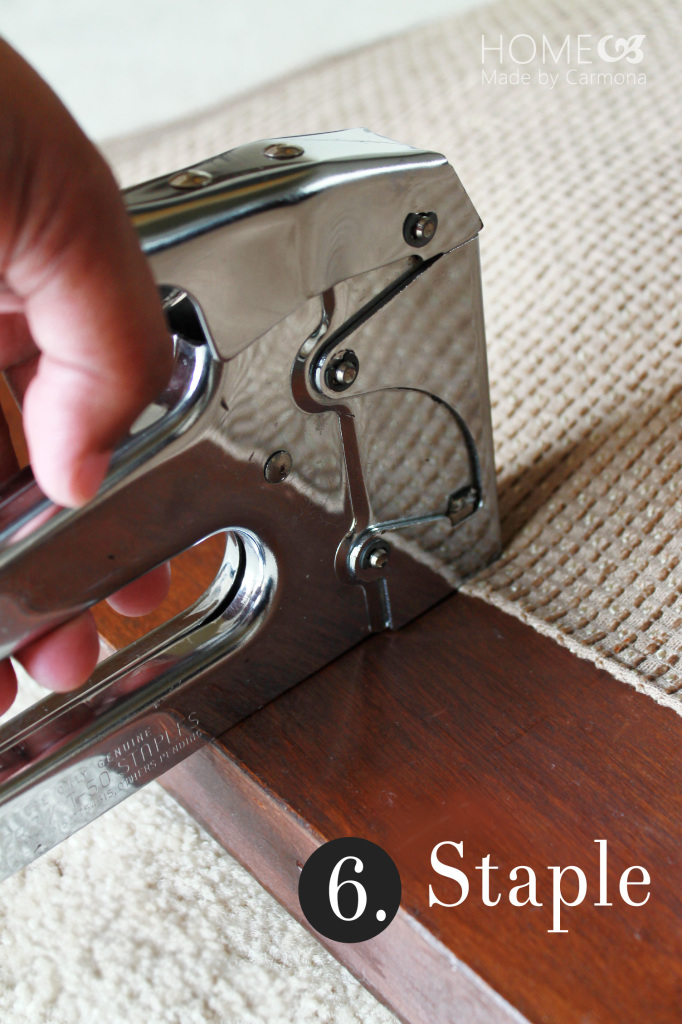
Staple both front vertical sides, then flip it over so you can prepare the top and bottom of the headboard. Pull the overlapped fabric for the top and bottom taut in the back. Again, rather than leaving raw edges, it is just better to fold the raw edges under, THEN staple. This side will face the wall of course, is no one will see it.
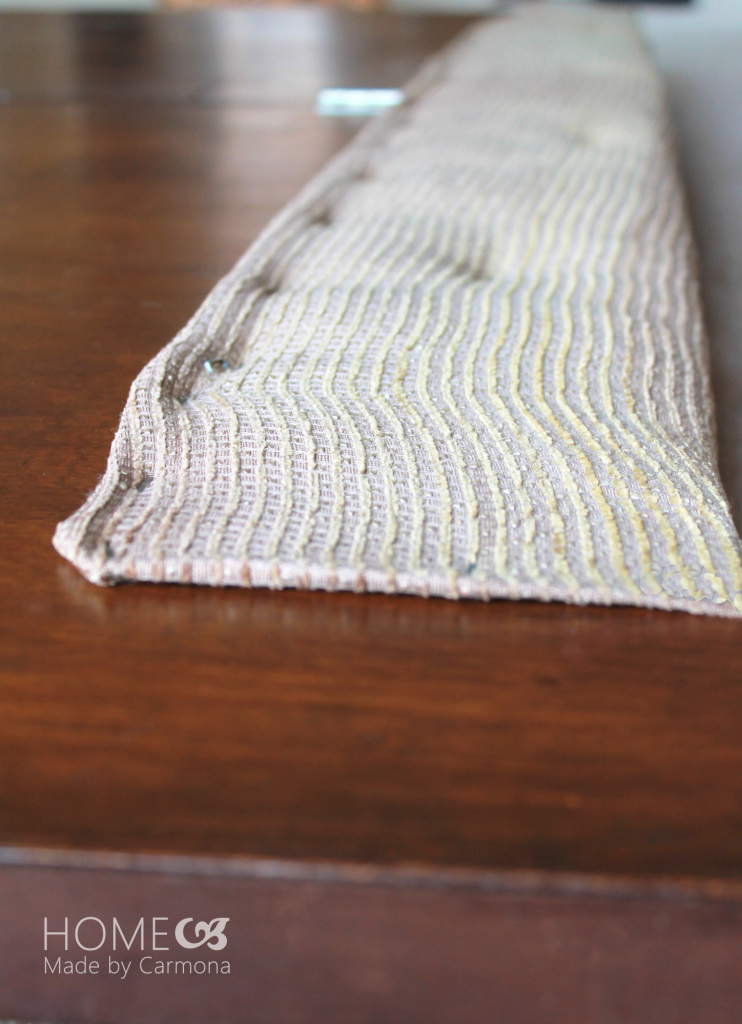
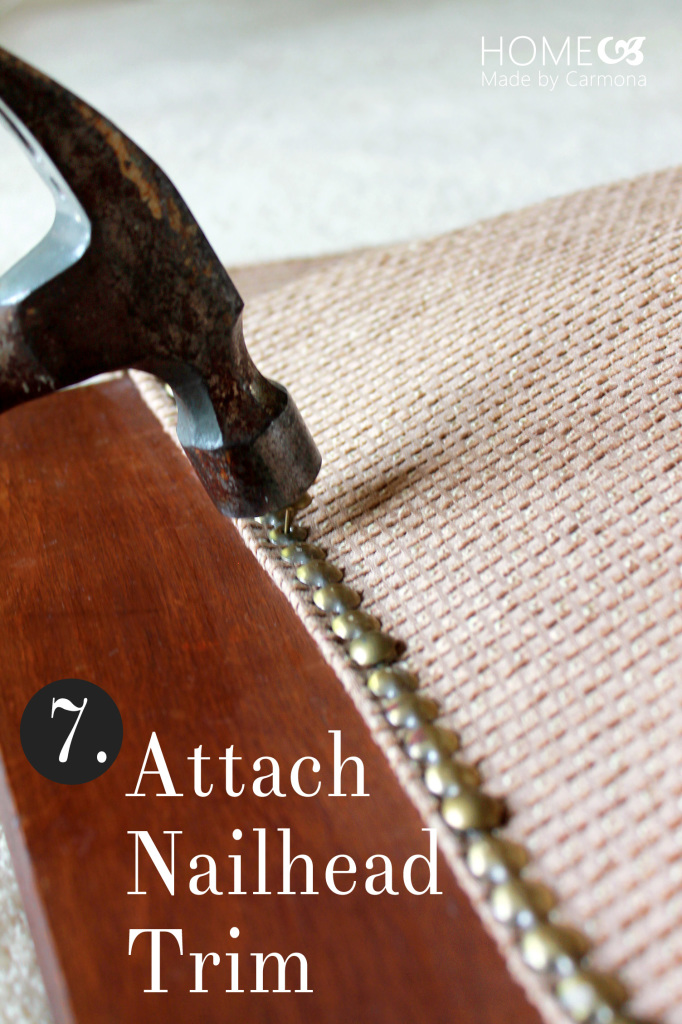
7. ATTACH UPHOLSTERY NAILHEAD STRIP
You could certainly have chosen individual nail head upholstery tacks, but the nailhead strip makes life SO much easier, and keeps it straight. That being said, I learned that not all upholstery nailhead strips are created equal. One I bought had a rust on it and had to be returned, the next one I noticed that the tacks didn’t match the strip precisely, so you may decide to just go with individual nailheads, if you do you can forgo the staples and jump straight to the tacks. If you use the strip, make sure you place it with a little overlap so it can be tucked over the top to the backside of the headboard.
Be sure to place the upholstery nailhead strip to line up perfectly straight, then place one tack to hold the top in place, and skip down to the middle, then to the bottom to make sure it is well lined up before nailing the rest of the tacks in place.
8. MAKE YOUR BED
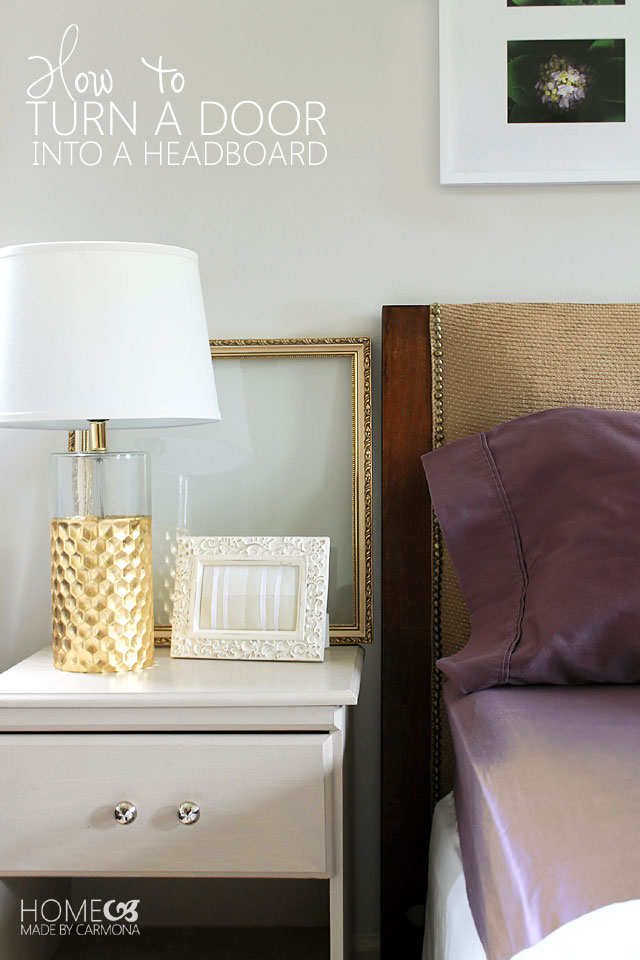
Set your beautiful completed headboard upright, and admire your handiwork! You can prop it right up against the wall, no need to secure it to the wall since the door is so thick and sturdy! Just place your bed directly in front, and enjoy!
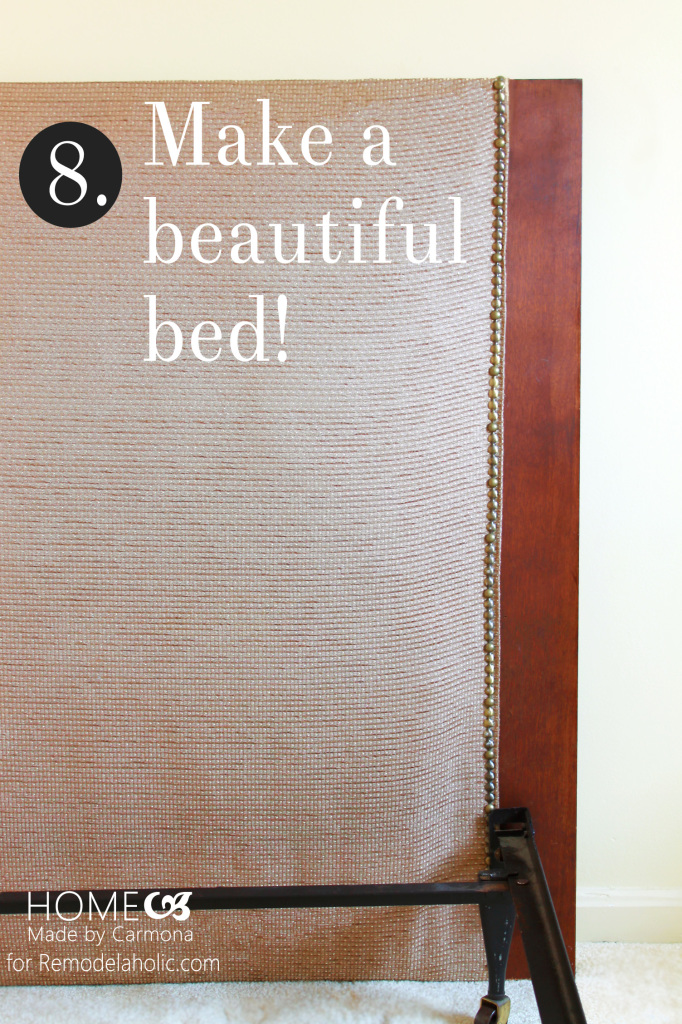
It’ a little bit rustic, a little bit glam, and quite chic all around! I love it! I think it will be stunning in the Very Violet Bedroom I’m making for my eldest daughter.


Have you found it a problem with the stuffing dropping down over time? I am wanting to get started on my DIY version of your headboard but just wondered how this had lasted.
Your site is fab!
Thank you! I have not had that problem, but I believe stapling across the middle (over the quilt batting but under the fabric) prevents that from occurring. The fluff has nowhere to go.
Great tutorial; photos are perfect and makes everything understandable. Love your blog.
I cannot express how much I love your blog. I have many that I subscribe to, I am sure you are familiar with them, but your content and tutorials appeal to the inner DIYer in me in a truly viseral wsy. Thank you so much. Keep blogging and teaching me, I am your sponge.
Josie
Thank you so much! That is a high compliment, and it means a lot to me. Thanks for following!
Love the headboard from a door! My house is old and is filled with old hallow doors like this one you used. Hopefully when we slowly replace them I will be able to make one for our guest bedroom. Thanks for sharing!
Thank you! Oooooo, that means you have a gold mine of door projects once they are replaced! I have a handful of projects I love using old doors for. Lucky you! 🙂
Very easy steps to a beautiful headboard!
Did you secure it to the wall or the bed frame?
Thank you! The lovely thing about using a door is that it is so sturdy it did not need to be secured to the wall. I did not secure it to the bed frame either! Once the frame and mattresses are pushed up against it, it isn’t going anywhere! 😉