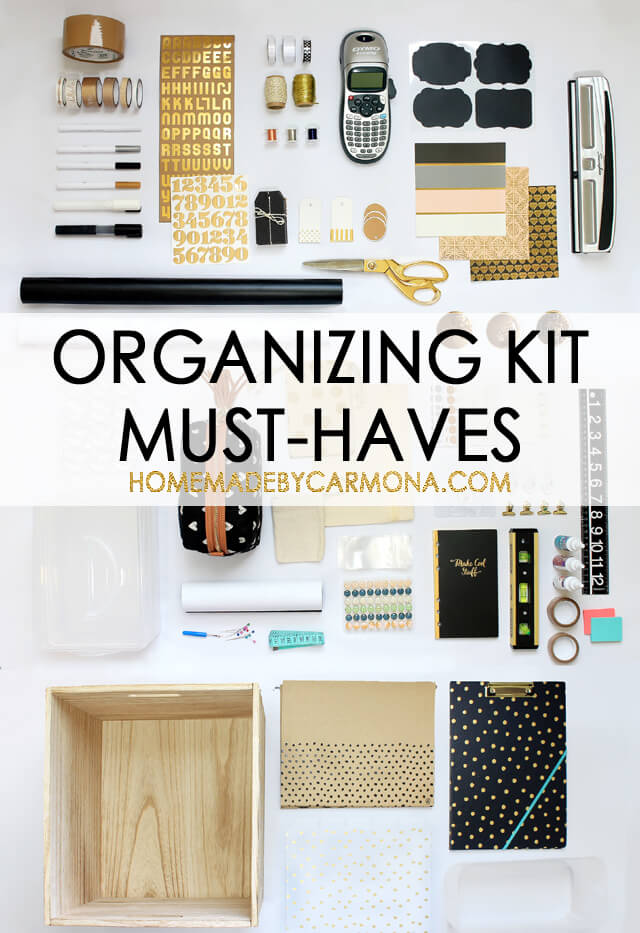
When we clean we use a cleaning caddy, when we repair or build something we cart around a toolbox, why don’t we have an organizing kit for those awesome organizing tasks?
Well I do, and I’m over at IHeart Organizing this week to show you all the insider tips to assembling your own organizing kit. PLUS I have put together a handy dandy little printable shopping list for you so you’ll know just what to buy for it too!
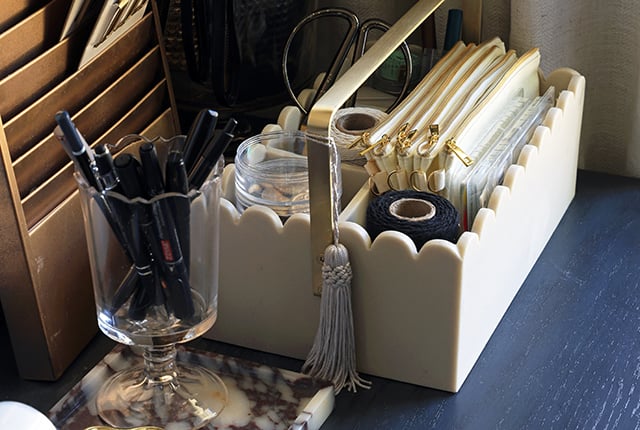
Today’s post is to share how I use everything in my organizing kit!

In my opinion you should love your organizing kit, so make it both cute and user friendly! Get all the details for how to assemble one from my post on IHeart Organizing.
You will have to pop over there to see my assembled organizing kit too…this is just the sneak peek! 😀

Wondering how I use all those items under the category “for labeling” to get organized?
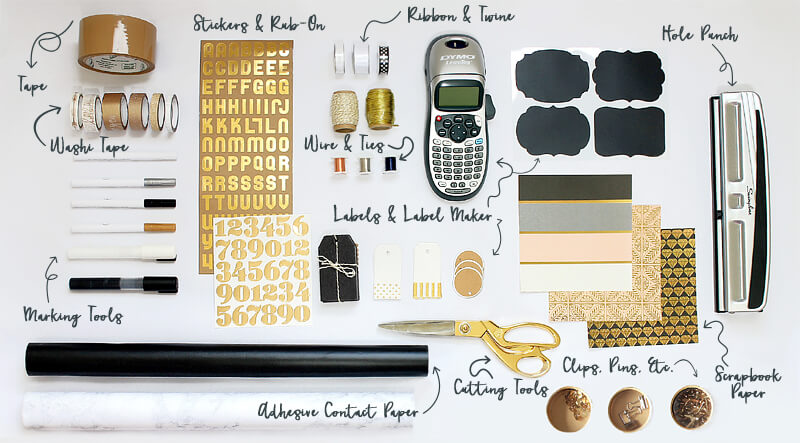
Well first of all, you have to be willing to think outside the box when it comes to creating beautiful organization. Don’t go for the norm, it isn’t typically pretty, instead use crafty items as your organizing go-to’s. Labeling should be both helpful and gorgeous!
- Label Maker: Sloppy handwriting? Don’t write it, type it!
- Hanging Tags: Use anywhere sticky labels won’t stick.
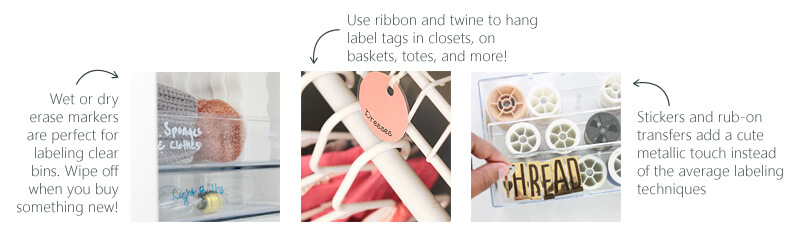
- Ribbon & Twine: Tie up poofy comforters, blanks and throws. Hang tags with pretty ribbon instead of the normal threads.
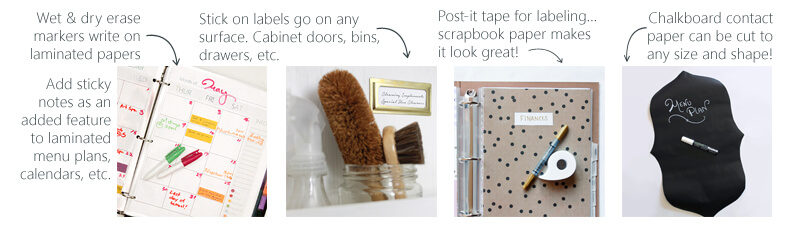
- Washi Tape: Makes a stylish background for labels. Place a clear label on top, or write on washi tape with a permanent marker.
- Scrabook paper: Make your own DIY tags and labels, then place the hole with a hole punch.
- Painters tape, masking tape: Never underestimate the power of writing on a good old piece of tape and using it as a label…even temporarily!
- Markers: Keep markers for every surface. You can label fabric, ceramic, glass, wood, paper, and more! Erasable markers are great when you might need to erase and write something new on your bin.
- Clips: Not sure what goes where yet? Temporarily clip your labels on!

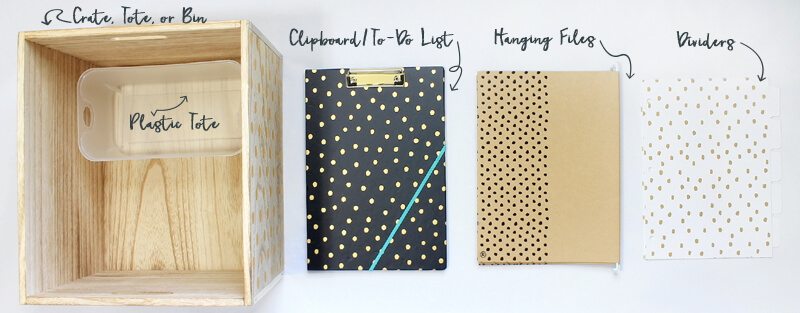
Divide and conquer. The rule of organizing is to find a home for everything, placing like items together. Look for organic ways to store frequently used items.
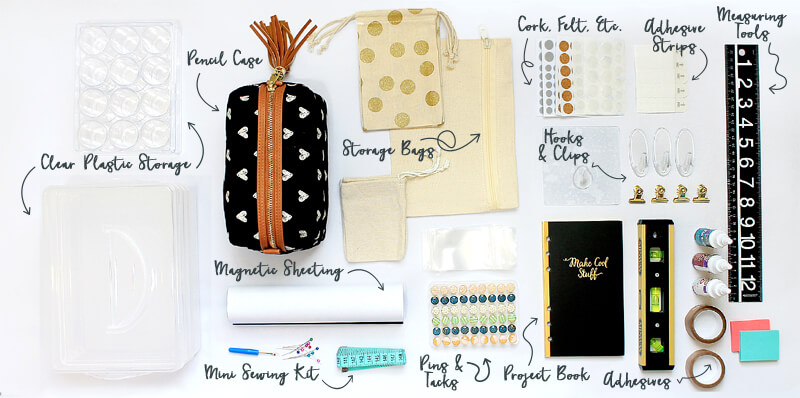
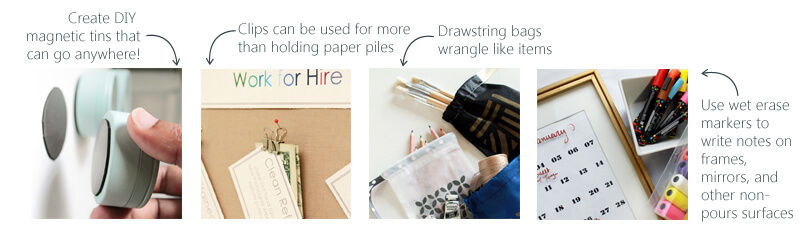
- Pencil cases, drawstring bags, & plastic bags: Fabric based, and plastic based bags are perfect for dividing and organizing small items. Think game pieces, craft items, jewelry, office supplies, etc.
- Clear hooks: Removable hooks of varying sizes can come in handy for any vertical organizing project. Wrangle keys, hang towels, hang jewelry in the closet, hang decorative items as well!
- Trash bags: For purging of course! Every organizing task should have some purging.
- Scrapbook paper: Place this pretty paper in the bottom of a drawer, shelf, bin or divider, both to keep it clean and to add a nice touch. Mod podge it in place if you want it to be permanent and cleanable.
- Adhesive contact rolls: Keep your favorites handy. I like chalkboard contact paper, and marble for decorative projects. Cut a piece of the chalkboard paper in a lovely shape to create a reminder list or menu plan that can go on any wall, cabinet, or vertical space. Peel it off when you no longer use it. Also used inside drawers, shelves, and at the bottom of bins.
- Adhesive magnetic sheet & magnets: Create your own magnetic tins, or magnetize any item you want to store vertically in an easy grab manner. One magnet goes on the surface you wish to store it, and the other on the item itself.
- Cork roll: Sheets of cork can be cut to the desired size and shape. Use it to make DIY pin boards, cup or plant coasters.

Organizing sometimes requires a bit of “crafting” and “diy” on your part. Don’t endanger putting off an organizing task because you don’t have the right tools to get the job done. Keep these available in your organizing kit (or somewhere in the house), for whatever might come up!
- Glue for every project: Keep adhesives on hand for every surface type; paper, glass, wood, ceramic, fabric, brick, etc.
- Tapes & Adhesives: Clear tape, double sided tape, painters tape, masking tape, etc.
- Cutting tools: Scissors, exacto knife, wire cutter (small), paper cutter, etc.
- Hole punch: 3 hole punch, single hole punch
- Mini sewing kit: Threads, needle, pins, tape measure, etc.
- Writing Implements: A variety of markers, pencils, and pens. In metallics, colors, black & white… also look for chalk based, oil based, paint based, etc.
- Measuring Tools: Measuring tape, ruler, level, etc.

The last few items to include are a few miscellaneous items that might seem DIY oriented, but you just might be happy to have on hand for some of those tricky organizing tasks.
- Tacks & push pins: For pinboards, to temporarily hang pictures, etc.
- Picture hanging strips: These can be used to hang much more than just pictures! Even use them to secure breakable decor to a tabletop surface or the floor!
- Safety pins, and clips: Often used to hold tags and labels on soft fabric-based surfaces.
- To-Do list or project journal: Keep track of the tasks you want to work on, or are currently working on. This helps you create your shopping list before taking on the project, write down your needs, sketch out the space, and finally chart your progress!
I hope this gives you a few ideas on items you might want to keep in your organization kit, and the potential they have!


It is a gigantic effort to think, prep and put these together . You really are awesome.
Fun thing is – I have most of these stuff – somewhere in a bag – and now it is the will power to put them together – that is what I badly need.
Thanks Anima! Isn’t it great when you already have what you need to get a project or kit together? Then the only thing left are the fun parts! 😀