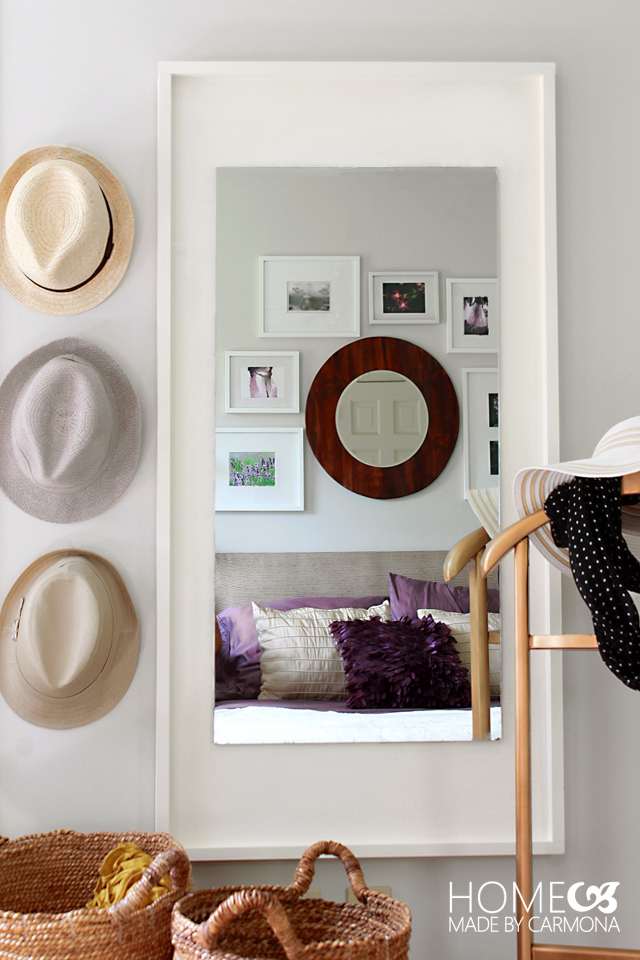
I seem to have a thing for decorating with mirrors…which is weird since I hate walking past them in a room and seeing myself at every glance. I don’t want to spend all day seeing my disheveled, paint smeared, sweating-from-the-last-diy-project self every time I turn around (although it is a fairly good reminder to go clean up and stop looking like a construction worker…I mean sheesh, my kids and hubby won’t want to see that either).
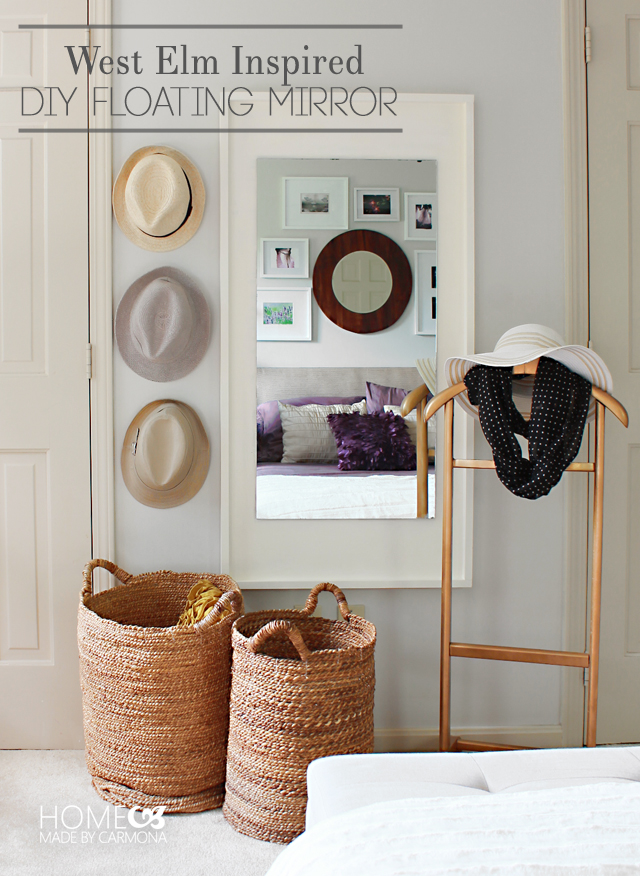
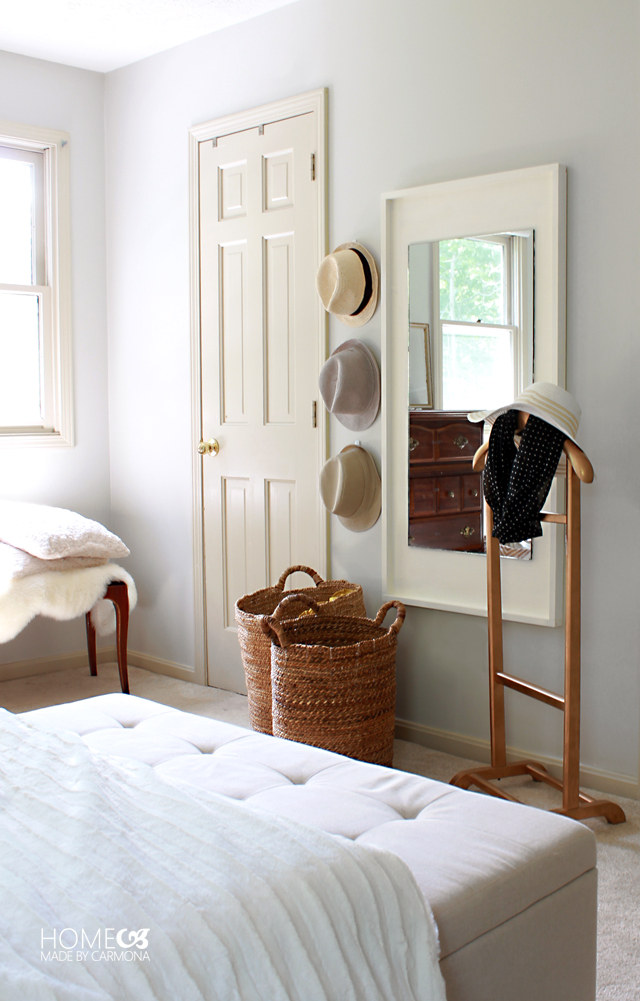
Yet, here I go again, adding another mirror to yet another room. This time it was much needed. My daughter has been asking for a better mirror in her room, one where she can see her whole body when prepping for the day.

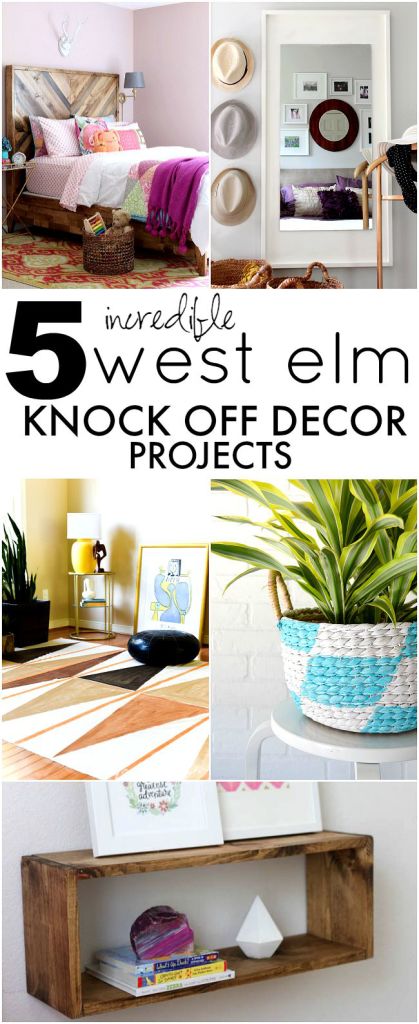
Today’s set of DIY projects are the last of the West Elm Knock-Off series. Oh, I’m sad to see it go. What about you? Would you love a series where the 5 of us ladies do a set of knock-offs of another much loved company? What would you like to see, Pottery Barn, Restoration Hardware, Ballard… 😉 Well, you are going to love what these talented ladies each made this week.
DIY Floating Mirror
[line]
This gorgeous West Elm floating mirror I’ve been eyeing costs $399 for the floor mirror and $199 for the small wall mirror. That makes my between $20-$40 DIY version a steal!
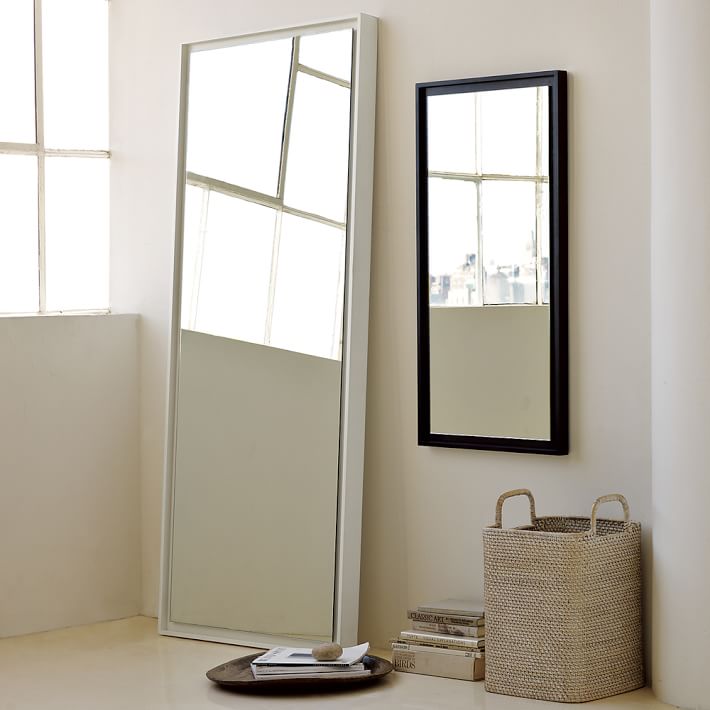
(via West Elm)
I love the modern design and style of this West Elm floating mirror, but my daughter wanted a slightly bigger wood surround. The plan is to find cute little hooks to attach to the wood surround for her collection of pretty hair ties. So my mirror will not be an exact replica, however you can make yours look just like the West Elm version with this same tutorial.
The great thing about this tutorial is that you will be building a completely custom frame. It will be based on the size of the salvaged mirror you find
Here’s What You’ll Need
[line]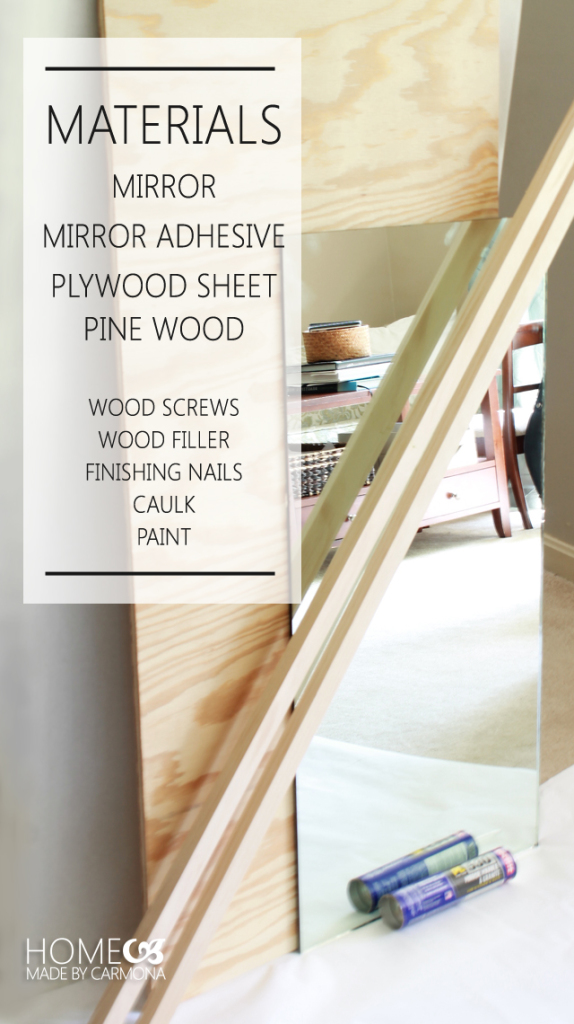
This project will likely cost you anywhere from $20-$40 depending on whether you already have wood screws, wood filler, caulk, or paint. It is a bit tricky because the most expensive part will be the mirror, and if you buy it new it will cost way more than my price range. Here is a trick you need to stay in that $20-$40 cost range; don’t buy glass mirror new, purchase salvage a thrift shop mirror, or buy a cheap dorm mirror for $10. If the mirror has adhesive along the edges, you will need to cut it to size and to eliminate the messy edges.
[left] [/left]
[right]
Want to know what I spent? Here is the breakdown (Purchased at Lowes):
- Mirror – free salvaged mirror
- Mirror adhesive -$4.99
- 48×24 cut Plywood sheet – $7.87
- 1x2x8 Select Pine – 2 @ $5.27 ea.
- All other items were common items leftover from previous projects, so I only spent $24
[/right]
Let’s Get Started!
[line]
The great thing about this tutorial is that you will be building a completely custom frame. It will be based on the size of the salvaged mirror you find. Remember that you will want a thin glass mirror if possible, the thicker the heavier it will be. The bigger the mirror the less likely you will be to want to hang it… Large floating mirror DIY’s should be perched against a wall rather than hung.

Determine Plywood Size & Sand
When you purchase your plywood, have the hardware store cut it to size while you are there. Always eliminate the extra steps wherever possible! This means you need to know the dimensions of your mirror and how many inches you want of wood showing. I chose a 2 inch surround on the sides, and about 4 inches on the top and bottom. But if you want it to look like the West Elm version, I recommend having your plywood cut about half inch to 1 inch larger than your mirror. Go ahead and sand the rough edges of your cut plywood sheet.


Cut Pine To Create A Framework
Time to measure and cut the pine wood strips that will go around the plywood like a frame. Let’s do this the easy way, without having to use a tape measure.
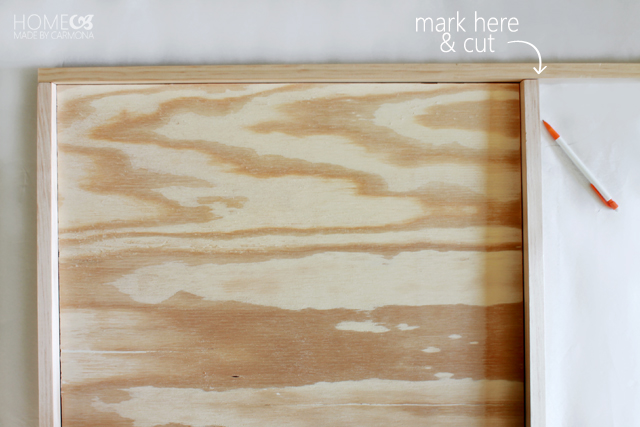
Measuring 2 Vertical strips: The vertical strips must measure exactly the same as your plywood sheet. Place your pine wood strips alongside the plywood flush with the bottom and mark it. Cut and sand any rough edges.
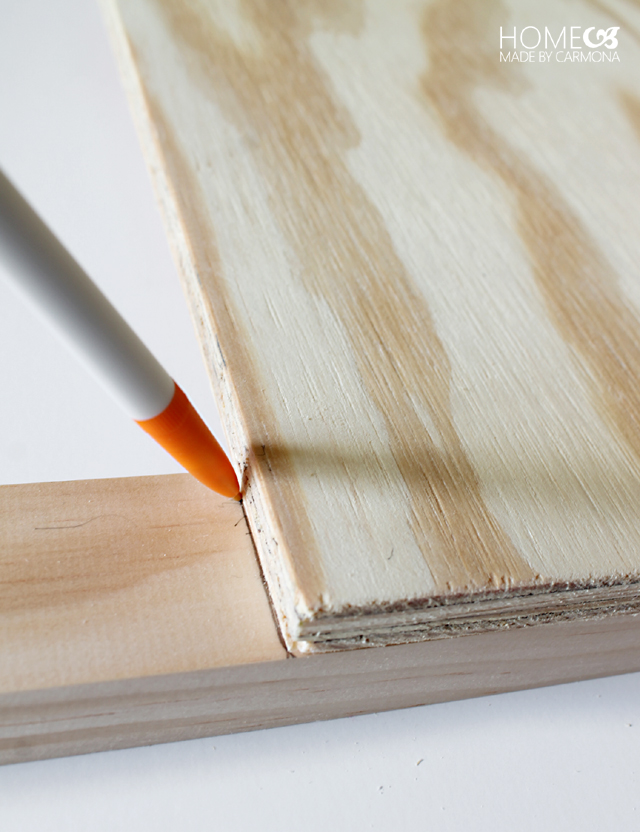
Measuring 2 Horizontal strips: Lay the plywood and vertical strips down on the ground in the way they should be attached. Lay the horizontal pine wood strip across the top, one side flush and mark where it should be cut. Cut and sand any rough edges.

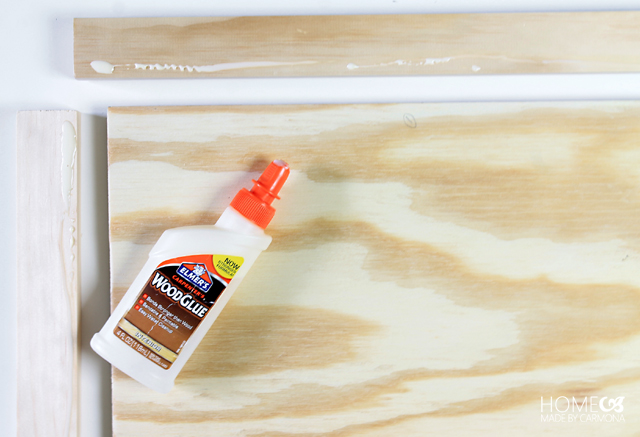
Attach The 4 Sides Of The Framework
Lay all the pieces beside each other to ensure that everything lines up properly. Attach the 4 pine wood strips with some wood glue and allow it to dry. I use some painters tape to help hold all the corners in place.
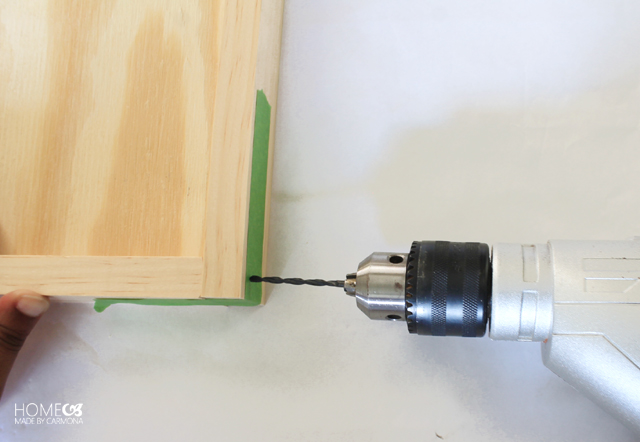
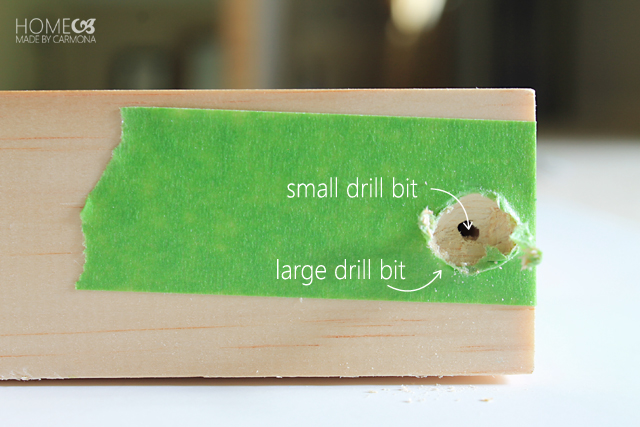
Next you will attach the 2 horizontal wood strips to the vertical ones with wood screws. Drill a guide hole, and a using a larger bit make a crater so you can sink your screw heads.
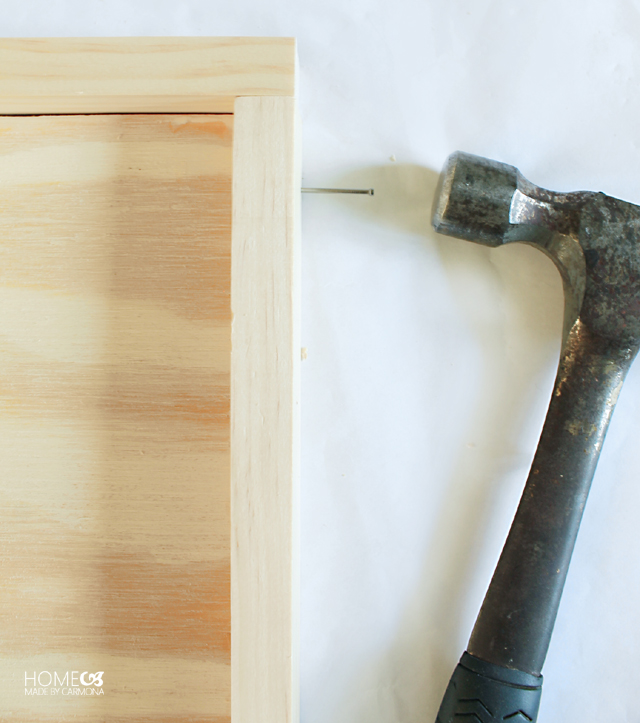
Using finishing nails secure the frame to the plywood. Start with a nail near each of the 4 corners to hold in place, then you can set the entire structure upright and more easily nail all around the perimeter. I recommend a nail every foot or less.

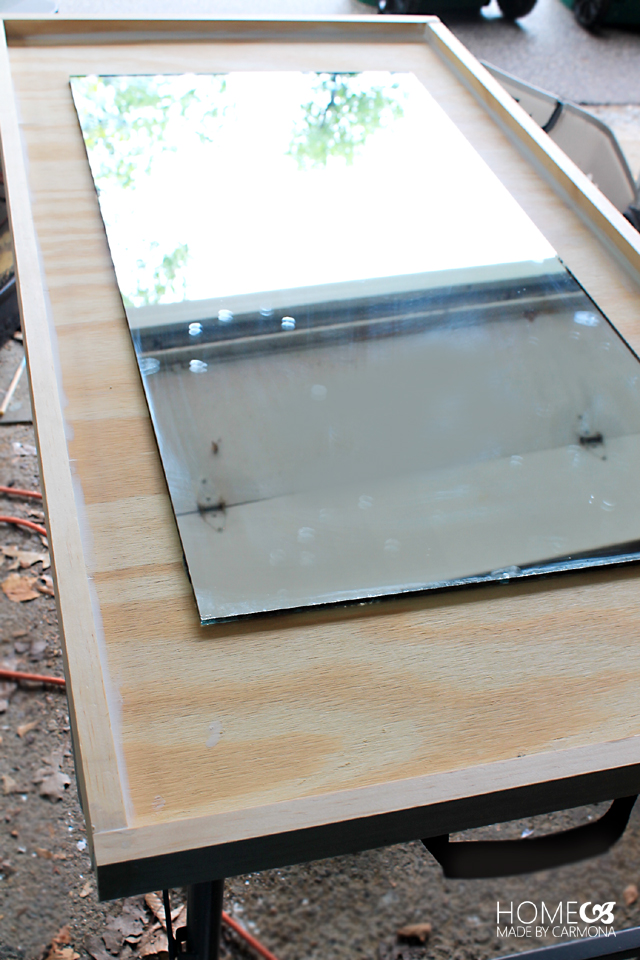
Place your mirror on the frame you have just built and center it. Mark all around it so you will know where the mirror will lay.
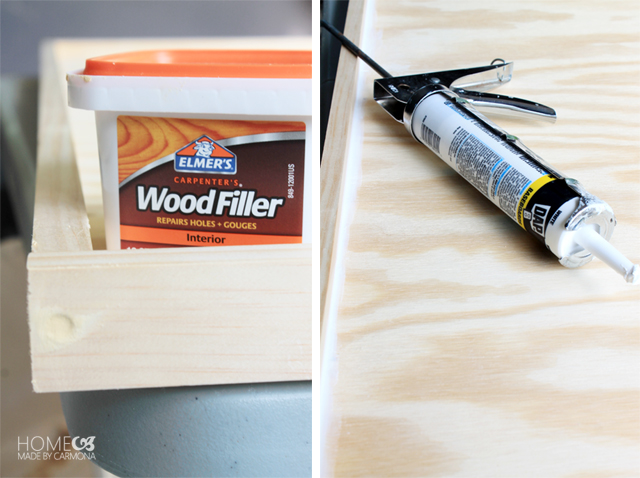
Now remove the mirror and use wood filler to cover the screw heads, and caulk along the edges to make it appear seamless between the plywood and the frame. Allow it to dry.

Finally paint your structure (leaving the middle where the mirror will go unpainted –this is where the penciled outline becomes helpful), seal it, and adhere the mirror using a special mirror adhesive and your caulk gun. Be sure to follow the directions found on the adhesive tube! Typically it will require 48 hours to cure before you place it upright.

And there you have it! If you made a small wall sized mirror, or medium sized like mine, you can attach heavy duty hangers to the back, just make sure it is rated for the weight of your custom piece.
How did you like this West Elm knock-off? Well if you loved this, you are going to adore the rest of the knock-offs by my fellow bloggers in this series:
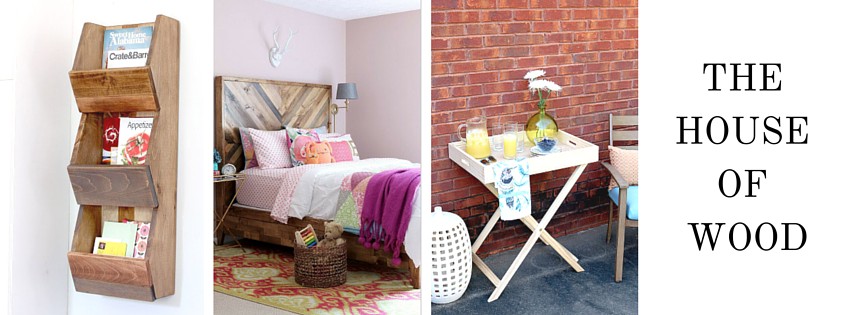
THE HOUSE OF WOOD- ALEXA RECLAIMED WOOD BED
HOME MADE BY CARMONA – DIY FLOATING MIRROR
PLACE OF MY TASTE –WEST ELM INSPIRED DIY PAINTED RUG
TINY SIDEKICK – WEST ELM INSPIRED GRAPHIC BASKET
MAKING HOME BASE- SHELF DIY WEST ELM KNOCK OFF
In case you missed any of the projects in this series, don’t worry! You can find them all right here:
WEST ELM BENCH KNOCK OFF | DIY FLOATING MIRROR | ACRYLIC SIDED SHELF KNOCK OFF
WOOD AND PIPE ENTRYWAY STAND | DIY WOOD SLAT BENCH | SHELF DIY WEST ELM KNOCK OFF

WEST ELM INSPIRED PAINTED RUG | DIY DEEP PICTURE LEDGE | WEST ELM INSPIRED STRIPED POUF
RECLAIMED CUBBY SHELF |WEST ELM INSPIRED ALEXA RECLAIMED WOOD BED| DIY BUTLER STAND
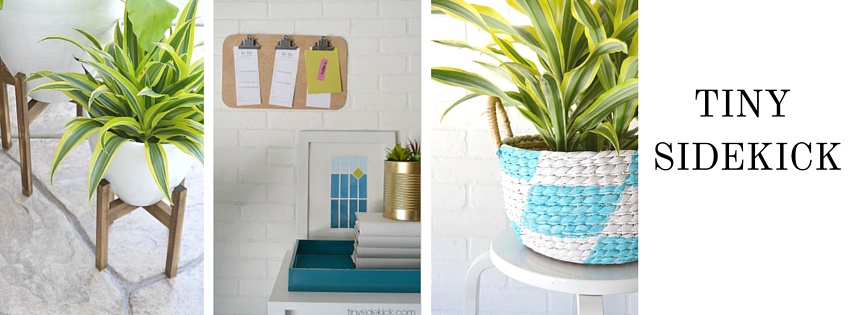
WEST ELM INSPIRED WOODEN PLANT STANDS |WEST ELM INSPIRED NOTICE BOARD| WEST ELM INSPIRED GRAPHIC BASKET
Hope you loved our entire series! You now have 15 gorgeous West Elm products you can make yourself! If you build any of these West Elm inspired projects, show them off by sharing via Facebook or Instagram and tagging them with #WestElmKnockoff and #HMCmaker ! I would looooove to see your amazing handiwork!

[go_portfolio id=”diy_gallery”]


I love this idea Ursula! I have some frameless mirrors that I’ve been wanting to put to good use. Thank you so much for this idea!
What do you use to hang your hats on? I love all of it!
Thank you! Just some 3M hooks…the kind that stick on and can be peeled off later. That way I don’t leave holes in my wall. 😉
I absolutely love this! I’ve been looking for a chic full-length mirror to add to my bedroom, but everything I like costs a billion dollars. This is a perfect alternative. Thanks for sharing!
xx Hannah // http://www.HomemadeBanana.com
Great tutorial and what a lovely home decor project! Love it! Thanks for being part of this great series! XXOO
The wider frame looks so much better. I love miirors as well; always snag them at garage sales but usually with a tacky frame. This is perfect, thanks!
Beautiful!!! I love this mirror so much – when I was thinking about what home decor project I wanted to tackle I seriously considered a mirror – I’m desperate for a large mirror like this in my bedroom! You did such a great job – it’s been so fun doing this series alongside you! You are such a talent 🙂
Yours is better than the original!
Great idea! I have two salvage mirrors that I can do this design with.
Beautiful job, as always, Ursula! So happy to have been a part of this series with you! I love mirrors too, but don’t much like looking into them too often either. Ha! <3