*This post is sponsored by Rust-Oleum and the Cleveland Cavaliers!
My good friends at Rust-Oleum challenged me to create 4 amazing projects for all the basketball loving Cavs fans out there, so here it is! Project number 3 of 4, and I think you are going to love it!
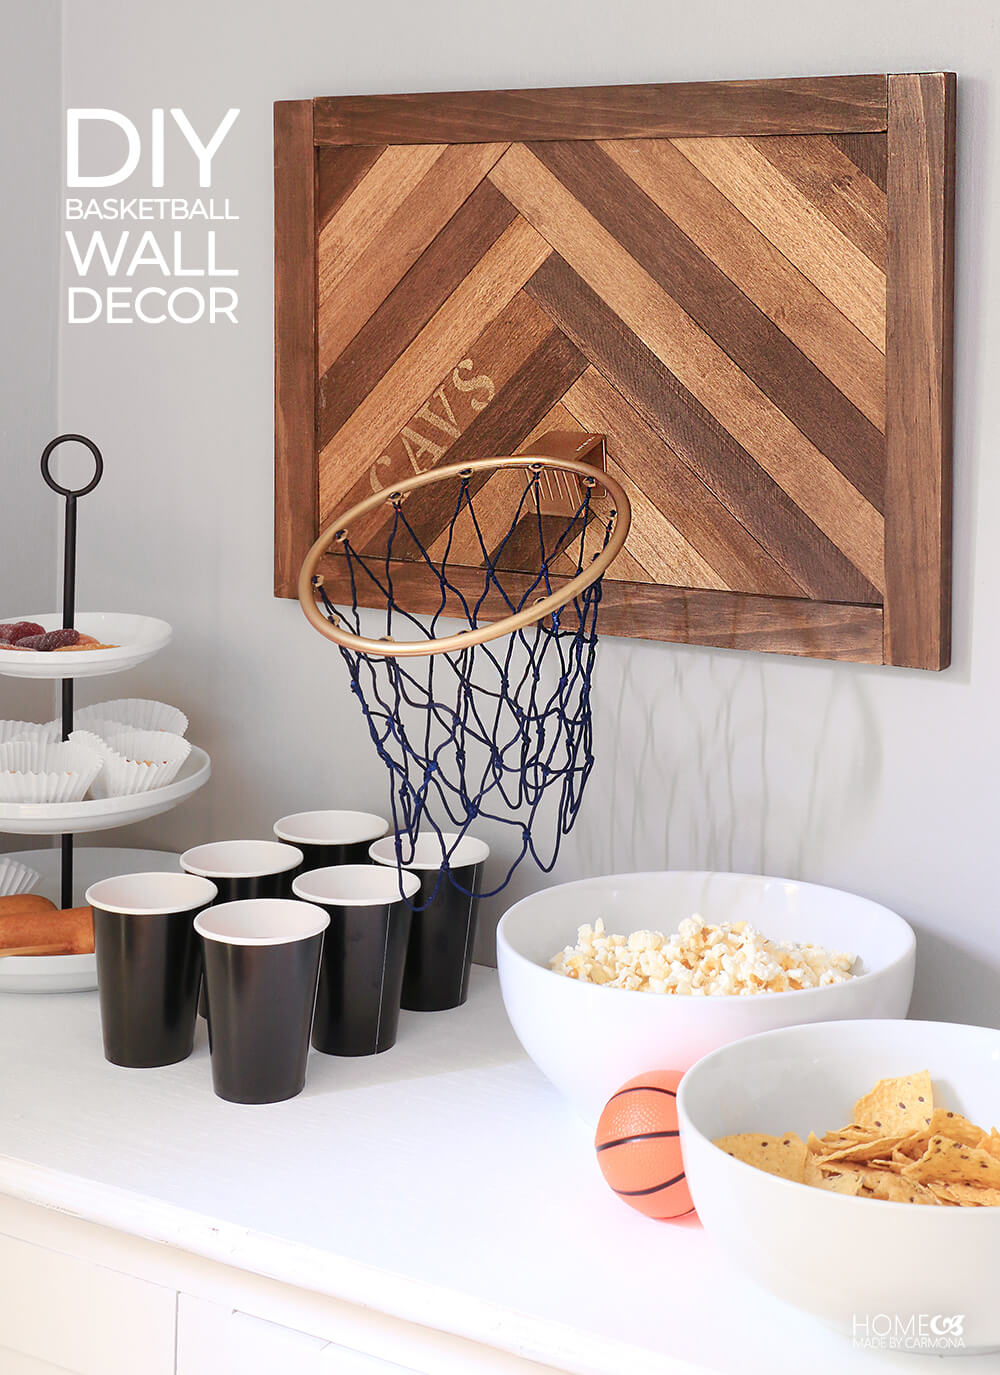
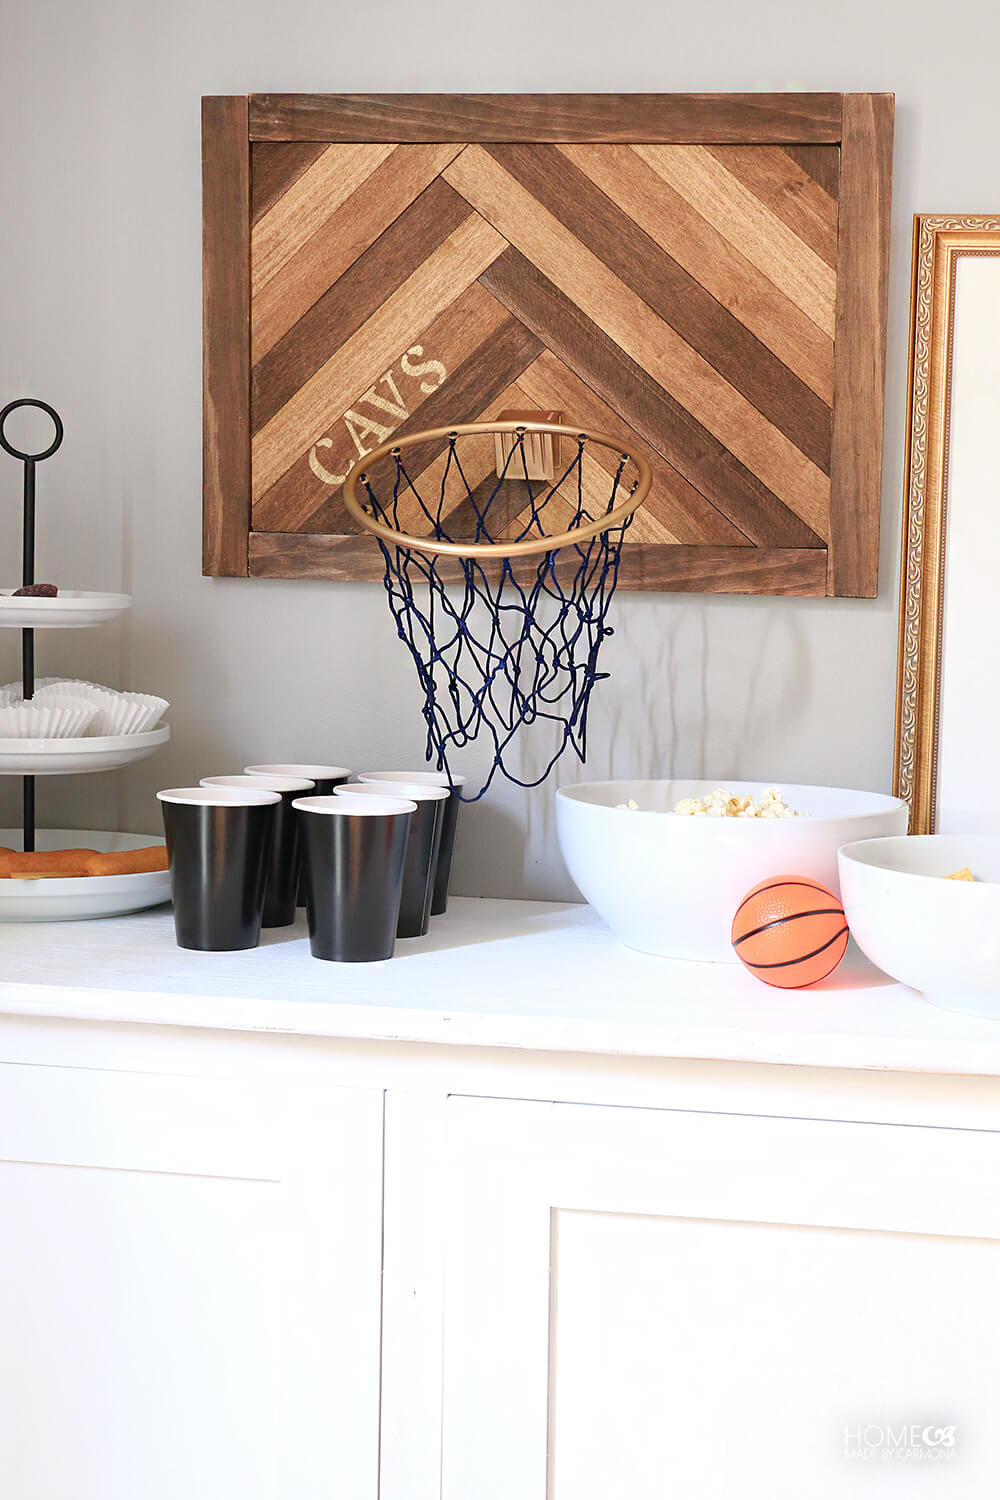
This super cute basketball hoop is also wall decor that even the non-sports lovers out there can admire! It makes the perfect backdrop for your party table on game day, or makes for fun wall art for your basketball loving child.
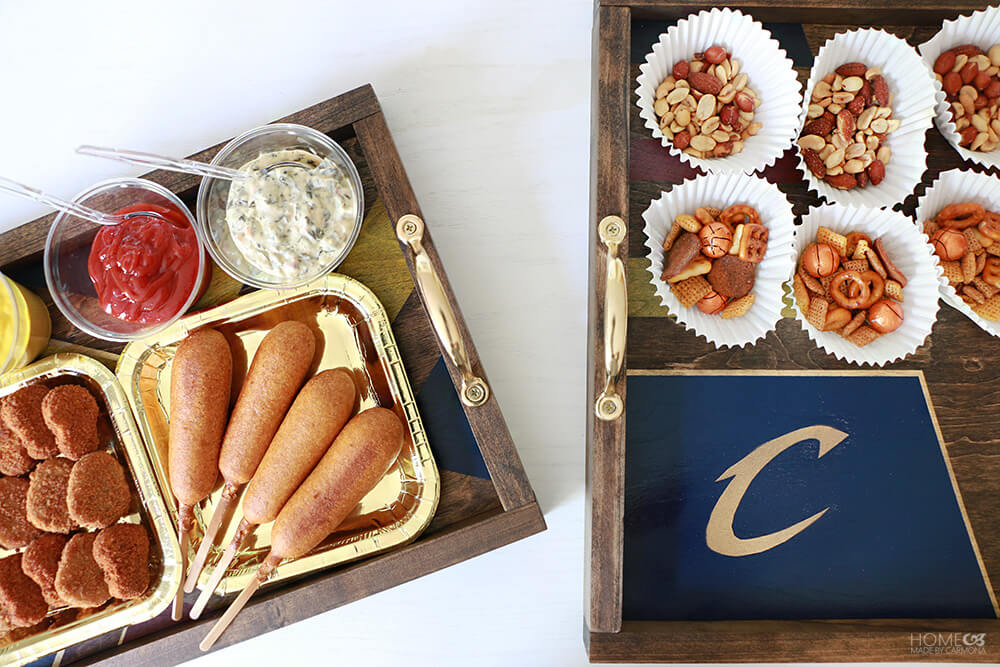
In case you missed them, check out my first two projects, these stunning and useful DIY serving trays, great for your game day party.
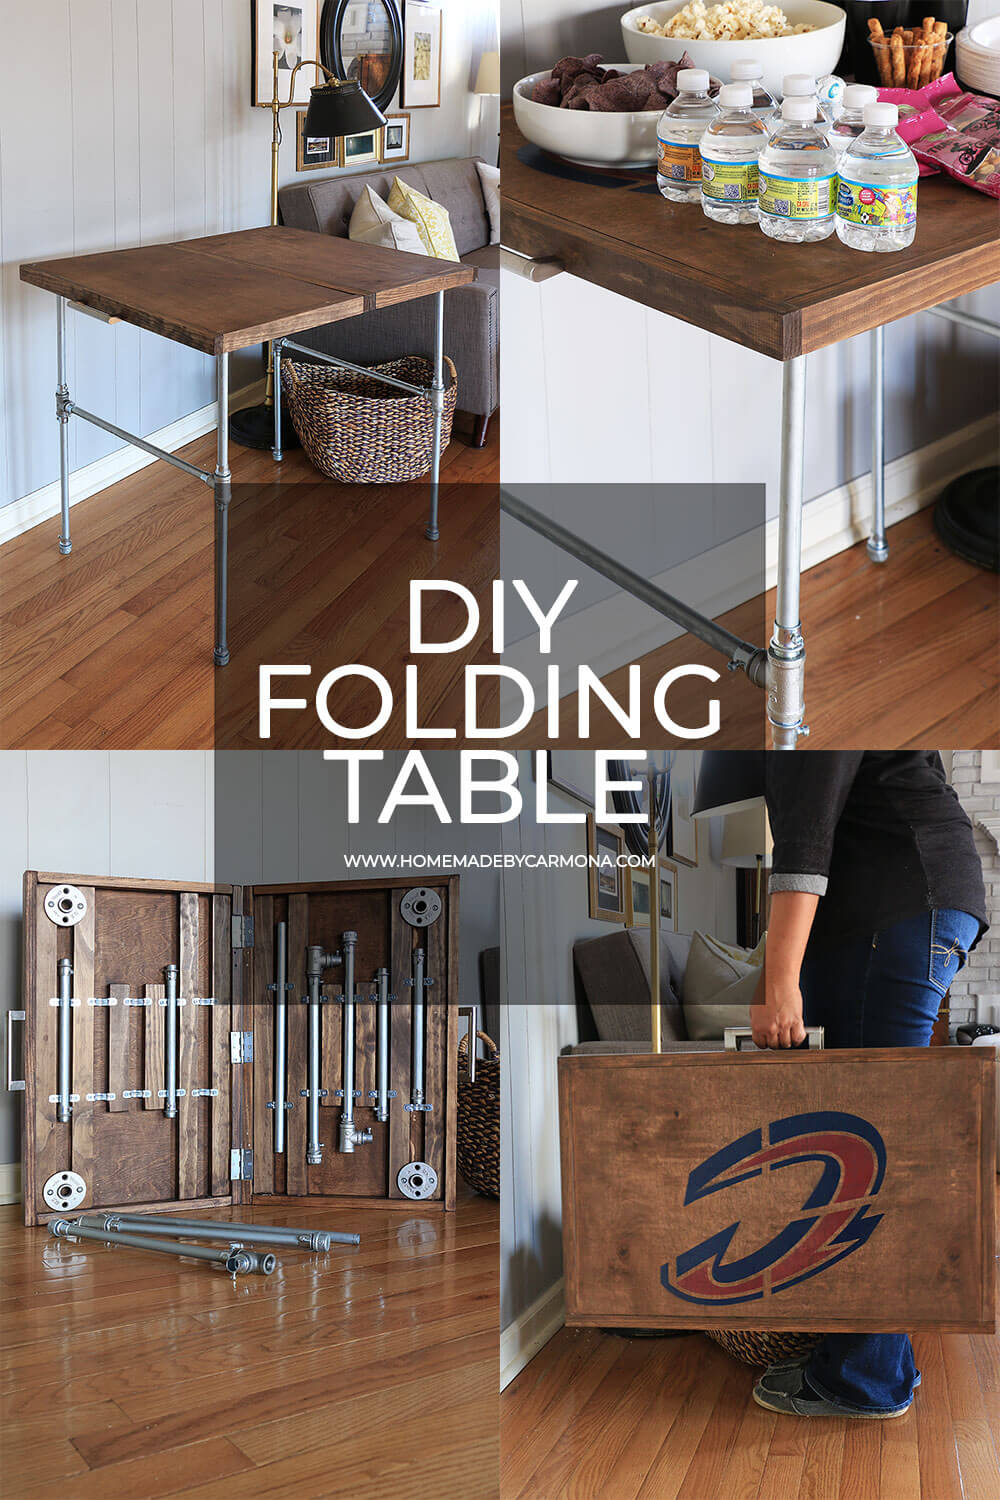
And don’t forget this handy industrial DIY folding table!
Ready to learn how to make wall decor for the fiercest basketball fan? Let’s get started!
Basketball Hoop Wall Decor Tutorial
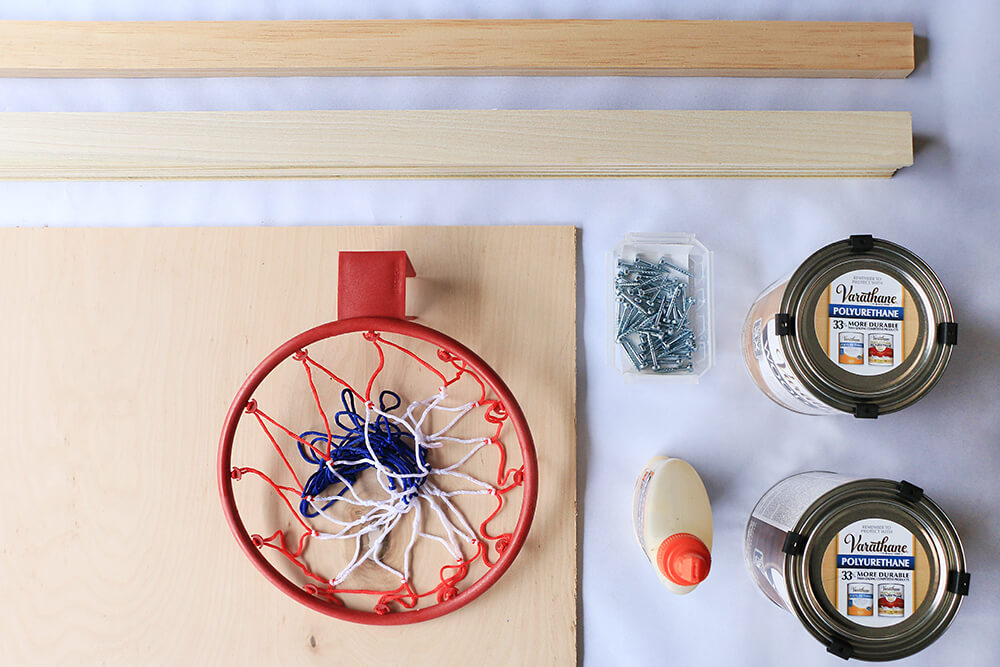
Here’s what you’ll need: (affiliate links)
- (1) 3/4″x1-1/2″x6′ select pine board
- (5) 1/4″x1-1/2″x2′ pine craft wood
- (1) 1/4″x2’x2′ plywood sheet
- Wood glue
- 1/2″ pocket hole screws
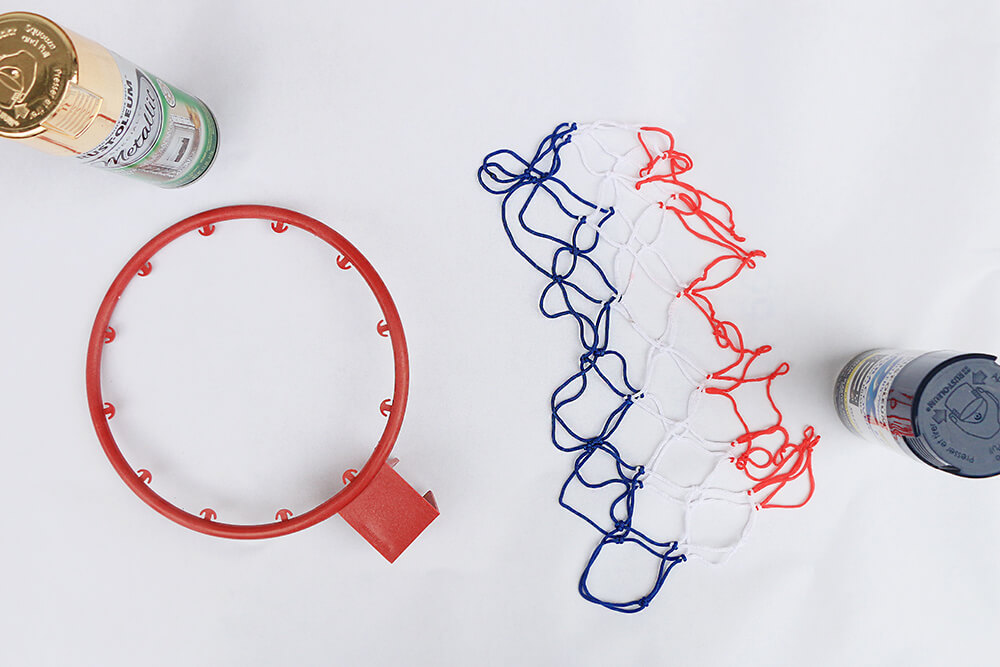
- (1) Mini toy basketball hoop & ball
- Varathane stain (at least 2 types of choice)(Dark Walnut & Golden Oak)
- Rust-Oleum spray paint in Gloss Navy and Metallic Gold
- D-ring Picture hangers
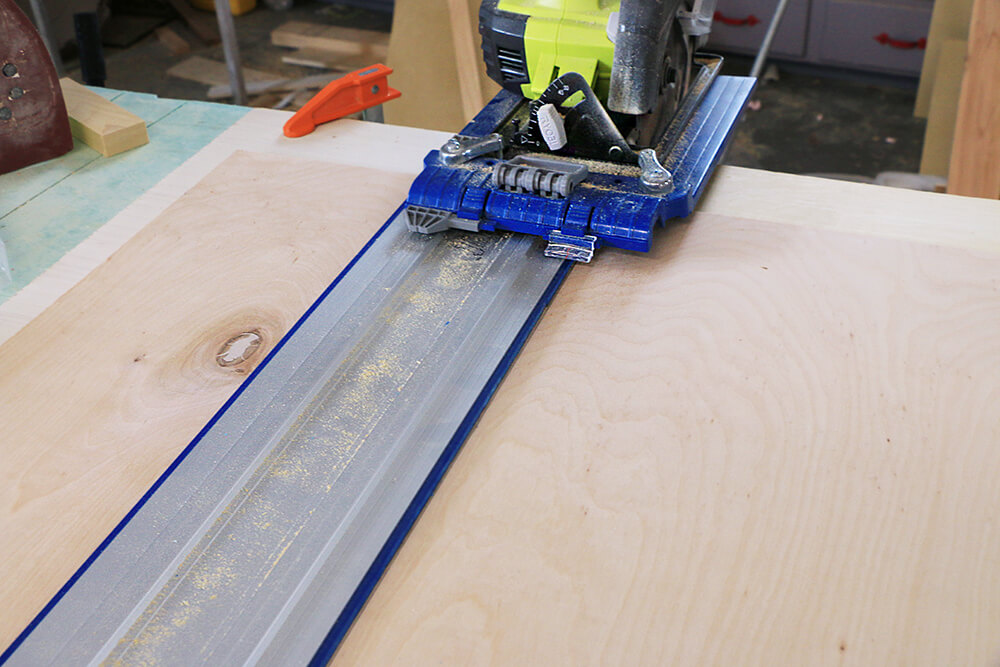
Step 1. Cut Wood To Size
Start by cutting your 3/4″x1-1/2″x6′ board into two 15-1/2″ pieces, and two 21″ pieces. Later these pieces will become your frame. Next cut the 1/4″ plywood sheet into a 12-1/2″x18″ rectangle. This will be your backing.
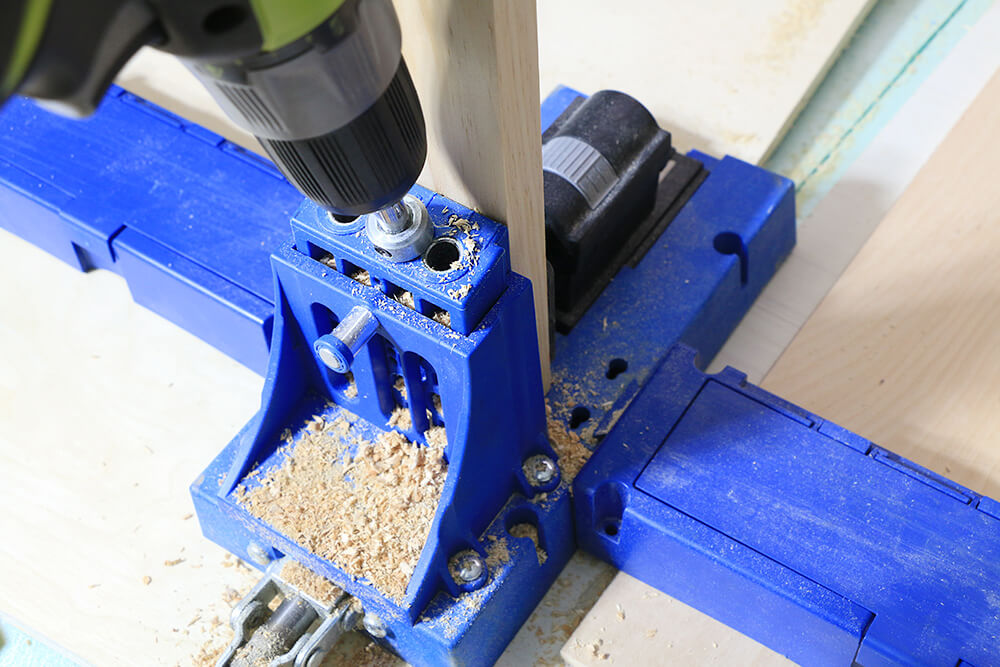
Step 2. Drill Pocket Holes
Start by drilling two pocket holes into either end of the two long 3/4″x1-1/2″x21″ frame pieces. Note: You can see by the image under the next step what your pocket holes should look like.
Step 3. Stain & Paint
Stain all four frame pieces in the dark walnut color (or stain color of your choice).
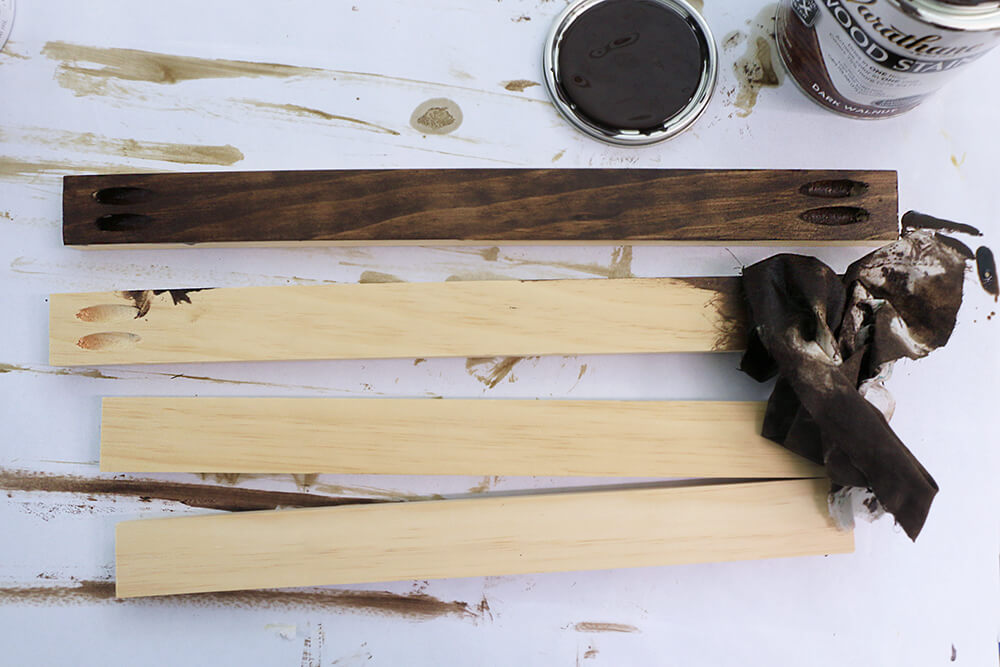
Next stain the 1/4 slats in a variety of different hues. Some in dark walnut, some in golden oak, and some start with the golden oak and then darken with the walnut stain on top.

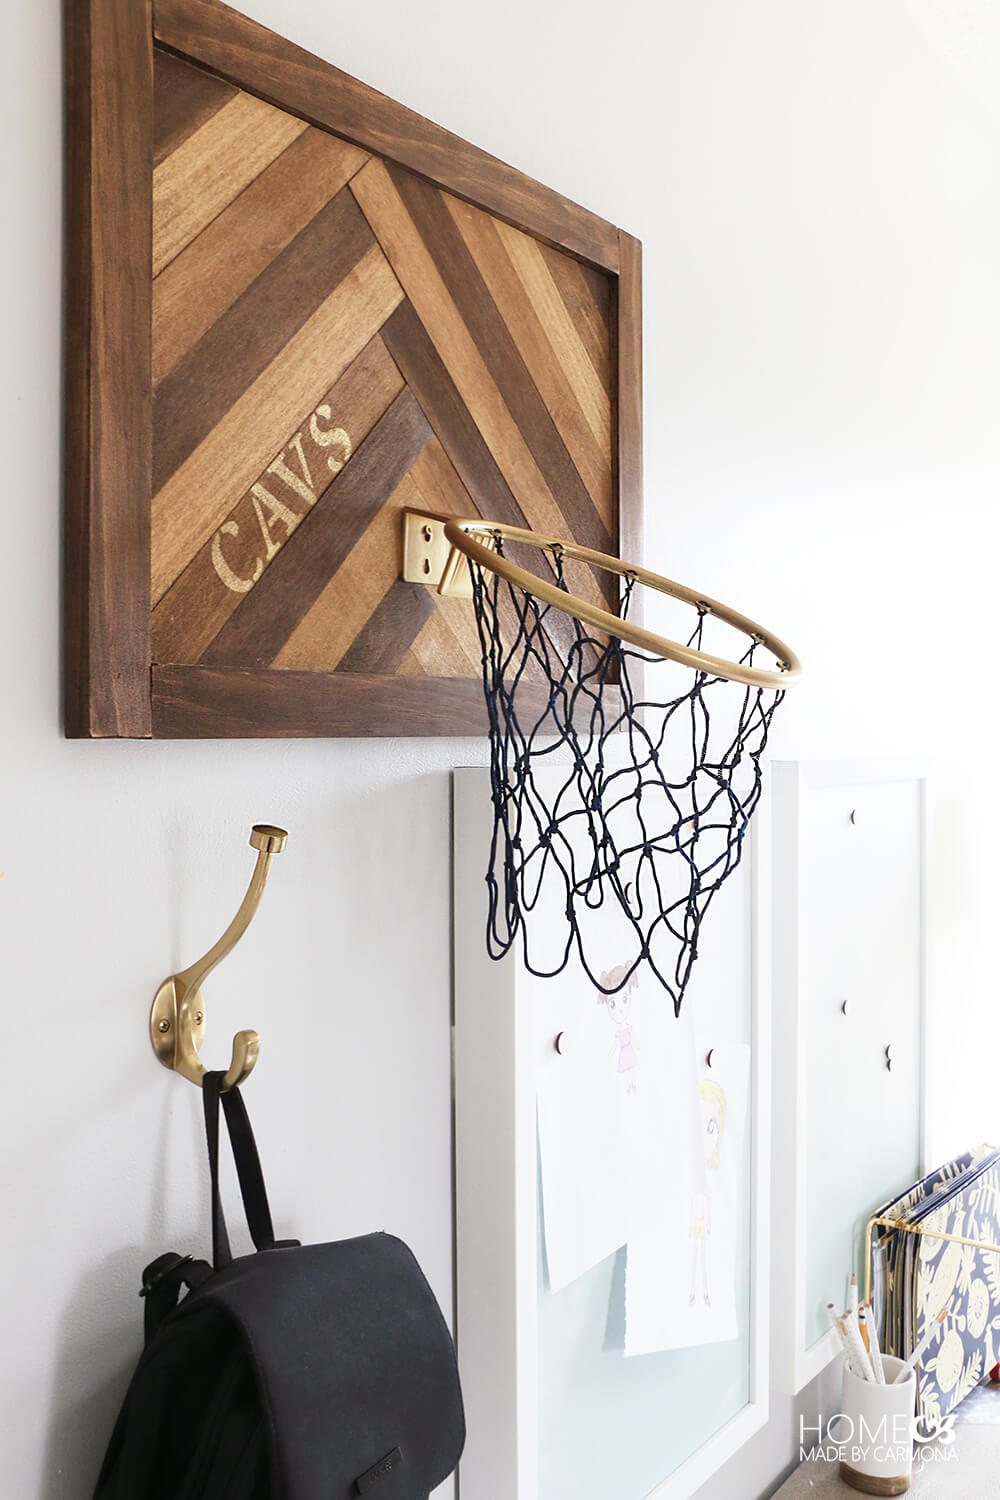
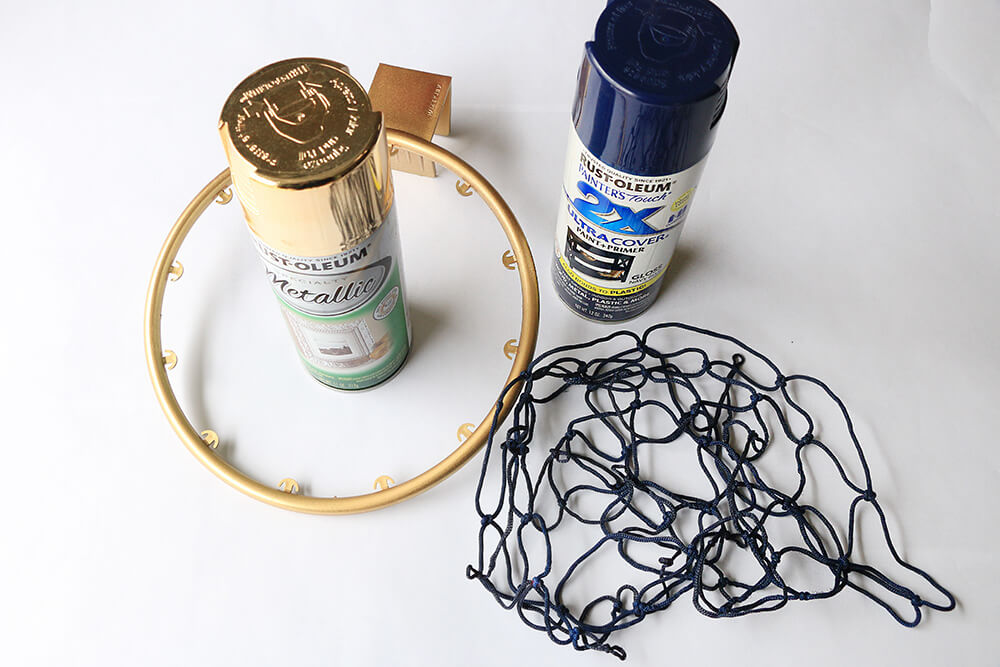
While your stain is drying, spray paint your toy hoop and net. You will have to remove the net from the hoop before painting. Use Rust-Oleum metallic gold for the hoop, and their beautifully deep blue for the net.
After the hoop and net have dried, spray a clear protective coat on the hoop to keep it from scratching in the future.
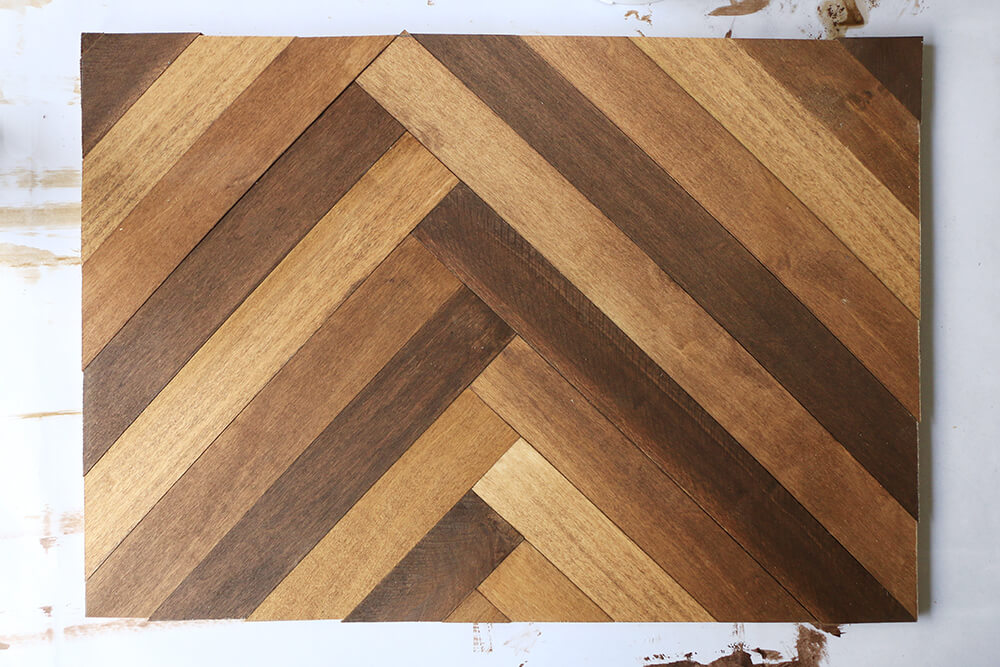
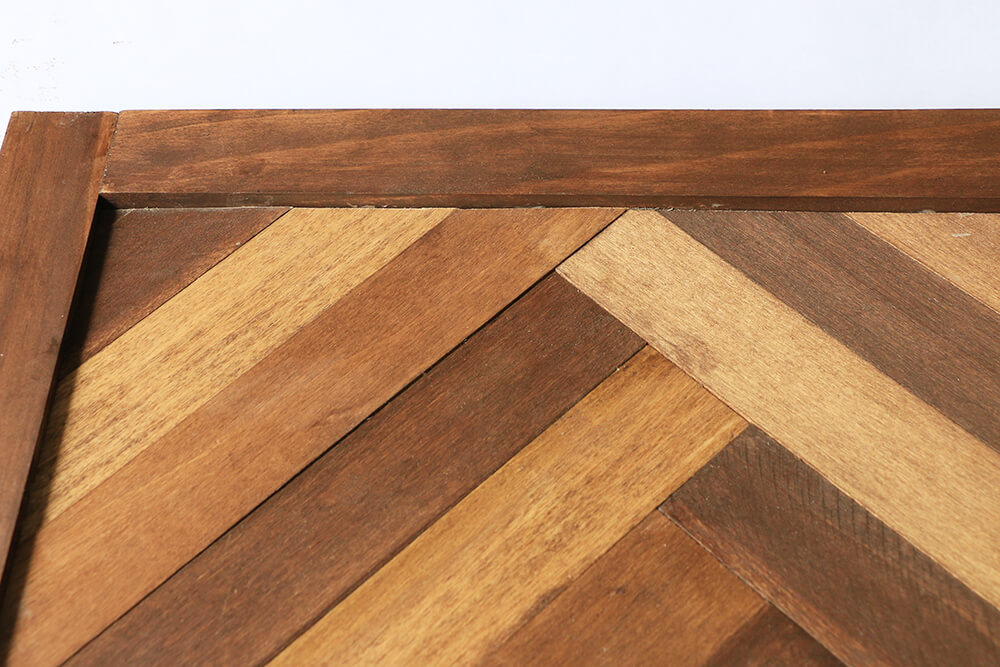
Step 4. Apply Slat Designs
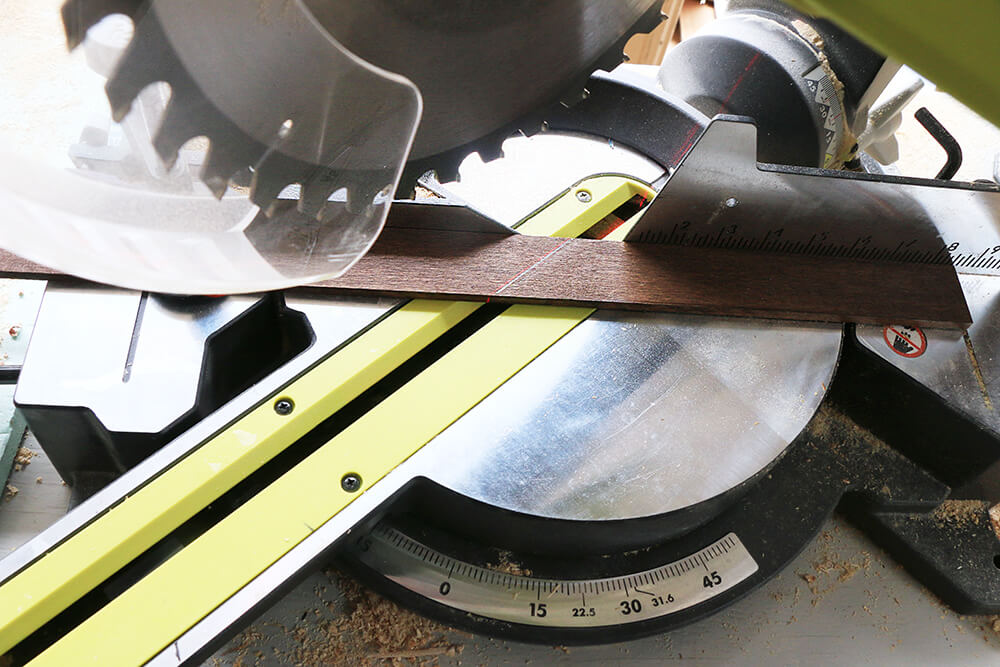
Once your 1/4″ slats have dried completely, lay two slats on top of your rectangular backing in the direction you want your design to run. Then use a straight edge to mark the angle that needs to be cut off the excess so that it is flush with your rectangular backing.
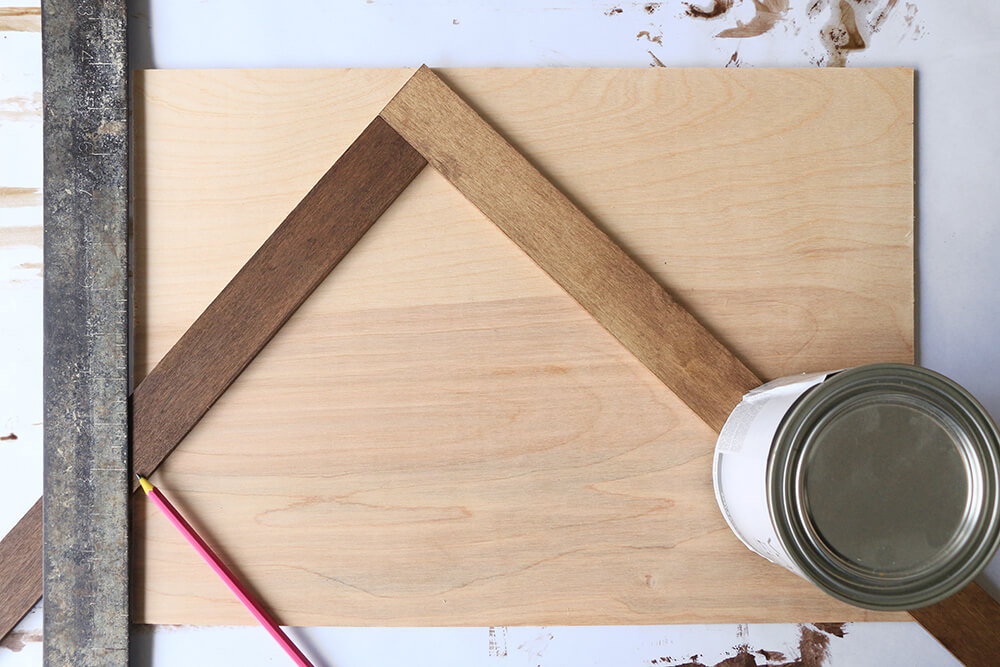
Use a miter saw to cut the slats to size for the exact angle.
Glue the slat in place and do the same with the next one. These two will be your guides moving forward.
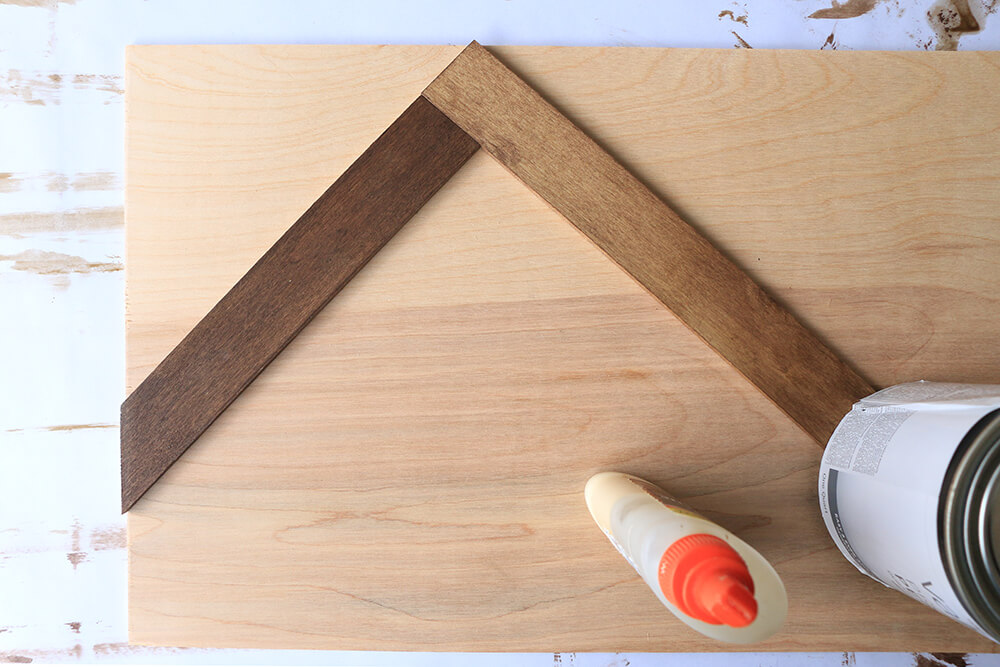
Now you can start to build your design, staggering each slat with the flat sides pressed against each other. Remember, no two slats should be exactly side by side…they should stagger.
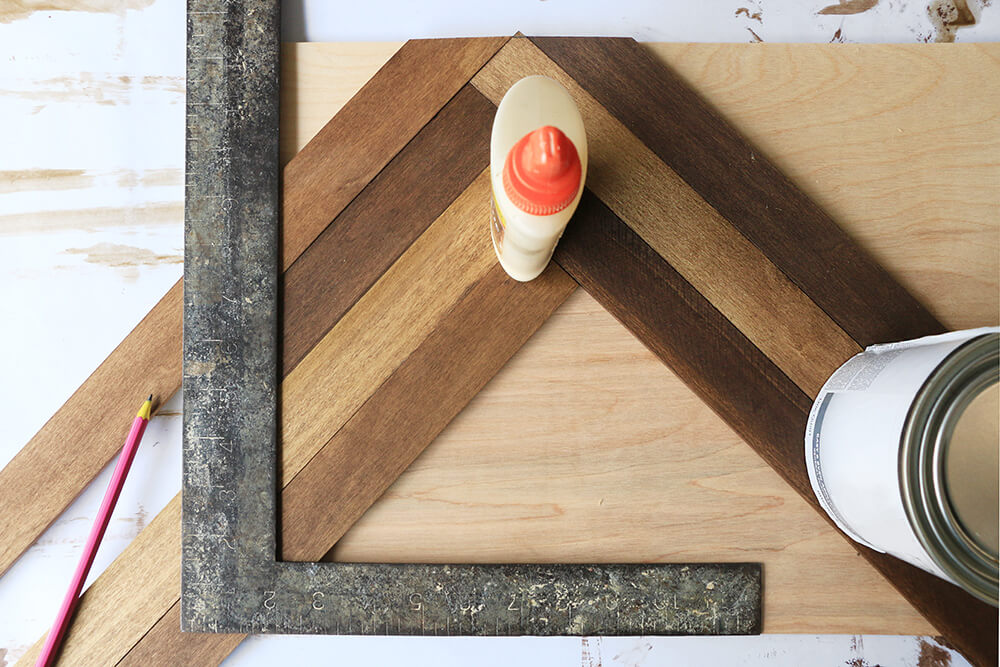
Tip: Line up several slats, and mark them all for cutting at the same time. You may have to rotate the angle of your miter saw, so cutting several slats at once makes it easier, and you spend less time changing the angle.
If any of your edges don’t line up perfectly as you glue them in place, don’t panic! You can always go back and cut any overlapping edges with a jig saw or even your sliding miter saw.
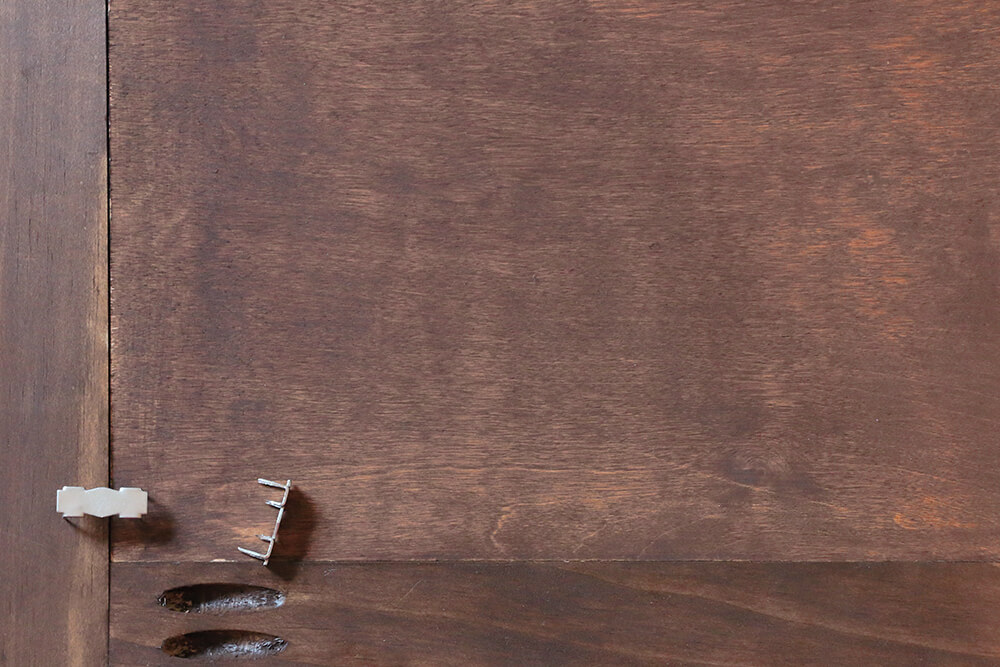
Step 5. Attach The Frame
Once all your slats are glued in place and have dried completely, flip the piece over (design side down). Place the 3/4″ frame pieces around it, and attach frame pieces using pocket hole screws. Try to get the pieces as tight as around the design base as possible.
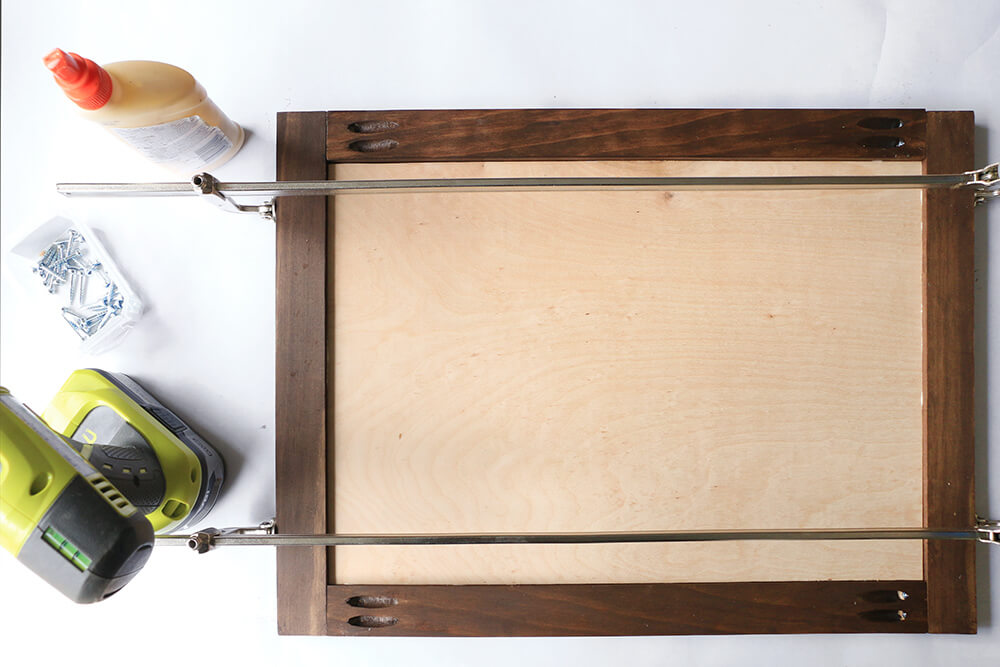
Once all four frame pieces are attached, flip it over and press the design side down so that it is recessed into the frame, and the entire back is flush.
If your frame measurements were precise and the designed backing is nice and snug, that will be enough to hold everything in place. Otherwise you can secure it using metal claws.
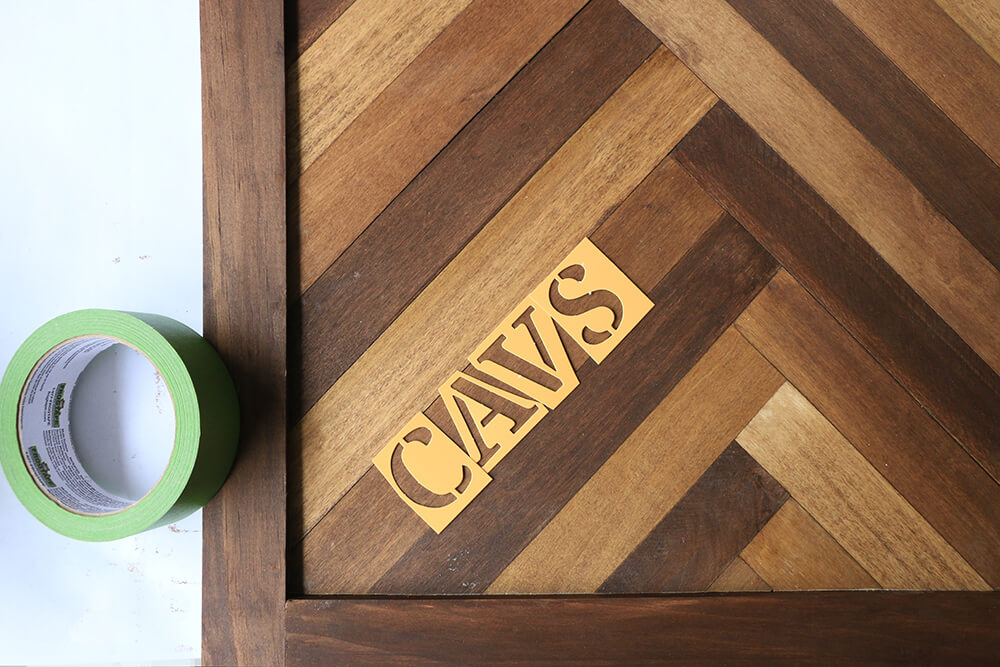
Step 6. Add Final Touches
Using a stencil, spray on the Cavs logo, or spell it out in words, and attach your basketball and hoop.
Finally add D-ring picture frame hangers to the back, hang, and enjoy your awesome handiwork!
I know how awesome and creative my readers are, so if you followed this tutorial and built these trays, share it with us! Tag me at HomeMadebyCarmona on Facebook or Instagram, and share with the hashtag #dominatethepaint so Rust-Oleum and the Cavs can see how you rocked it!
*This post is awesomely sponsored by Rust-Oleum, in collaboration with the Cleveland Cavaliers! All opinions, project plans, and are my own.

[go_portfolio id=”diy_gallery”]


Thanks for sharing the idea looking very beautiful and unique. Must give it a try for a trendy look.
Thanks so much Ursula Carmona I suck at art, so this really helped ;]