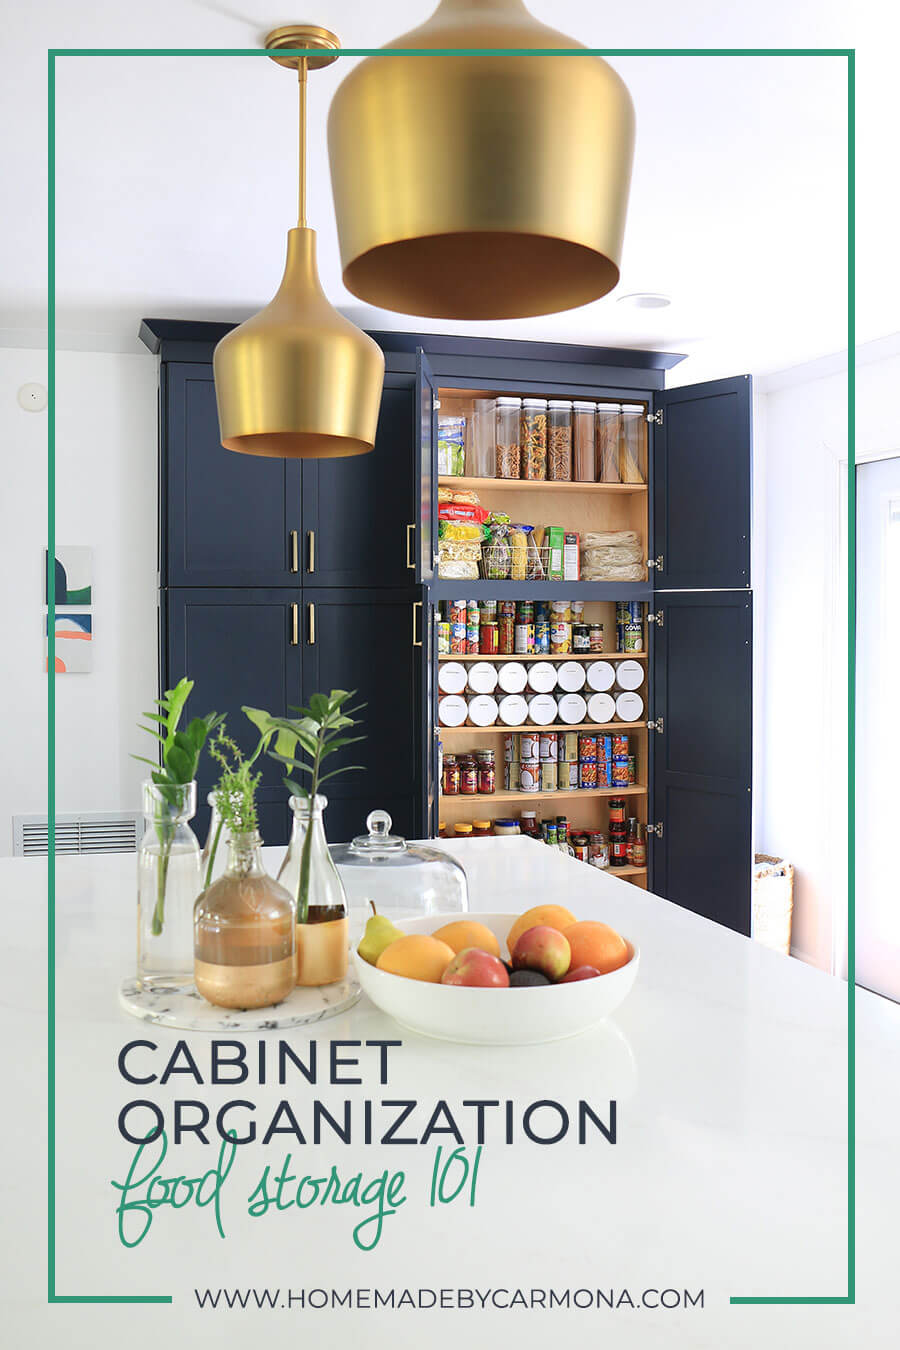
A stylish kitchen is great, but a practical kitchen with efficient cabinet organization is even better.
In the Kitchen Organization Tips series, we’re going to cover several clever hacks and important tips to help make your kitchen operate like a charm! Over the next couple months I’ll show you how to best store food, spices, dishes/pots/pans, small appliances, plus other clever cabinet organization ideas!
Today we’re covering best practices for storing non-perishable food so it is organized and easy to find.
Hey, I want to know what canned and dry goods I have and don’t have at a glance. Nobody wants to dig through a cabinet or pantry in order to find what they’re looking for. I also don’t want to keep buying the same canned good because I mistakenly think I’ve run out of it. Uh huh, you know what I’m talking about…
Here are a few things I do to keep my food storage amaze-balls
#1. Create A Dedicated Space For Each Food Type
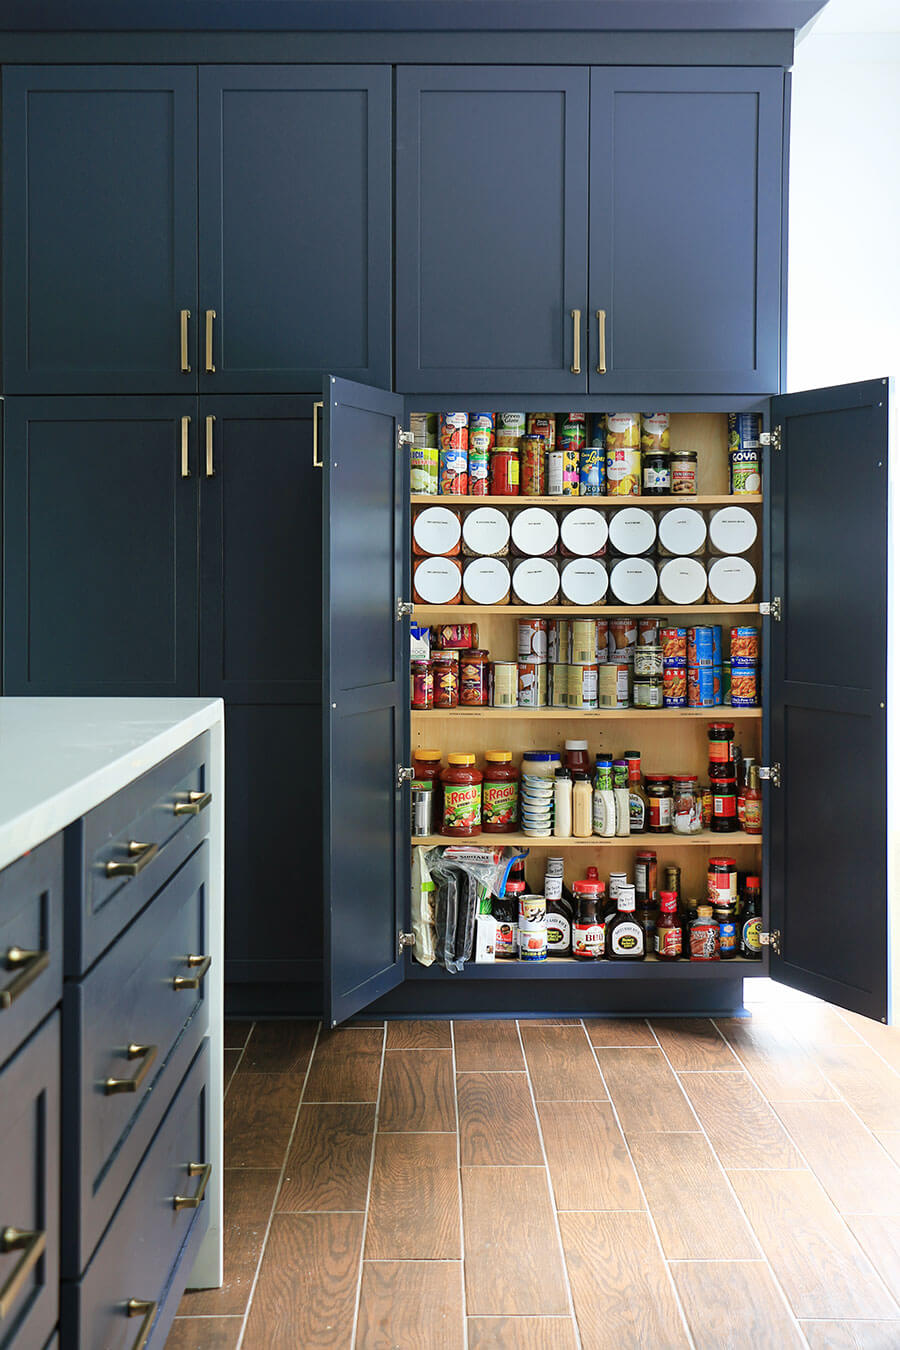
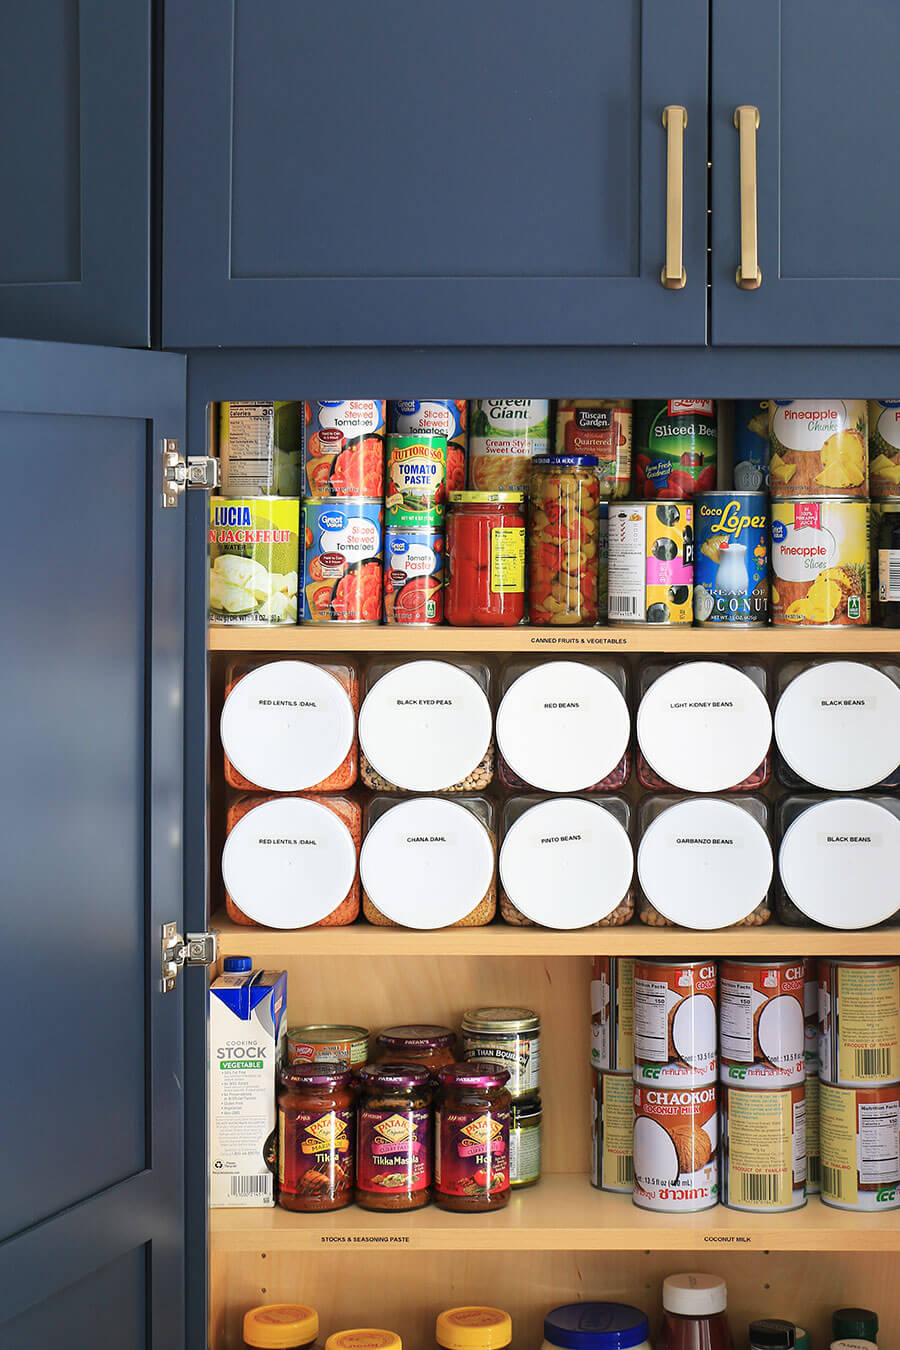
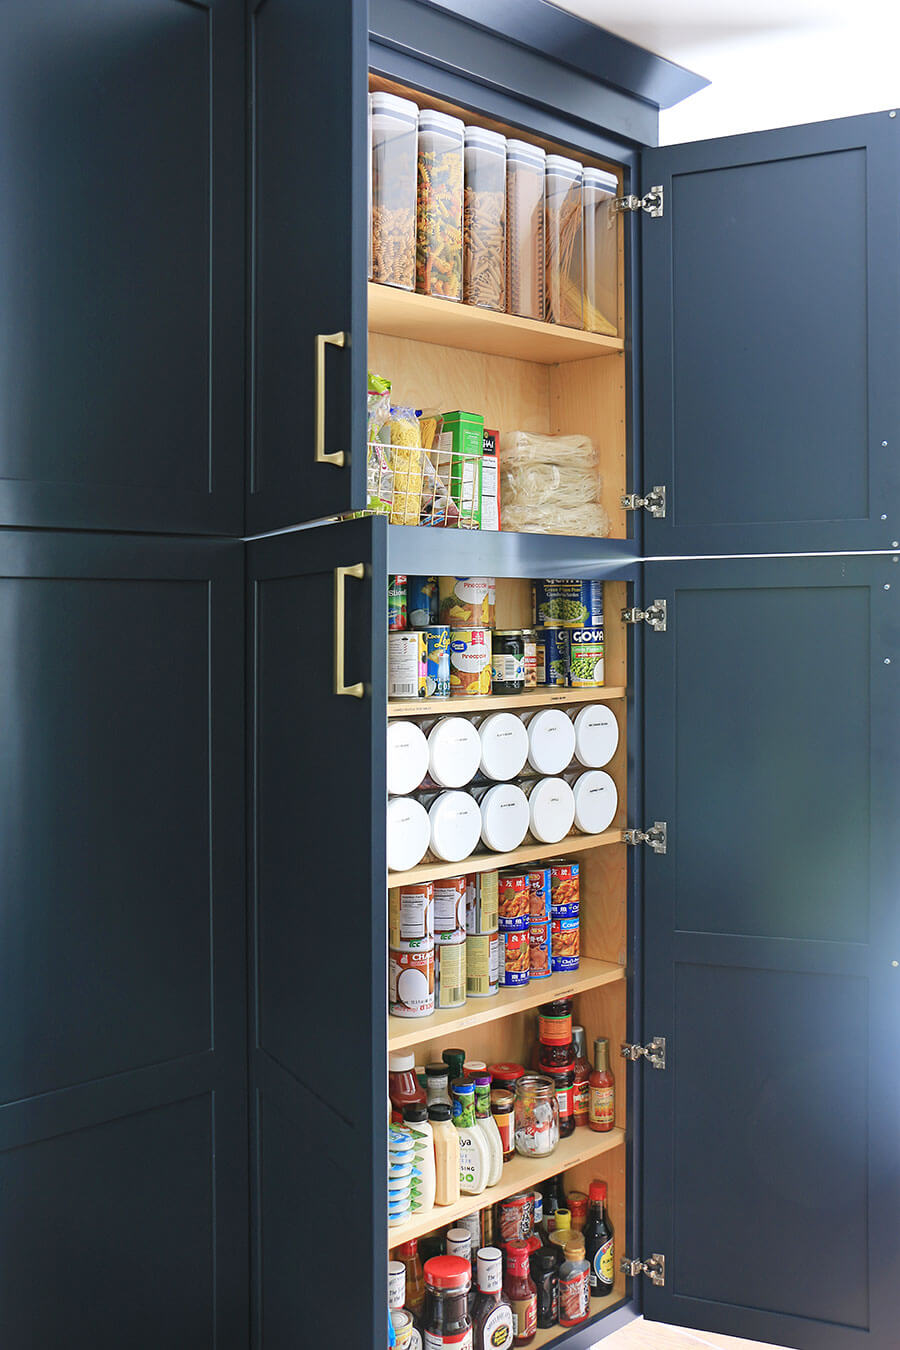
Put like foods with like foods. So yes, that means I have an entire shelf dedicated to just dry beans because I store a lot. But for foods I keep in smaller quantities I break up the shelf in sections and label each general section by category.
Then if I see a particular section in my cabinet looking a little bare, I know it’s time to add these items to my shopping list!
Everyone will label their cabinets differently based on the foods they use the most. My own personal shelf labels are as follows:
- Canned fruits / vegetables
- Canned beans
- Dry beans (entire shelf)
- Stocks & seasoning paste / marinades
- Coconut milk
- Vegetarian meats
- Pasta sauce
- Condiments
- Pepper & hot sauces
- Misc. (entire shelf)
Other dedicated cabinets or shelves are labeled as follows:
- Rice & Grains (dedicated cabinet)
- Pasta (dedicated cabinet)
- Oils (entire shelf)
- Baking supplies (entire drawer, + dedicated cabinet)
- Cereal (entire shelf)
- Snacks (2 shelves)
- Drinks (entire shelf)
#2. Label Shelves & Storage Containers
Use a clear plastic based label tape in your label maker for shelves and food storage containers you plan to wash semi-frequently. Not every container will be washed all that often…such as your dry bean containers. But when they are washed, you want a label that will withstand that washing with no problems.
You don’t have to go crazy with labeling, but it is important any food item you may have a hard time distinguishing is labeled.
Also label any containers you plan to keep the same food type in regularly. This helps recognize when you are out of an item. When the container is in the shelf but empty or almost empty, it’s time to add that item to the shopping list.
#3. Place Containers On Their Side (& Stack)
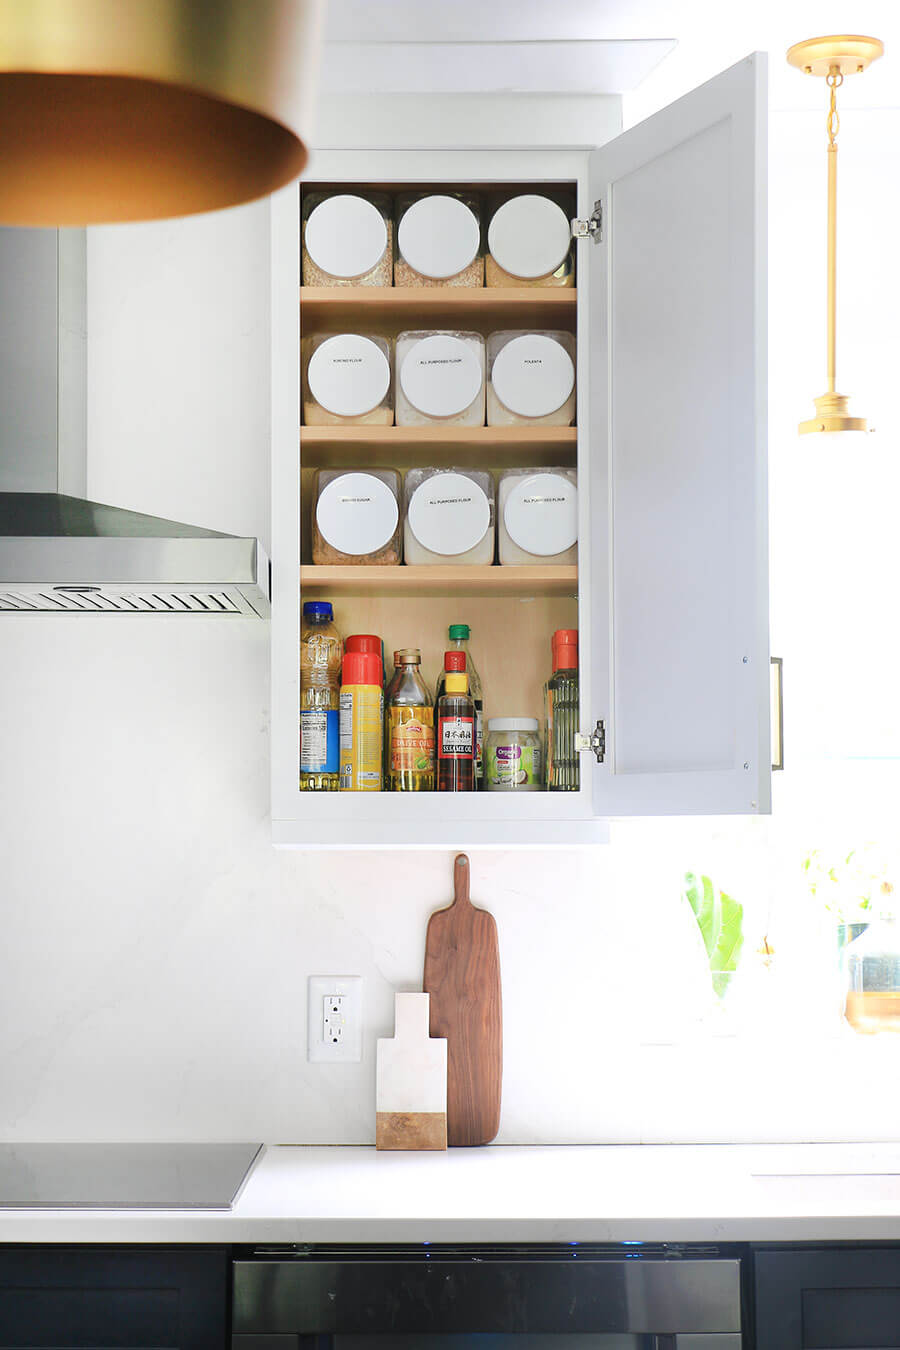
Sometimes you have to think outside the box when determining the best configuration for your shelves. My dedicated ‘baking supplies’ shelf has many tall 1 gallon containers best suited to hold a full bag of flour. I found the best way maximize the depth of a typical shelf was to lay these containers on their side and label the covers.
If I stood them upright I could only fit 6 back to front containers. Then you can’t see what is behind each container, and you had to move things to get to the ones behind it. In this way I squeezed in an additional 3 containers and can easily see what I have.
#4. Ditch The Deep Pantry
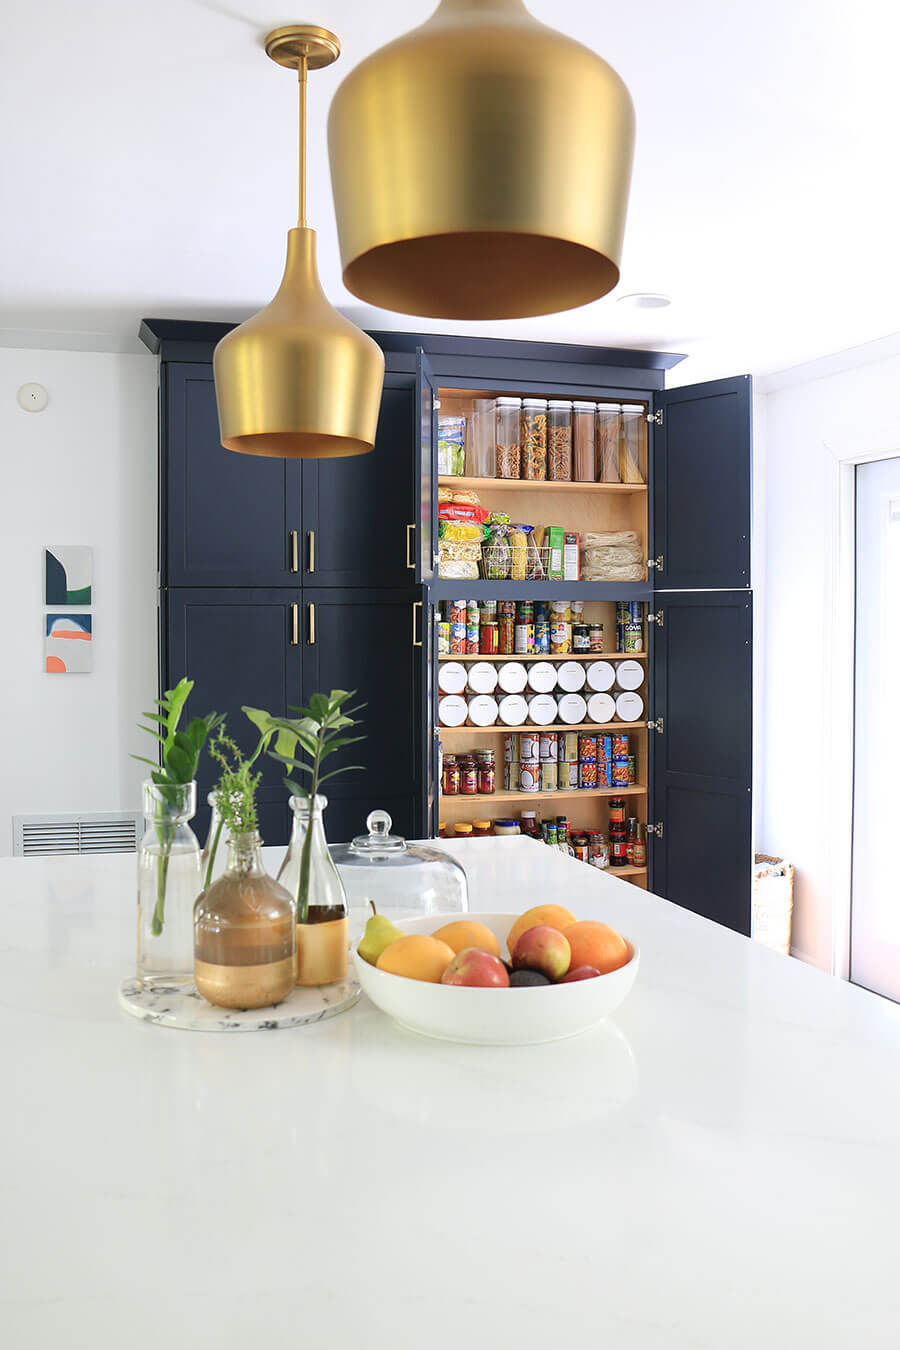
If you are lucky enough to be the one designing your kitchen, consider ditching the deep cabinet pantry in favor of a shallow floor-to-ceiling cabinet pantry.
In most cases 7.5″-11″ depth pantry is all that is needed to fit food storage containers. My own cabinet interior is 7.5″ depth. It allows a 2-3 layer of cans stacked, and is designed to fit fit my 7.3″ (2qt) Mainstains plastic containers. No more digging for what you need, and it doesn’t take up a big footprint in the kitchen!
#5. Use Baskets & Trays To Divide And Store
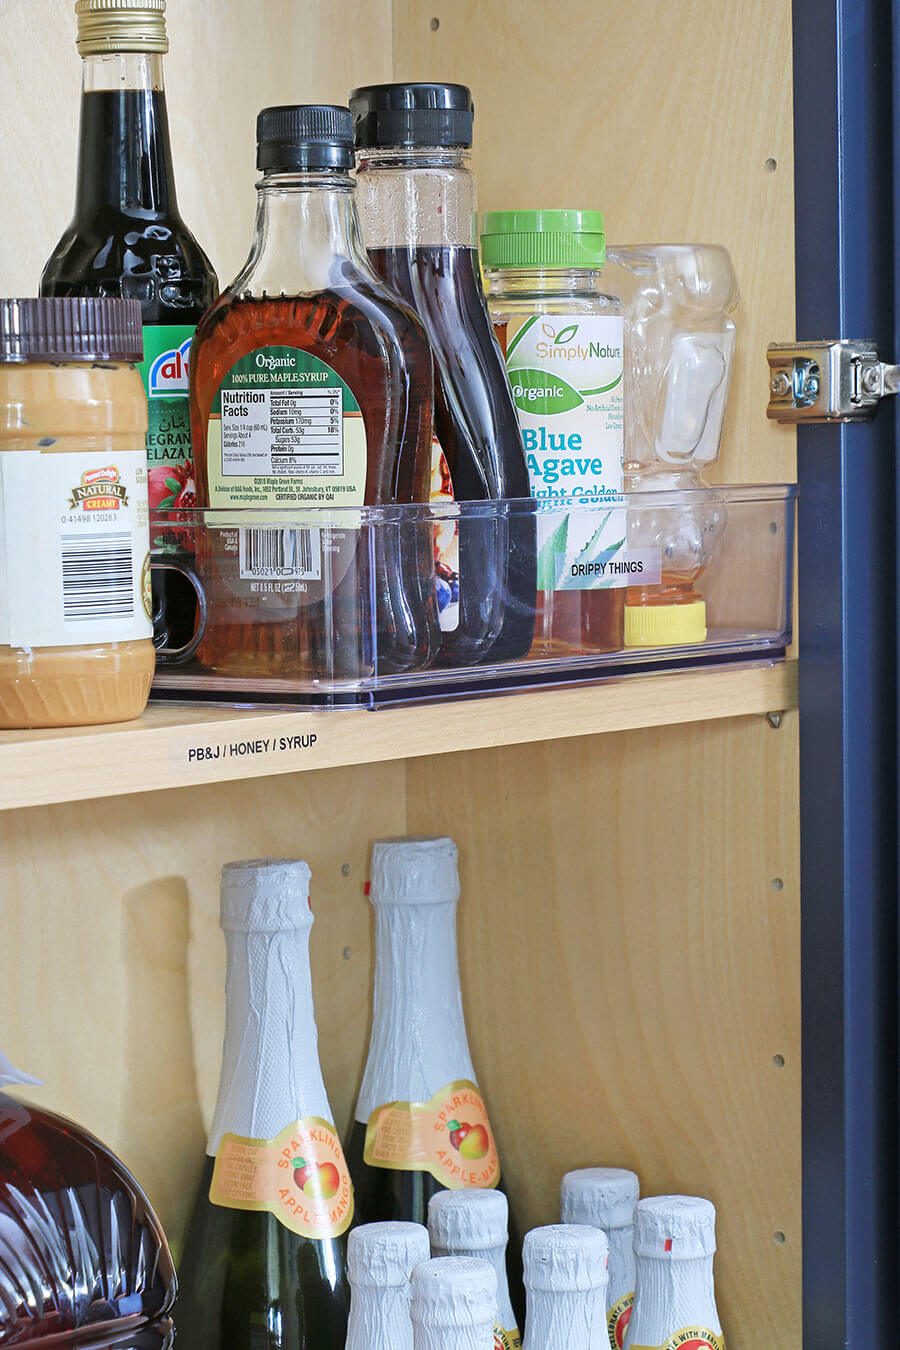
Baskets and plastic trays to further compartmentalize your cabinets and for easiest storage. My cabinets are custom sized, so I don’t use many trays, but when I do I use them for sticky or loose items.
As a matter of fact, anything that can make a bit of a mess is best stored in a plastic tray. It’s easier to take out and wash preventing ants and bugs in your pantry. Additionally, trays or baskets are great to store items like tea and hot drink varieties that you want to pull out and present to guests.
For regular sized cabinets, consider using rolling can organizers, stacking organizers, and more… but we’ll talk more about clever space extending items another time.
#6. Vary the Storage Container Based On The Food Category
You might be tempted to use the same exact set of canisters/containers for every type of food. It seems easier to maintain since every container and lid match. Yeah, don’t do that…
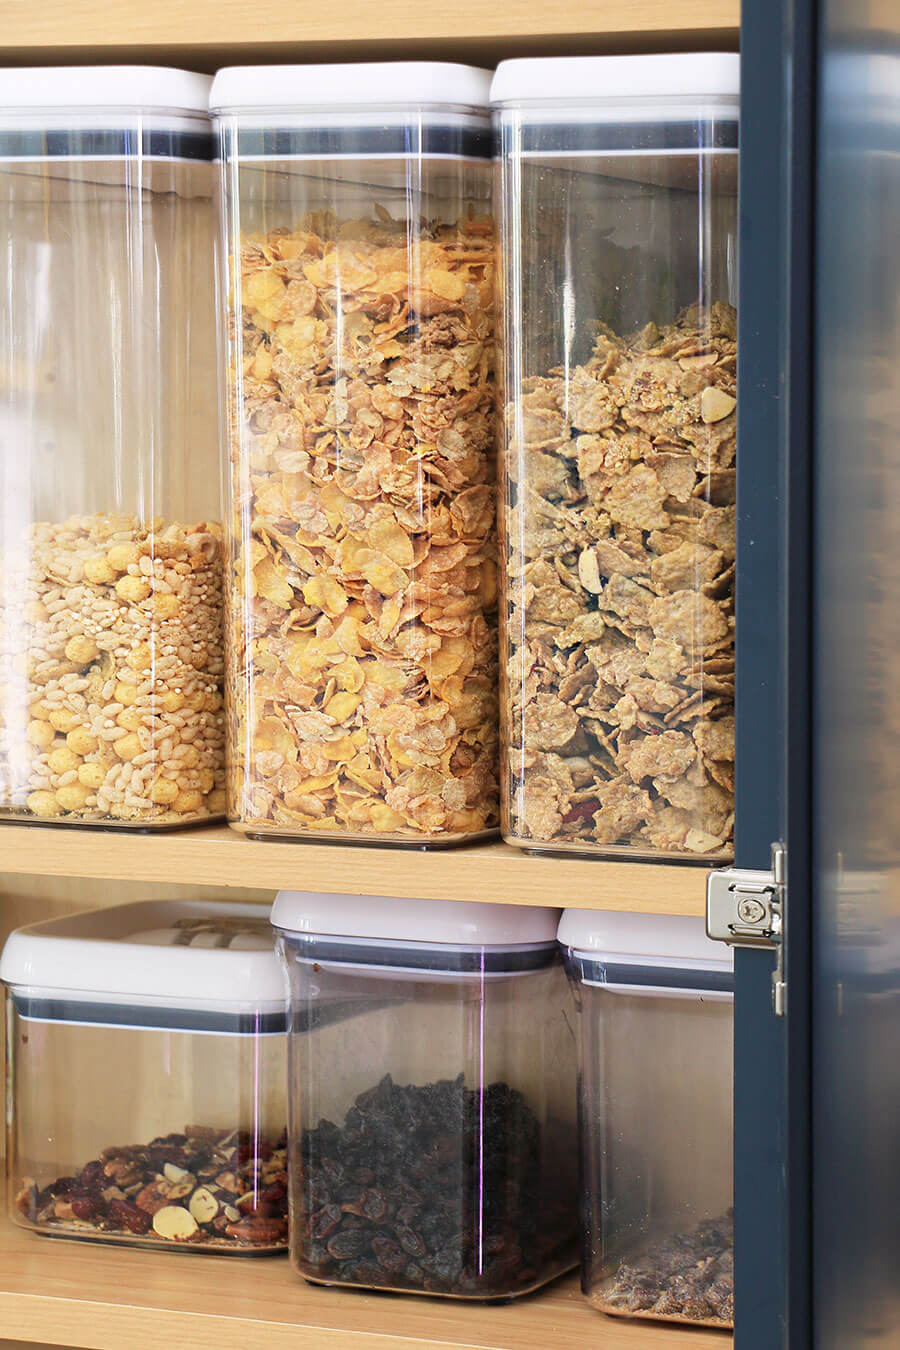
It’s all about what size and shape best fits the food category. For example, I use large flip tight lid containers that can fit two boxes of cereal for breakfast foods and snacks. Meanwhile I might use a smaller container for snacks, dried fruit, and items that come in smaller quantities.
However size isn’t the only consideration. The containers I use for flour and dry beans are don’t need to be washed very often, so I bought a less expensive type of container although it is hand-wash. Plus I prefer the twist top lid for these types of foods.
It is okay to vary the container type in different parts of your pantry/cabinet, and even change up what brand you use to best meet your needs.
#7. Store Foods In a Drawer
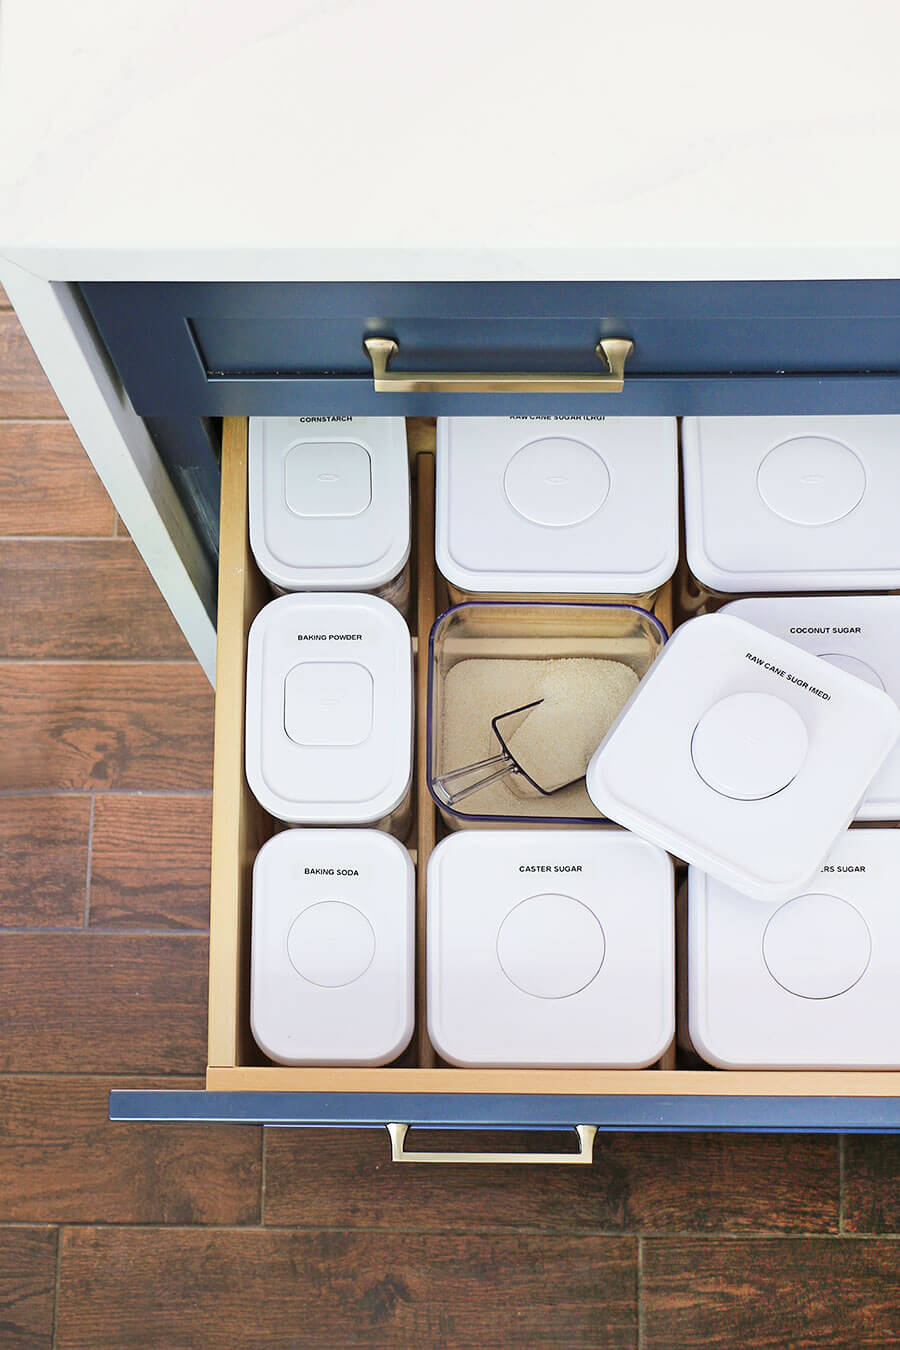
My kitchen has a big island with lots of drawers for storage. While I use most of it for non-food items, I reserve one drawer for specialized baking ingredients. Because my daughter and I also run a food blog called Cooking With Carmona, I found it helpful to create an easy reach drawer with all our specialized baking goods right where we do all our mixing. Hey, we have 7 different types of sugar on hand at any given moment!
The drawers above and below also include other items we use for baking…of the non-food variety. You could probably call this section of our kitchen the baking triangle since this side of the island is within reach of the baking utensils and bowls, the baking cabinet, baking drawers, fridge, and most importantly…the oven!
#8. Map Out Your Kitchen & Cabinet Organization
This last tip should really be the first tip, but I wanted you to have better idea of creative storage BEFORE you started planning. It gives you a few ideas to work with as you map out your own kitchen.
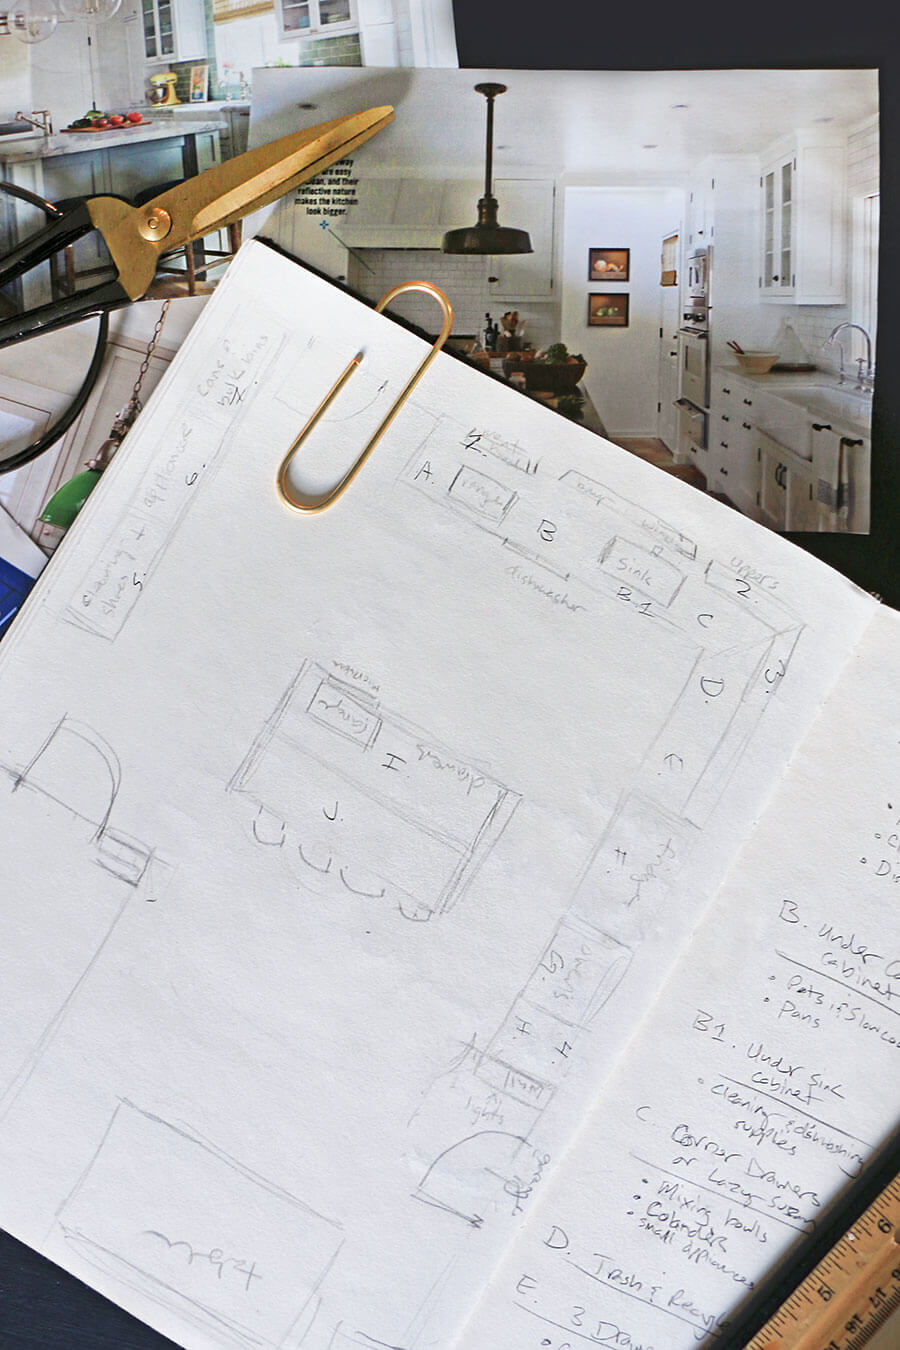
It took months of careful planning to design my kitchen so it would be the most efficient use of storage. Whether you are remodeling your kitchen from the start, or planning the best use of the space you already have, plan carefully! Put it down on paper by making a list of everything you use, and create a floor plan of your existing (or soon to be) kitchen.
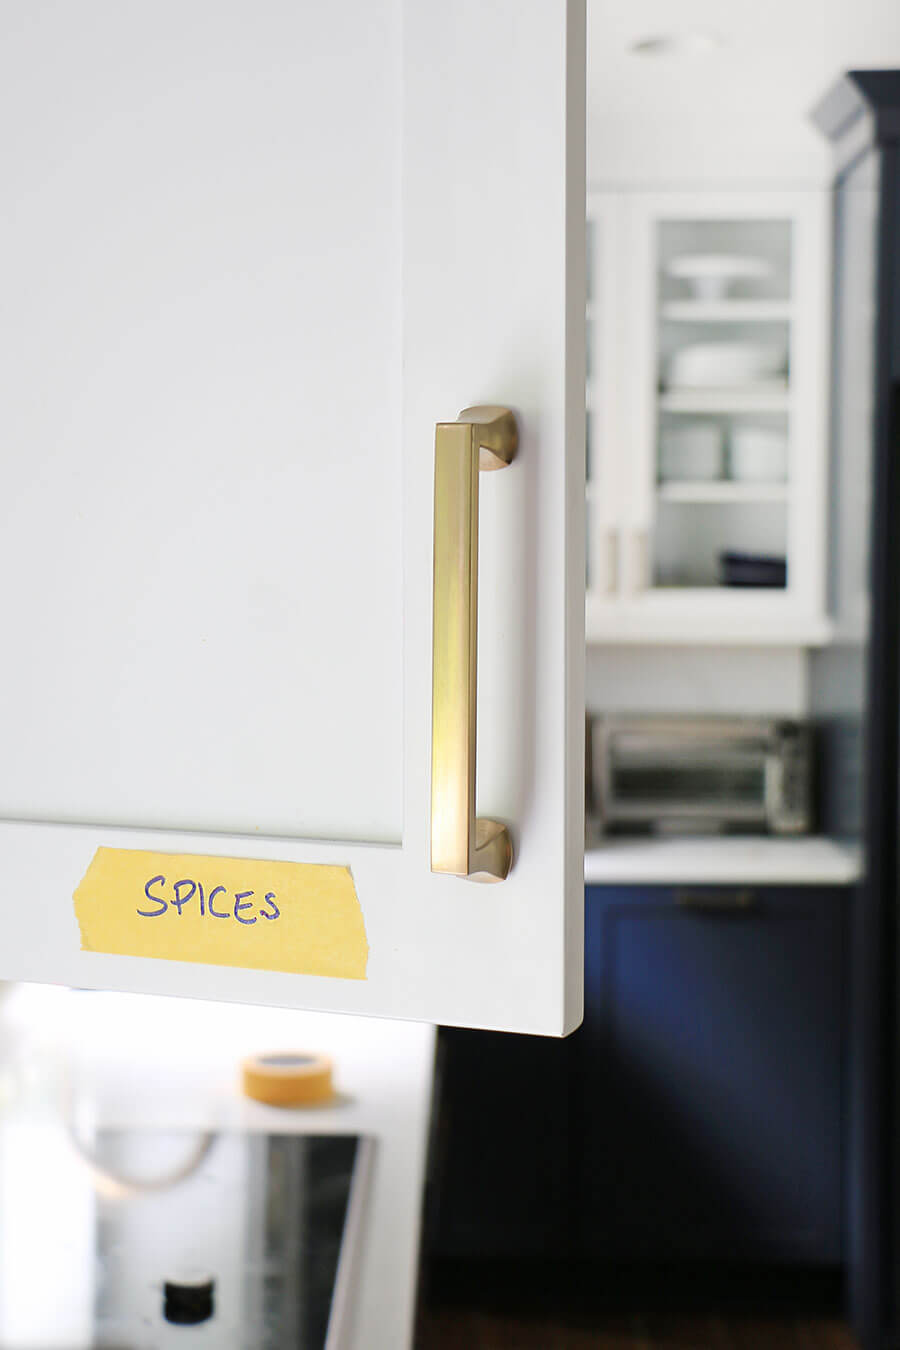
Another method is to write the food categories on painters tape and place it on the cabinet/shelf you think it would work best. As you continue to place your tape, you’ll start to realize what is missing, what needs more room, and what should be close by each other. You’ll want to keep the tape up for a few days as you move about your kitchen to compare how you use it now, to what the new plan/placement of storage will be.
Bonus Tip: Stock Up!
I mentioned this before, but anytime an area in my pantry starts to look a little sparse, I know it is time to fill that section up. I could probably live for a year off of the food in my cabinets if it came down to it. It’s always a good idea to be prepared! Not just for natural disasters, but if ever a hard time hits or you need to save some money, you can reduce your grocery spending for non-perishables and live off of what you have until you are financially stable again.
I hope these tips will help you get your kitchen cabinets whipped into shape, and keep all your foods visible and easy to keep track of! Never underestimate the power of cabinet organization.
Like This? You’ll Love These!
RELATED POSTS: Learn to decorate your kitchen counters for style & function | Unique ways to use bar carts |





What color are those cabinets? Beautiful! Also, did I see a slide out broom storage cabinet somewhere? Can’t find it now.
Thanks! They are KraftMaid cabinets in midnight blue. No slide out broom storage here, I built a broom storage in my laundry room however.
I was looking at a pantry/cabinet designed for your kitchen. I saw it @ https://homemadebycarmona.com/cabinet-organization-food-storage/#comments.
I’m wondering if you would share the design drawing/measurements, I really trying to get my storage problem under control.
Thank you
I love your kitchen and all of your organizational tips, I love the one about a shallow pantry so that you can see everything that you have. In my previous kitchen our pantry was on pull out drawers and it worked really well for us. Our current walk in pantry is not pretty 😭, but I try to keep everything one container deep so that I can easily see what I have. Next I am going to read your post on organising spices 😬😬😬 it’s not pretty in our house 🤦
Hey, practical solutions are everything! Haha, pretty comes after that, right?
I love your food storage organization tips. I have to try that for my bulk goods- I like how you keep them on their sides with the labels showing on the lids. Pinning for inspiration.
So incredibly helpful as I’m
About to finally move into my new house! I feel much more sure of myself now thanks to this! Your amazing lady. I want to see you with your own show on HGTV!
Wow, that is some high praise…it means a lot to me! Thank you!
OMG! I can’t even. Your kitchen is perfect! It is beautiful. I have to share this on the weekend edit. OMG… it calms me and is gorgeous. The cabinet colors and hardware the spaghetti jars. xo , visiting from Colorado, laura E
That’s very sweet of you to say! Thank you!!