Step-by-step instructions to help you sew DIY drawstring bags, and great ideas on how to decorate them!
*Thank you to Smart Fab for providing the materials for this project!
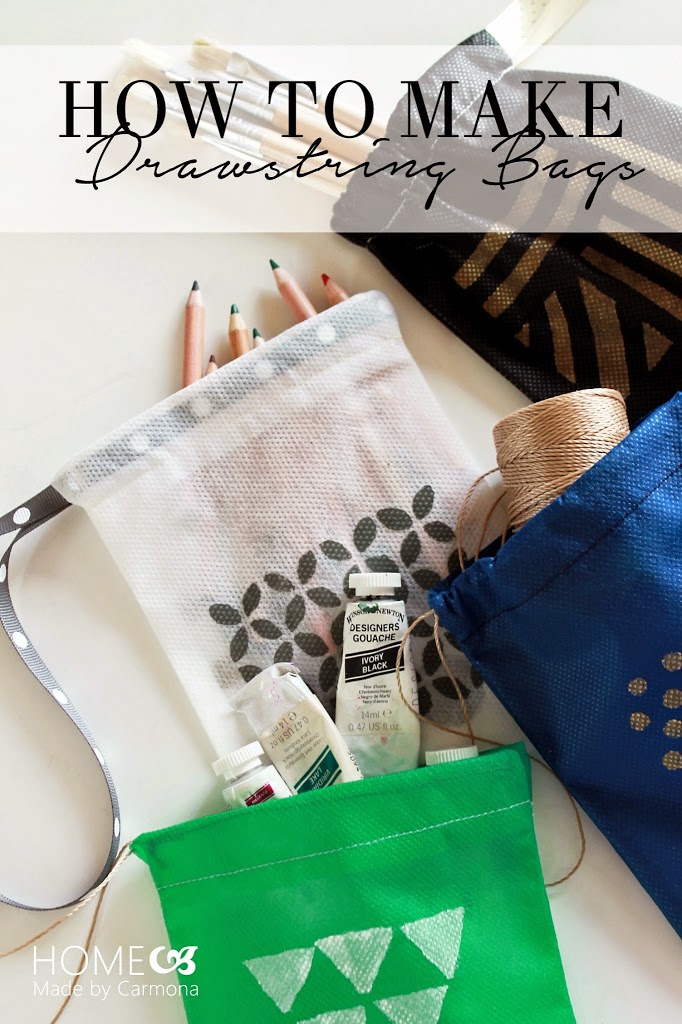
Drawstring Bags For Organizing
I’ve gotten that organizing itch again… With all the crafty projects, summer road trips, and junk drawer-like messes, I’ve decided to bring things back into order using drawstring bags.
I’m the naturally messy type, but being able to scoop up items and toss them into like groups just helps keep messes to a minimum.
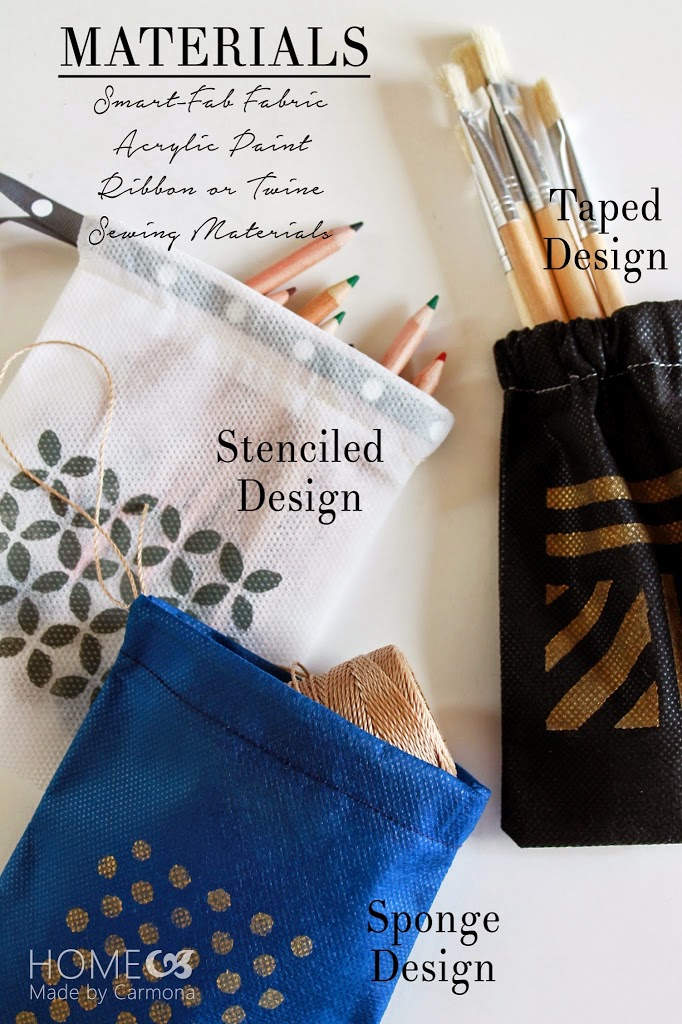
The Right Fabric For Drawstring Bags
With three kids everything I own gets a lot of wear and tear. Its ridiculous how much wear and tear considering I have all girls! I’d like these bags to stand up against the onslaught of use. For these bags I’m using the sturdiest material I own; Smart-Fab’s disposable art & decoration fabric. It is strong, it doesn’t fray or fade with washing, and it is great for painting on, making this the material of choice for a durable and attractive drawstring bag!
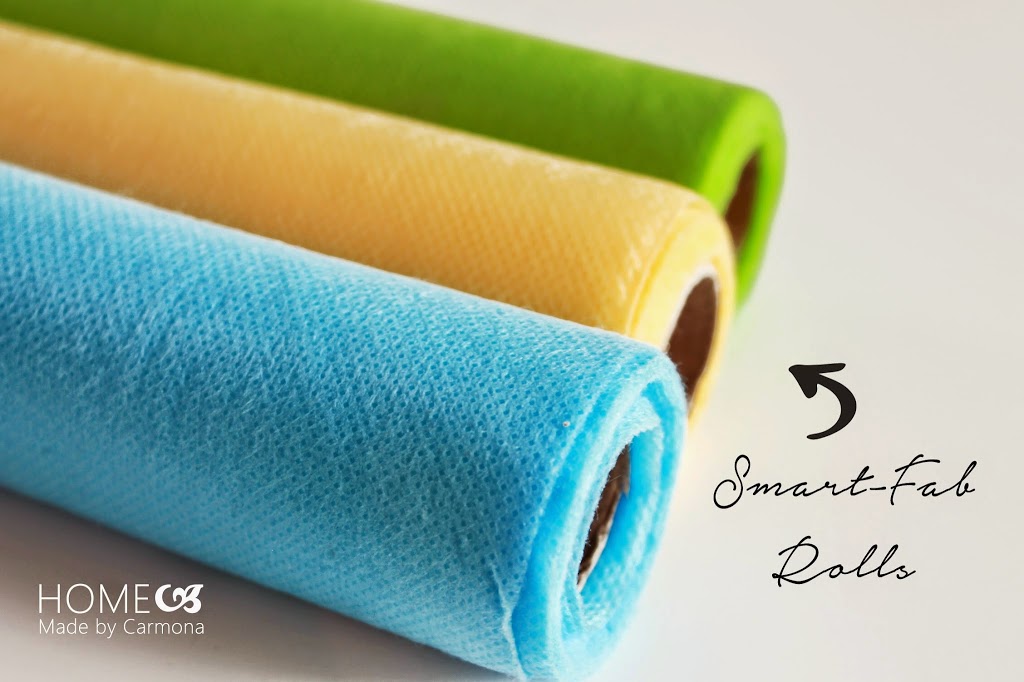
Smart-Fab material comes in rolls so you can make bags of any shape and size. I’m thinking about creating some long drawstring bags. These will be the perfect size to house my kids kites, beach gear, and a dozen other items we lug around during summer.
I was surfing through the Smart-Fab Pinterest page, and was impressed with all the things you can create with these large rolls! With kids I’m always looking for sturdy craft materials, and if you’re a mom you are too. If you want more info take a look at their website or Facebook page.
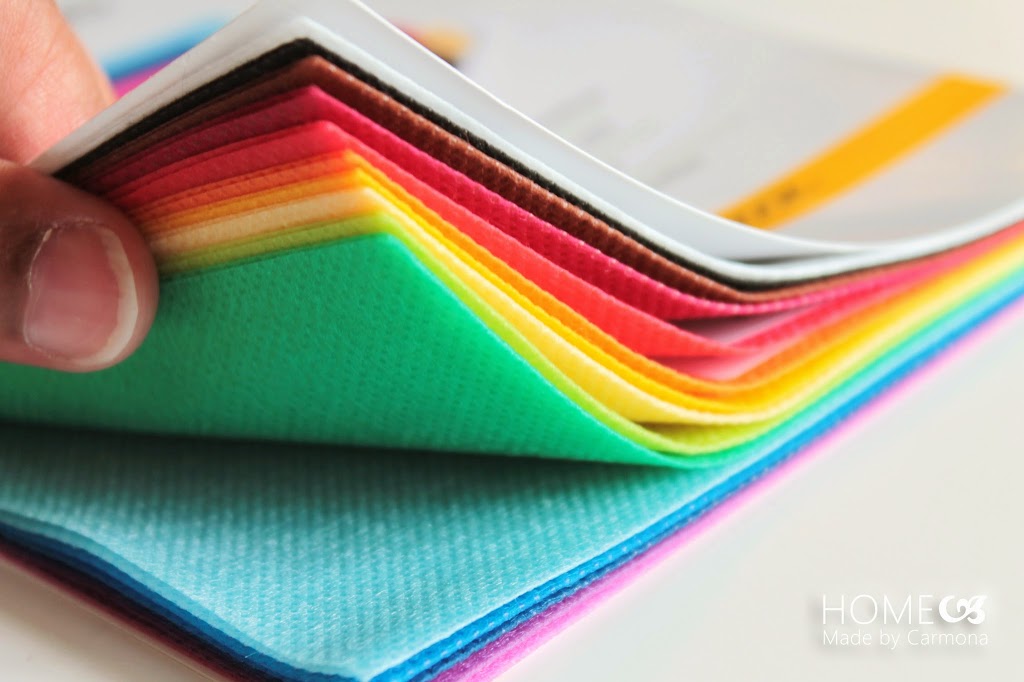
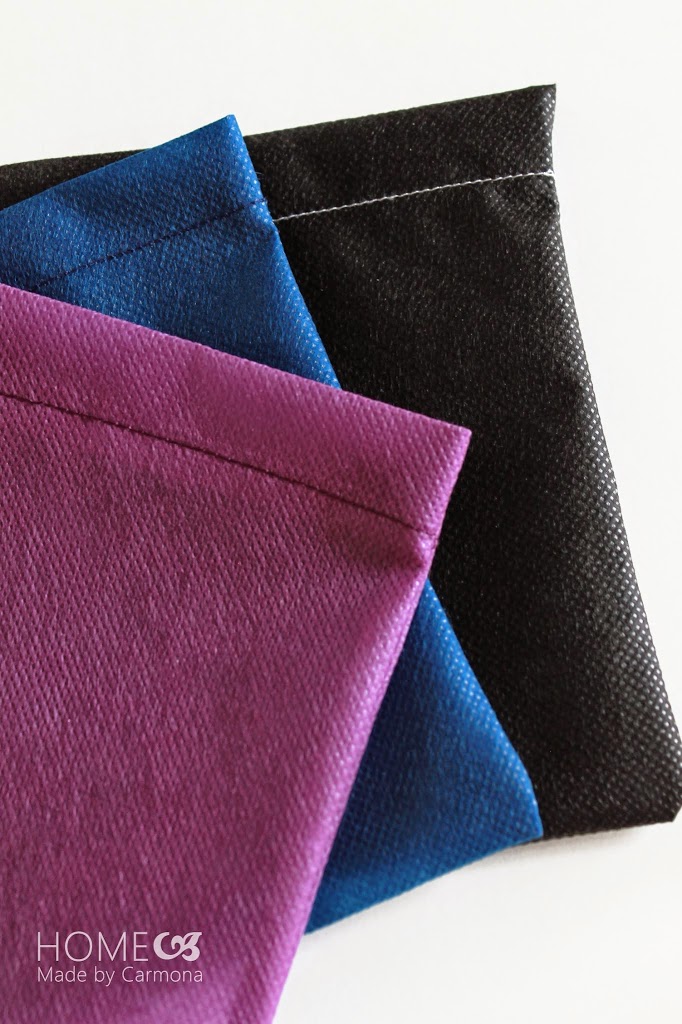
The color swatch book let me preview the variety of colors so I could determine which I would love most and get rolls in those colors. I am a sucker for bold greens, blues, and of course black and white, but my ever girly girls begged for some drawstring bags in pink and purple. Aw, I’m a sucker for my munchkins…sure why not, some in colors for me, and some for my girls!
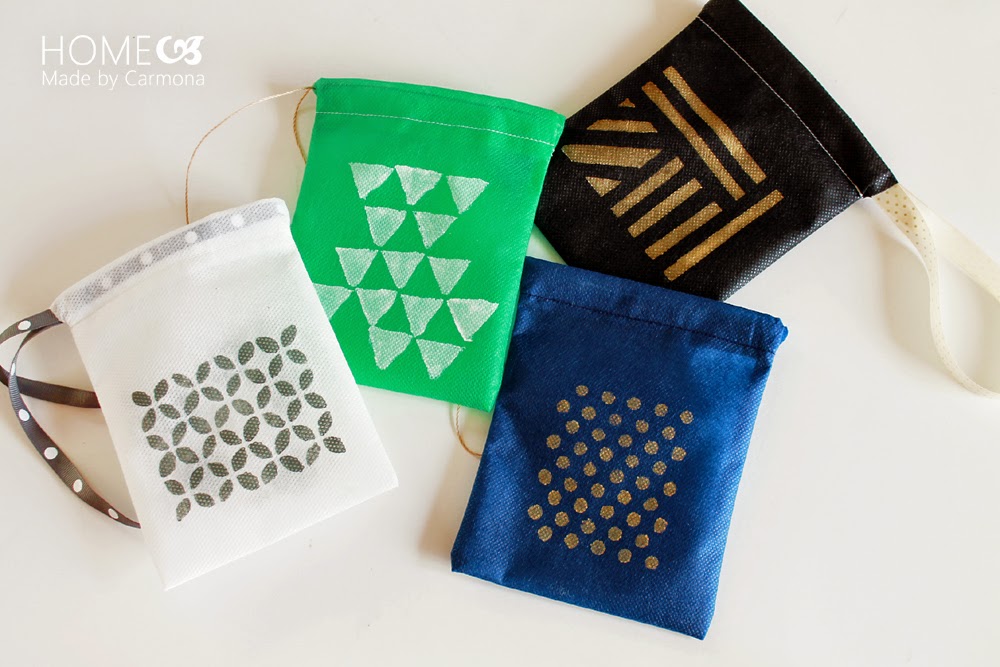
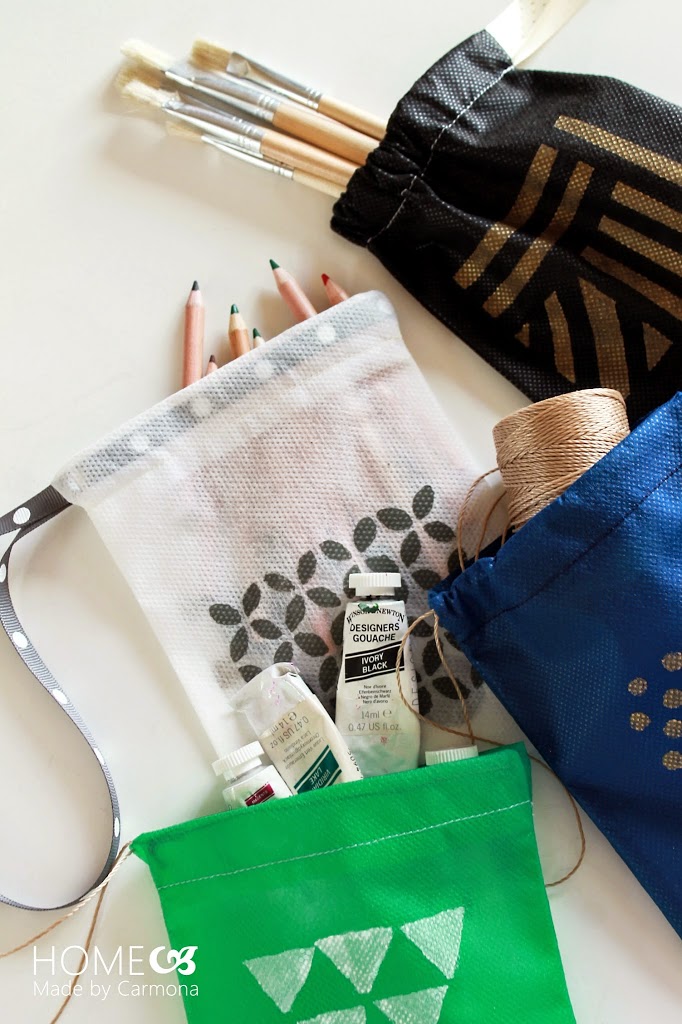
Fun Paint Styling Ideas
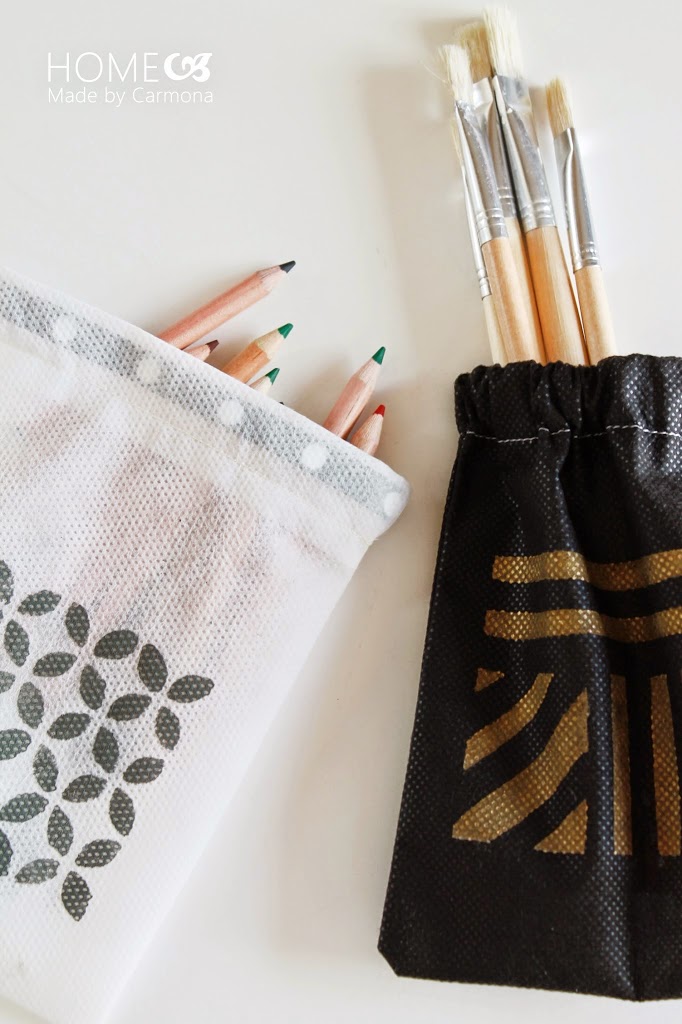
Before we get started with the sewing tutorial, let’s take a look at some fun designs! My girls enjoyed painting their own drawstring bags, so this makes a family friendly project. Unfortunately they were a little shy about me sharing their creations on the blog. Ah well, you’ll have to take my word for how adorably cute their designs were…but then again, I might be biased. *grin*
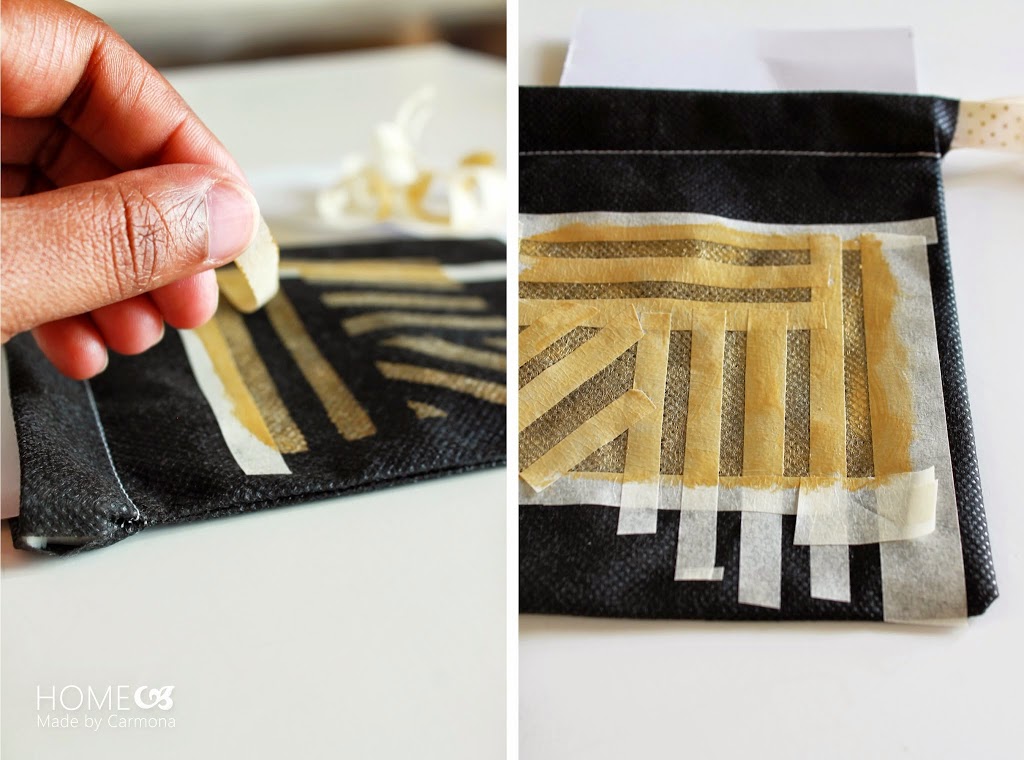

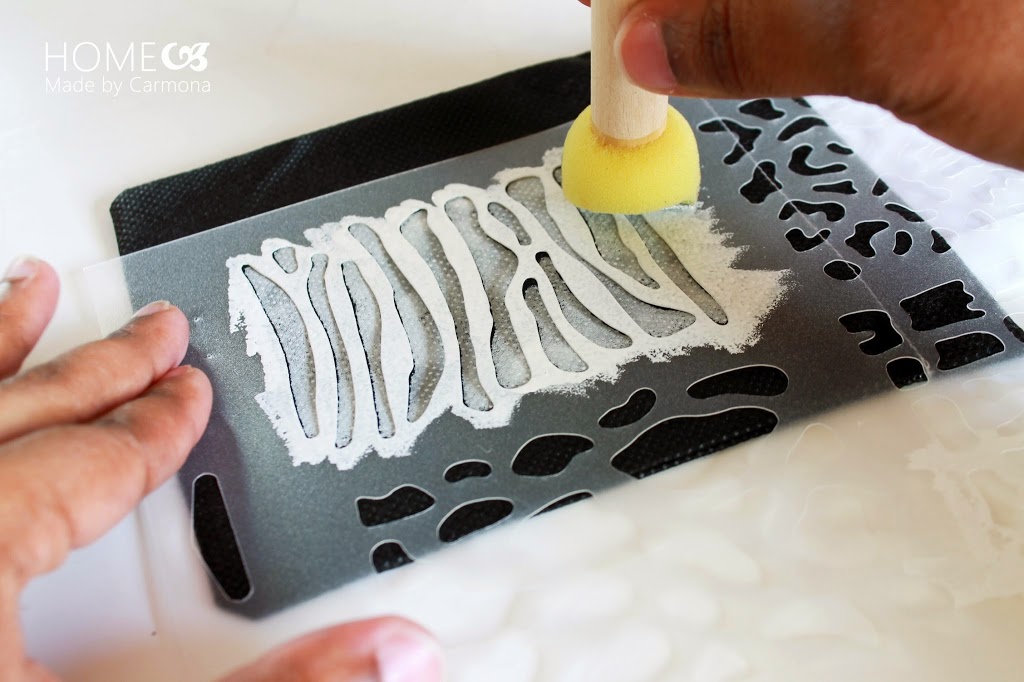
Before you start painting, insert a little piece of cardboard or paper to protect against the paint seeping through. Some of my drawstring bags have a different design on the back. A great idea for organizing is to paint a picture of the items the bag will house, or to stencil a word saying what goes in each bag on the back.
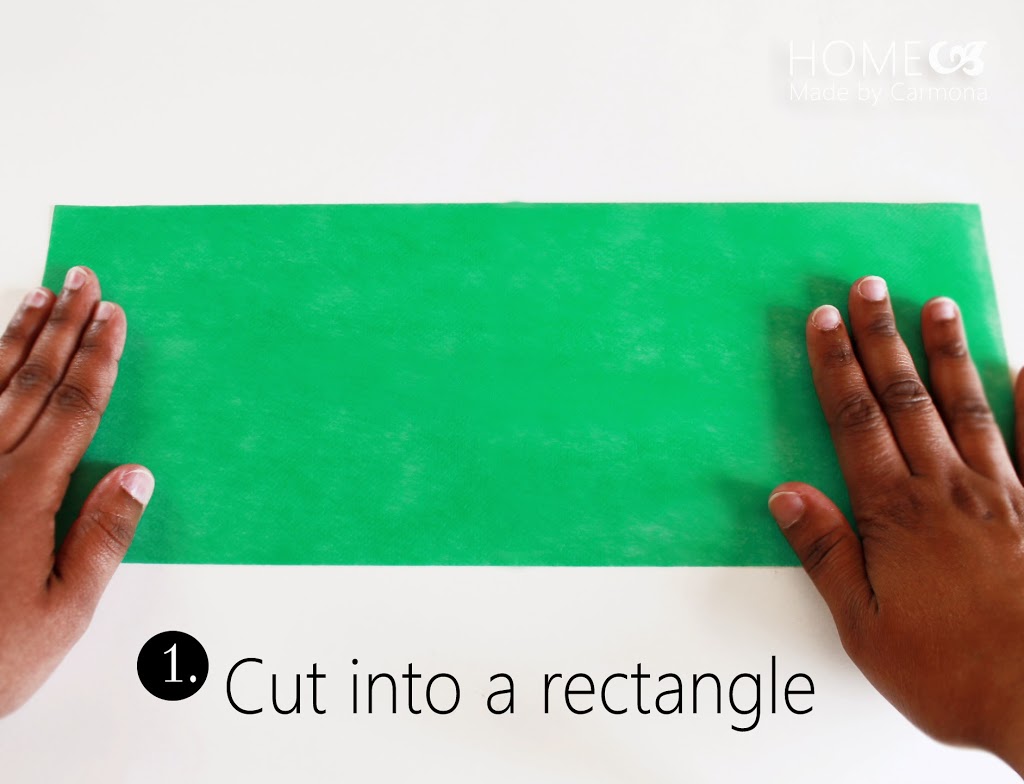
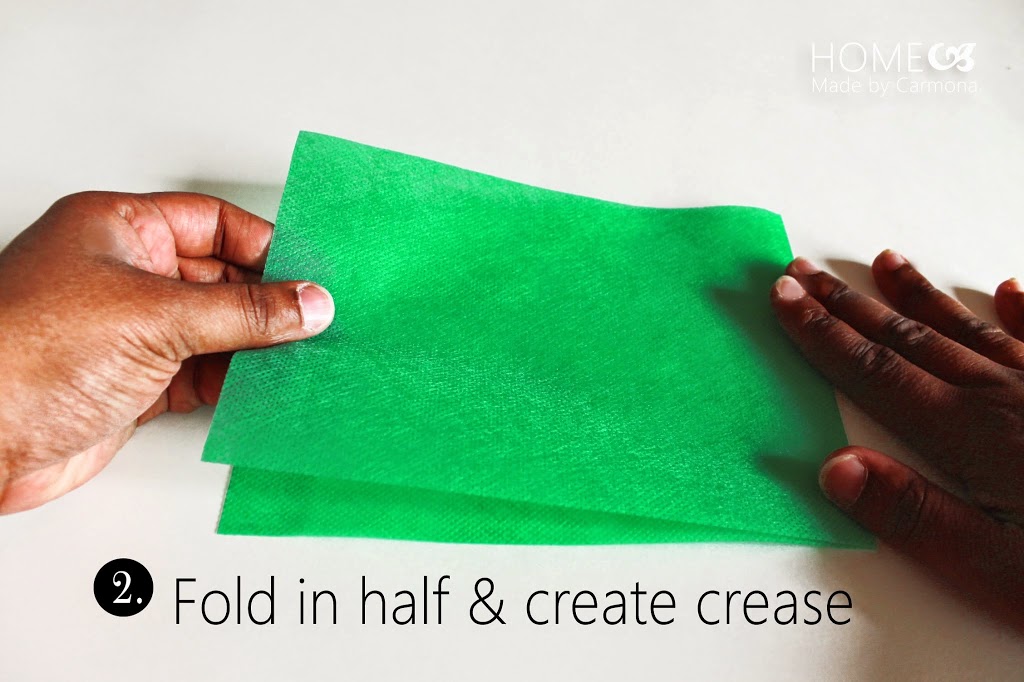
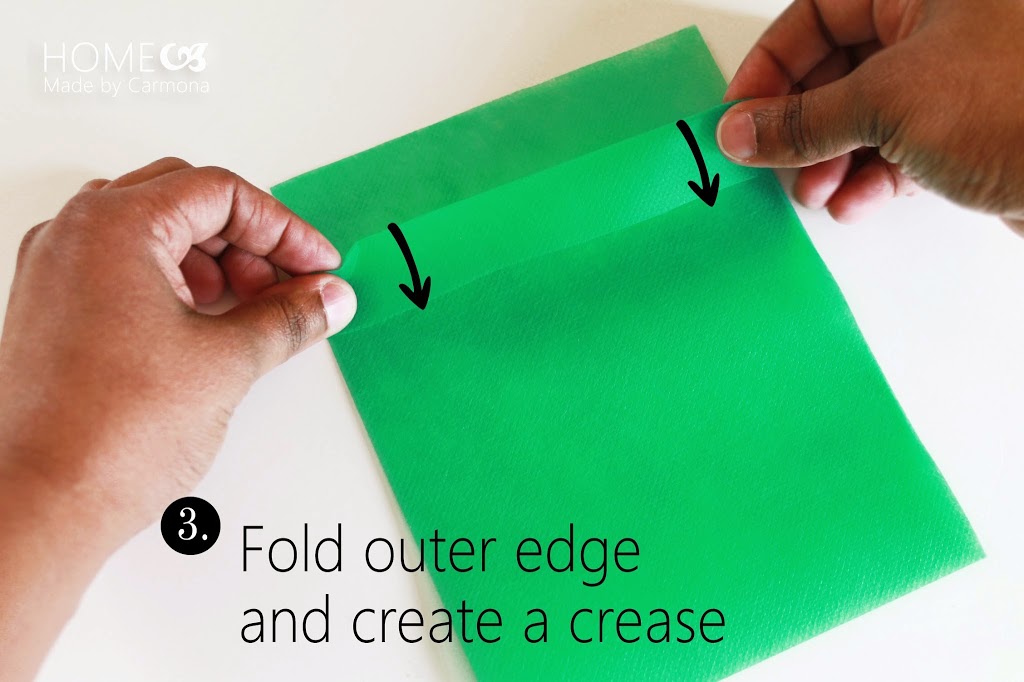
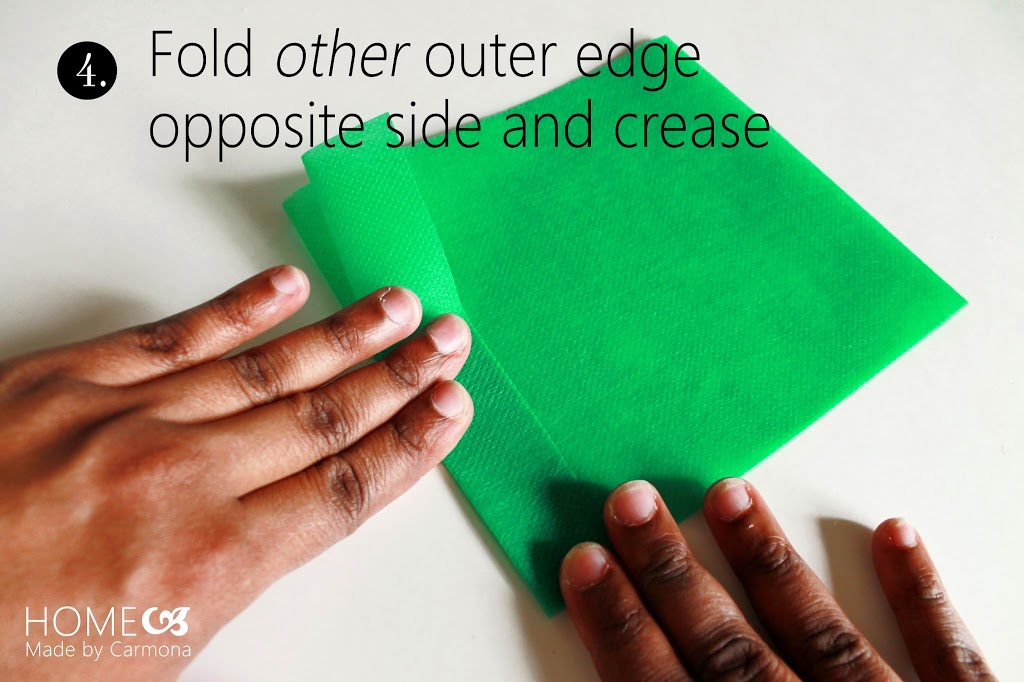
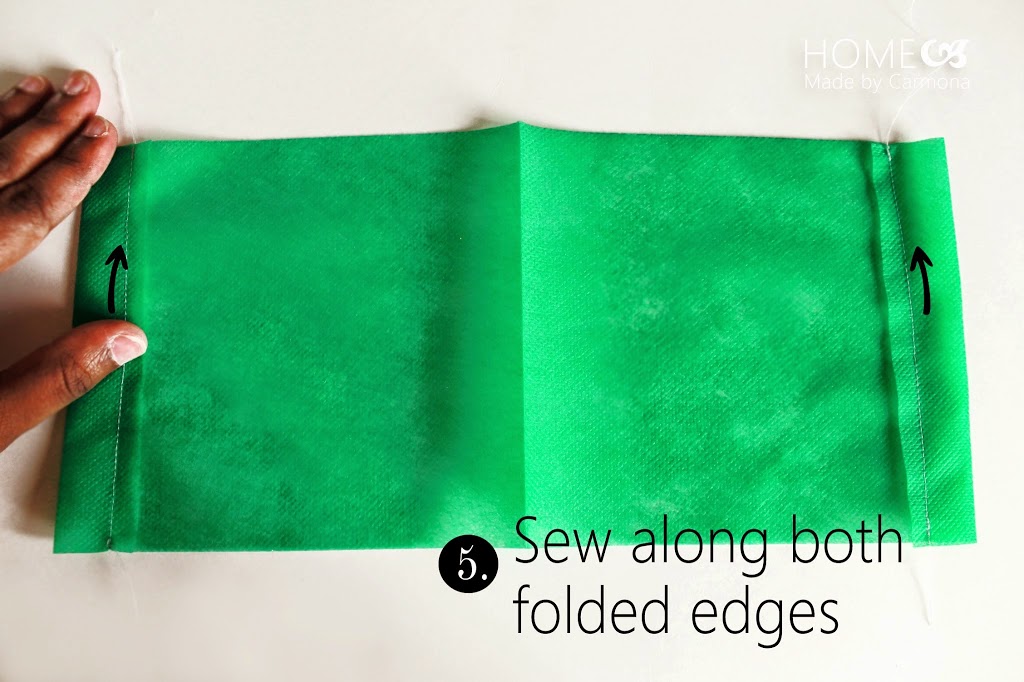
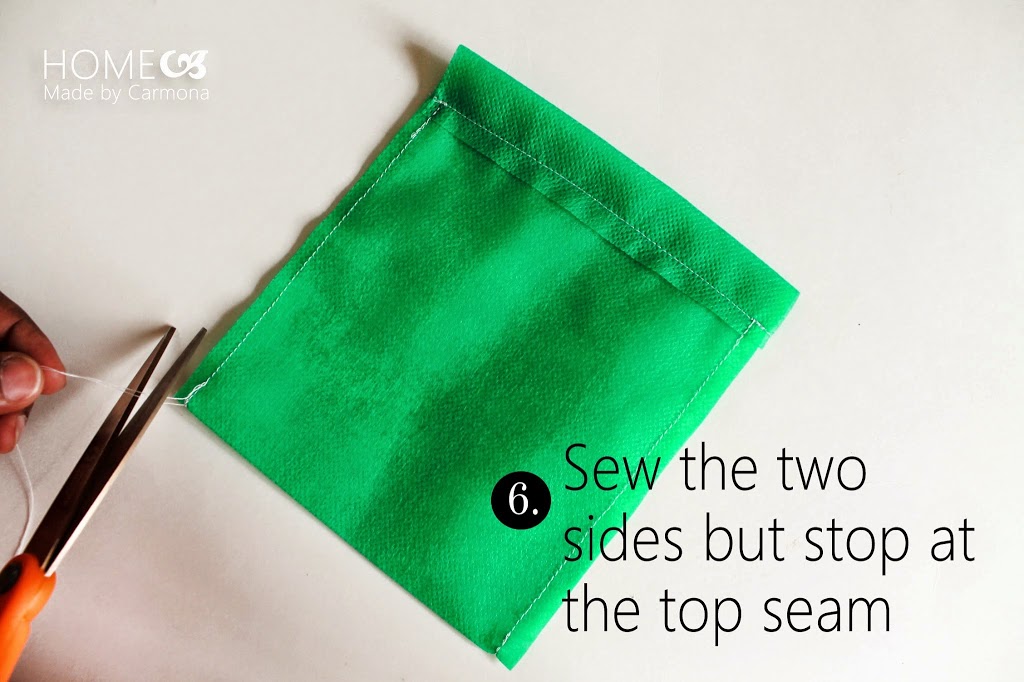
Steps To Sew A DIY Drawstring Bag
Ready to get started? This easy-to-follow picture tutorial will help you sew some bags up in a jiffy!
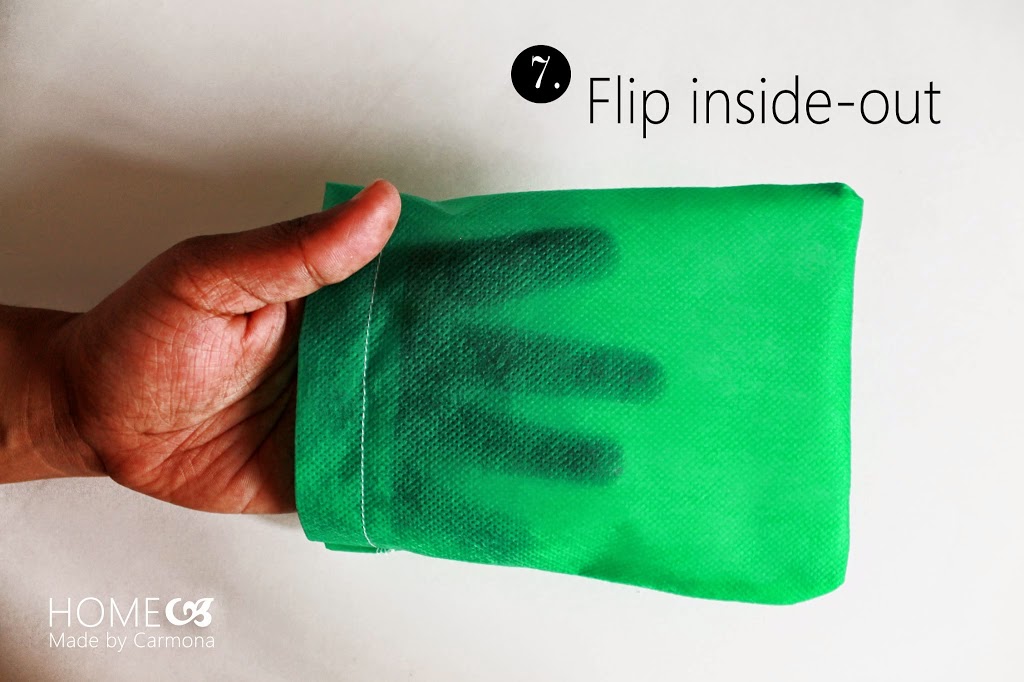
You are ready to feed the string or ribbon through the top. Finally, paint your drawstring bag. Once the paint dries, organize your knick knacks, sit back, and admire your awesome work!

[col1]

[/col1]
[col2]
[/col2]
[col3]
[/col3]

[/col1]
[col2]

[/col2]
[col3]

[/col3]
[col1]
[/col1]
[col2]
[/col2]
[col3]
[/col3]

[/col1]
[col2]

[/col2]
[col3]

[/col3]
[col1]
[/col1]
[col2]
[/col2]
[col3]
[/col3]

[/col1]
[col2]

[/col2]
[col3]

[/col3]
*Thank you to Smart-Fab who graciously gifted the materials for this project!


So so cute!! And practical too. I can see my 3 yr old wanting some for her puzzle pieces, some for her Paw Patrollers, some to confiscate my make-up… 😉
I really like your bags. I could make these for my daughter’s baby shower with baby theme stamps and for the crochet beanies I sell on eBay. Also shared with my son who teaches arts and crafts part time to young kids. Thanks for sharing. Homegoods-etc
where are the pics associated to the article?
Thank you so much for letting me know! My host server had a little glitch. It should all be normal now and the photos back! 😉
These are so cute! Love the colors.
Oh they are cute – drawstring bags are so useful and it’s much easier to make your own in the exact size you need than try and buy them in the store.
Thank you Clare! Yeah, I do love to be able to customize storage of any kind into the sizes that work best!
Easiest tutorial I’ve seen so far! Can’t wait to make dozens of these for all my stuff!!
Very cute idea! I would love it if you joined and contribute your awesome posts at my link party at City of Creative Dreams, starts on Fridays 😀 Hope to see you there at City of Creative Dreams Link Party.
Thank you! Yes, my kids absolutely loved this project! It is great for any beginner.
What a cute idea and I love the geometric designs on the front. It’s give it a touch of modern class. I love how simple it is too, I think this is going to be one of the first projects I let my daughter try and sew. Thanks for the great idea.
LOVE these precious bags! I totally adore the colors and geometric shapes you used. Pinned 🙂
Thank you! I’m a sucker for geometric shapes, lol!
Simple and cute! Love how you embedded your own pattern design on top of them, very pretty!
Thank you Onel! You have a fantastic blog…I will have to follow along! 😉